Leaderboard


Popular Content
Showing content with the highest reputation on 05/10/2016 in all areas
-
As many of you know there are plenty of things to remember and many of ways to operate in the real world. I will pass on some of the tips I use real world that should help in the sim world also. One of the biggest concerns when flying passengers is passenger comfort. It's even more important in the corporate world that I operate in. From time to time I find myself riding as a passenger when attending recurrent sims and when picking up/dropping off aircraft. One of the most noticeable things when riding as a passenger is sudden or aggressive pitch changes. This happens for various reasons, but here are some tips to minimize the occurrences. When initiating climbs, it's a good idea to start in vertical speed. Select vert speed and smoothly dial it up until the engines reach max power. Once there, select FLCH and the passengers will not notice at all. If you select FLCH first, the engines will surge forward, and then the nose will pitch quickly to maintain the current speed. The Gulfstreams I fly have the ability to decide the amount of thrust to use based on altitude changes 6,000ft or less, but it still can get aggressive. Some guys like to set 200 to 300 feet per minute in the first few seconds and last few seconds of the altitude change. I prefer a smooth increase instead of wasting free brain cells milking the vert wheel. In the real world, FLCH gets pitchy after mach change over, but no worries in the sim. When using FLCH when climbing above change over, I watch it like a hawk. As soon as the plane starts a move, I hit the vert speed button to lock it in. Once the airspeed settles/recovers, I max out the engines and re-engage FLCH. This happens because of temperature inversions and wind changes as you climb. This can easily cause a instantaneous change on the speed indicator causing the plane to quickly pitch to adjust. If you are paying attention, you will see the speed change and hit vert speed before it pitches. When the jet is heavy, it lags a little and makes FLCH less pitchy. Another good tip is to use vert speed when light weight if you are clear of obstacles. 2000fpm works well. This technique slows things down and makes the jet more manageable. If you are climbing at 4000 to 5000fpm, the jet will make an aggressive zero g maneuver at level off. It's much easier to use vert speed in this case. When I would return back to base after training missions back when I flew KC-10s, we would do about an hour of transition and pattern work. We would get back at about 380,000 pounds compared to the max 590,000 pounds. Newbies would perform an autopilot go around up to 2000ft. At 380K and 3 engines churning out 52,500 pounds of thrust each, 2000ft comes very fast. The look on their faces when the plane would aggressively pitch to capture and every now and then blow past the altitude, was priceless. I taught them that after you hit TOGA and the plane gets going, you needed to quickly vert speed and back it off. If you hit vert speed too late, you would ruin the capture mode and blow past the altitude for sure. Those were some fun times. Another good tip is speed brake use. I hear plenty sim experts shade people for speed brake use and I think it's rubbish. They were put on the plane for a reason. I also spend a lot of time operating on the NE coast of the USA and we get slam dunked into airports all the time. They keep you up longer and only step you down a few thousand feet at a time. There isn't a descend VIA, it's only constant crossing restrictions on the way down. I hardly ever get to use VNAV on descents. What you find is that you have to use speed brakes and use them early! Even in the real world i see people get so far behind and rushed because they were taught not to use the brakes. It's quite common to ride the brakes on the river visual to 19 at KDCA. There are two tricks to speed brake use. 1. The earlier you use them, the less amount you will need. SA is everything. 2. Speed brake use is like slipping out and back into bed with your significant other sleeping. You ease them out nice and slowly. Once you are done, you ease them in slowly. In some cases, you have to ride the brakes until you are ready to trade them for flaps. You work in flaps, and then ease in the brakes. I'm sure if you could descend when ever you want, you wouldn't need them, but welcome to the real world. When operating in areas with close multiple airports with departure and arrival corridors, it gets interesting. I like the 3 or 4 times your altitude to lose technique. So if i have 10,000ft to lose to be at 2000ft 10 miles from the airport: 3 X 10 = start descent by 30 miles from the field. 4 times your altitude to lose works well also because it gives you more time to slow prior to 10,000ft. If you are at or past this point and have yet to descend, you will need some brakes. Guys will say that the brakes are loud and rumble, I guess they have never sat aft of the wings on an airliner. For slowing, I like 12 at 12 or 13 at 13. Basically set 1300 fpm at 13,000ft to reach 250kts by 10,000ft. This has worked very well in all the jets I've flown. In most jets, you can only get 1500fpm and maintain 250kts clean. Any higher rate, and you will accelerate. Just in case you didn't catch my 737 techniques in another post, I'll post them again. Keep in mind that these are more aimed at the BBJ, but should work. Aircraft References • Main Gear on your side: NESA Transmitter in lower outboard of window • Main Gear on Opposite side: Lower inboard corner of window • Outboard Side of Engine on your side: Window Handle • Outboard Side of Engine on Opposite side: Glare Shield bend • Wingtip on your side: 2.5 concrete blocks • Nose Gear: Inside of HSI Engine Start (Approximate values) • 2 -- 20% N1 • 4 -- 400 degrees EGT • 6 -- 60% N2 • 6 -- 600 pph FF Before Takeoff (LLLAASSTT Chance) • L-anding Lights (tech: nose wheel light on when cleared for takeoff) • L-adies (sit the FAs down with PA message to the back) • L-ower DU display cleared • A-utothrottle ARM (tech: when cleared for takeoff) • A-utobrakes - RTO • S-trobe lights ON • T-errain (tech: Captain Terrain/FO Weather) • T-CAS (TA/RA) 10,000’ check during climb out (FLAAPS) • F-uel Pumps (Ctr Tank management per alternate operating procedures) • L-anding Lights -- RETRACTED/OFF (consider 18,000’ in high-traffic areas) • A-irspeed -- accelerate to desired climb speed • A-PU -- Off/as desired for shorter flights/EROPS/WX • P-ressurization check (Auto/pressurizing/cabin alt OK) • S-eatbelt (double ding by going off/wait 1 sec/on then auto) Before Descent (AIRBAG) • A-TIS • I-nstall the Approach • R-adio’s -- Tune and ID • B-rief the Approach • A-pproach Checklist • G-o Around Procedures (How will the airplane fly it? HDG SEL, etc.) Planned Descent Point • Timing -- Approx. 10 seconds for every 100’ of altitude to lose • Distance -- Divide HAT by 300’. This is the distance to start descent from the end of the runway. Enroute Descent Path Planning • Build a waypoint 40 NM track distance from the landing runway with 240/10000 inserted for Speed/Altitude. - AND/OR - Use the fix page and put a 40 NM circle around the runway (or FAF) and plan to cross the circle at 240/10000 for a straight-in arrival. • When planning an enroute descent to radar vectors to final it can be difficult to determine how far out you will be vectored and how soon you should begin your descent. Request a descent at a distance that will allow a constant 1500 fpm descent. To determine this descent point: • Load the expected approach using the FMS DEP/ARR page • Load the FAF or OM point/altitude on the descent page at 3R. • You can monitor the V/S as you approach this point. When the V/S approaches 1500 request descent. Even if the descent is not granted immediately, you will have a very good target descent rate when ATC permits the descent. This technique provides a constant descent that mirrors our constant climb to cruise profile. Descent Profile • 3.5:1 (Miles : Altitude) • For every 50 Kts of wind +/- 2 Miles • Losing 10 KIAS Takes 1 NM 10,000’ check during descent (10,000’ AGL for higher field elevations) (FLAAPS) • F-uel Pumps (Ctr Tank management per alternate operating procedures) • L-anding Lights -- EXTENDED/ON (consider 18,000’ in high-traffic areas) • A-irspeed -- decelerate to 250 • A-PU -- On/as desired/WX considerations • P-ressurization -- set for landing field elevation • S-eatbelt (double ding by going on/off/wait 1 sec/on) Cat II/III ILS (ABCD) • A-PU -- On • B-rake Setting • C-at II/III ILS Procedures • A -- Approach Brief • A -- Alert/Decision height callouts • A -- Altimeter bugs (radio and barometric) • D-epart runway plan (How will you taxi to park -- SMGCS?) Before Every Approach • “AAABBCC” • A-TIS • A-pproach loaded in FMS • A-irspeed set in FMS • B-rief • B-rake setting (off, 1/2/3/Max) • C-hecklist • C-onfiguration (flap setting) • “CRAMPS” • C-ourses -- set/verify inbound course on MCP for FP & PM • R-adios -- set/verify correct frequency (ILS/VOR/Tacan/NDB) • A-ltimeters -- set/verify QNH/QFE as appropriate through transition • M-inimums -- set/verify for PF & PM • P-ush -- APP mode (or VOR/LOC or LNAV or Hdg Sel) • S-peeds -- set/verify Vref is set and displayed for flap setting Engine Failure on Takeoff • “4 Cs” (accomplished when flaps are up at min. maneuvering speed) • C-hange (Level Change) • C-ontinuous (Max Cont) • C-rossfeed (with fuel only in wing tanks) • C-hecklist (NNP then After Takeoff) Single Engine Trim • Trim into good engine is approximately equal to Fuel Flow Single Engine ILS Approach • At 1.5 Dots or later on the Glide Slope -- • Gear Down • Flaps 15 • Reduce Thrust 10% N1 Non-ILS Approach (VNAV is preferred for straight-in approaches) • 3 NM -- Configure (Gear Down/Flaps 15, Bug 15, Landing checklist to flaps) • 2 NM -- or sooner/Set Next Lower Altitude (ensure VNAV if using) • 1 NM -- Flaps 30, Bug 30, complete Landing checklist • 0.2 NM -- V/S As Desired (unless using VNAV) Touch and go/pattern work Missed Approach Note: Assumes intent for complete flap retraction to missed approach holding pattern. • TO/GA (A/P will kick off under single-channel operation) • Set Go-around thrust • Set pitch to Go-around attitude • “Flaps 15” • Positive climb rate - “Gear up” • 400’ AGL - “LNAV” or “HDG SEL” (Note: for Non-Precision approaches your probably already at/above 400’ AGL or very close if going missed from and DA/DDA/MDA) • Retract flaps on speed • 1000’ AGL - Set LVL/CHG or V/S + 1500’ • After Takeoff checklist (Ops Man) Radar Pattern Climb Out From Touch & Go • PF rotates aircraft to 15 degrees nose high • Positive climb rate - “Gear up” • Flight directors - ON (if coming from VFR Pattern OR Recycle) • 400’ AGL- “Bug Up, flaps 5, LNAV or HDG SEL ” • 1000’ AGL - Technique: "V/S, Set 1500 fpm" or "LVL CHG" • Retract flaps on schedule to “Flaps Up” • After Takeoff checklist • Maintain flaps Up for downwind Note: PF re-establishes A/P and manually arms Autothrottles • PM rechecks weather, installs approach and helps tune nav radios (technique) • PF briefs approach, tunes radios and calls for the “Approach check” Precision Approach (use “CRAMPS” check technique) • Arm APP if cleared approach on intercept heading • G/S alive - “Gear down, flaps 15, Bug 15, landing checklist to flaps" • G/S intercept - “Flaps 30/40 (final flap), Landing checklist” slow to VREF + additive Non-precision approach (non/VNAV) • Arm LNAV or use HDG SEL for lateral maneuvering • 3 miles prior - “Gear down, flaps 15, Bug 15, landing checklist to flaps” • 2 miles prior (or earlier) - Set MDA or stepdown altitude in altitude alert window • 1 mile prior - “Flaps 30/40 (final flap), complete Landing checklist” slow to Vref + additive Note: Do not arm speedbrakes or use autobrakes if accomplishing a touch & go. VFR Pattern Climb Out From Touch & Go • PF rotates aircraft to 15 degrees nose high • Positive climb - “Gear up” • Turn off FDs if not already off (technique) • 400’ AGL - “Bug 5, flaps 5” (technique) • 1000’ AGL - PF lowers nose to 10 degrees pitch and reduces thrust (at Bug 5 speed) to approximately 75% N1 (technique) • PF levels off aircraft at 1500’ AGL or pattern altitude and maintains flaps 5 on downwind VFR Pattern • Enter downwind at flaps 5, speed Vref 30 + 40 (Bug 5 speed) • VFR pattern briefing - "30/40 Flap touch and go, Speed is ____" • Approaching abeam touchdown point - “Gear down, flaps 15, bug 15 Landing checklist to flaps” slow to Bug 15 • Before turning or during turn to base - “Flaps 30/40, Bug 30/40 + ___ (additive), complete Landing checklist,” slow to Vref + additive • Descend as required (approximately 600-800 VSI as a guide) Note: Do not arm speedbrakes or use autobrakes if accomplishing a touch & go. Technique for Establishing Automation After Pattern Work Note: Technique used should be pre-briefed. Assumes the "gear up" and "flight director’s - ON " is already called/done. • 400’ AGL "Bug Up, Flaps 5; HDG SEL or LNAV" • 1000’ AGL (or A/R) "Vert Speed + 1500’, Flaps 1" or "Level Change" (Flaps 1 above F5 speed and then flaps on schedule) • PF establishes A/P by selecting CMD and A/Ts -- ARM NG techniques.pdf6 points
-
Taking a short break from heavy metal (read: IXEG) Linz, Austria [LOWL] to Portoroz, Slovenia [LJPZ]3 points
-
This week, i have no time to work properly about X Plane things. Some improvements to test in this file (jsnapp fixes are included). Fight of wheel trim is fixed. The 2 spots on the roof, behind the seats are now synchronized. Axes settings are send from master to slave (Recommended by Morten: 3 left cursors to 0, 3 right cursors to 25%, null zone to 10). @jsnapp. You are right.about weather. No joy with animation of the radios knobs (speed knob as well). Claude. smartcopilot.zip2 points
-
Thx for the report xplana. I am about to enter a phase of very dedicated FMS work and hopefully catch all of these items. I am having to take a week off due to family medical issues and in addition, I have a daughter graduating college/university this weekend. ....and I'm dealing with family most of the week. I am VERY anxious to jump onto the FMS in earnest and bring it to its potential...is is much closer than the gizmo soft crashes would indicate....I just need to fly a lot. Thx again for the reports. -tkyler2 points
-
I will do everything that helps you solving bugs :-) Will come back on that topic tonight. Sebastian2 points
-
2 points
-
Father and Child2 points
-
2 points
-
Just arrived in Amsterdam after a short flight from Leeds2 points
-
Flight from EFTP to LEGE2 points
-
It´s starting to wear on me that we only have 5 or 6 737s left at Lufthansa. Last flight is planned for something like October, and I really hope they will throw a farewell party, but for some reason I doubt it. I start taping and taking pictures of all the 737´s I see, my Copilots think I am crazy . Just yesterday I saw our newest model, D-ABEF! (Only a little over 20, still a youngster!). And what do we get to replace them? NEO´s... what a nightmare. Jan2 points
-
Version 1.0.0
362 downloads
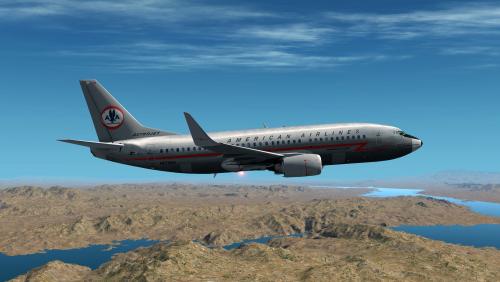
American Airlines "Lightning Bolt"or "ASTROJET" Livery. Simply drop in the Liveries folder. Please do not use my work without my consent. I can help combining my work with yours. Just ask. Thank you and enjoy!1 point -
I've had some response here at the IXEG forums and i've decided to post information from a real world standpoint. Below is a post I've made before that discusses if the average simmer could actually fly a real world jet. Check it out and post your thoughts. Rick THE TOPIC Ladies and gents, there have been some past discussions about a flight simmers ability to pilot a real world aircraft. The most recent topic comprised of flying a 737NG. There were plenty posts about the probability with varying perspectives. To have a good view point, one must understand what goes into flying a real world aircraft. For the most part, most of us are very familiar with the flight sim process. Some of us actually have real world experience in the flying biz. With that in mind, I think it's better to take a close in depth look at the possibility and how one would go about accomplishing the task. WHY Someone asked in an earlier post, "Why would a real world pilot even bother with FSX". Well for me, I learned a lot about flying from flight sim and the community. I was a flightsim addict when I was young. My dream of flight started with flightsim and it made the process easy. I've been flying for about 17 years now and I think flightsim paved the way by planting the seed. I know flying isn't for everyone. Some who are interested may never get the opportunity. It's in flight sim where many will get to experience flight. I returned to flight sim and the community to give back. If I can pass on experience or answer questions, I’m happy. I give advice to those who want to sim realistically. I've also been a part of a few beta test teams where I aimed to test flight dynamics against performance manuals and my own experience. This is why I stay active in the community. THE SET UP In this topic we will focus on an experienced flight simmer that uses add-on aircraft and flies them in a realistic manner. We can base it on a 737NG, but use jet aircraft in general. Here is the mind set. Most modern jet aircraft are the same in general. Systems are very similar. They are certified by the same requirements. They are typically flown the same. Some terms may differ by aircraft. Let’s look at the system that controls whether aircraft is in the ground or air mode. Lockheed called the components touch down switches (sws). Micky D called them ground sensing mechanisms. Some refer to them as squat switches. Gulfstream has called them nut cracker sys/sws and moved on to call them weight on wheel sys/WOW sys. Either way they perform the same function in the same manner. Autopilots, flight directors, auto-throttles and modes are the same throughout aircraft. What really changes between the aircraft are the flying procedures. Type ratings mainly focus on the procedures of that particular aircraft based on characteristics and capability. You have to know the automation/FMS procedure as well as the manual procedures when becoming qualified. This is what makes going from jet to jet easy. It also makes it easy for negative transfer. This is when you apply procedures from one aircraft to another. It's easy to do since the systems are similar. In reality, flying is all about habit patterns through repetition. We will look at the pros, cons and pitfalls of flightsim vs RW. THE SCENARIO Let’s say for some reason the walking dead have invaded your town and you need to get your family to safety. Or maybe Mayans were a tad bit off on the date and now you want to fly it out. So you happen to come across a 737BBJ or similar Boeing, you choose (no airbus). Someone has left the stairs down and the door is open. You scream "Get your @#%^& on!" in your Sam Jackson voice. If you are lucky, the jet is powered up. In this case it's not. POWER UP Above we mentioned how most jets are similar. There is usually an electrical control panel in the cockpit. The question would be, can an experienced simmer figure out how to power up the jet. In my experience, powering up a jet is straight forward and simple. Most jets are self sustaining, meaning you can operate the jet without any ground equipment. This can get difficult for the simmer. When I was flying heavies, there were plenty circuit breakers that would be pulled after flight. They were in the cockpit. This prevents some equipment from turning on while the aircraft is powered up. Radar altimeters, standby ADI, and probe heat were some of these items. Mx would install colored collars for quick identification of these breakers. Even though the DC10 had a ground service bus that only powered up the cabin, the breakers were pulled and full power would be applied. Now on the other side, in the Gulfstreams that I fly, things are all ways left on and no breakers are pulled. Even the radio, cabin, FMS, and SAT TV masters are left on. Some operators turn them off and some don't depending on the Mx costs they've experienced. I have found situations where the CDU and Display Units are dimmed to save on wear and tear. The Display screens are also turned off. Would the simmer be aware of these situations? Would he know to check breakers and sws? Most sim aircraft don't simulate these situations, but some do. An experienced simmer may be able to power up the aircraft. As I said it's straight forward. Due to add-ons, he may know that he needs the APU. He would also know that he has to turn the batteries on. A glance around the cockpit and he would surely find these items. In the real world, I all ways perform a radio check on VHF1 and APU/ENG fire test prior to starting the APU. In this case, he may not know and he doesn't need it. It would be nice to know that the APU fire sys works, but i haven't ever had an APU fire. Now in the aircraft I’ve flown, there were always flight pubs and aircraft pubs on board. In our jets we have laminated checklist and SOP briefing cards that are left in a pedestal slot. In the cabinets, we have the full set of flight and aircraft pubs. Our aircraft are all ways worldwide ready to go. I think the simmer would be able to power up the aircraft. The aircraft pubs greatly increase his chances if he finds/chooses to use them. PREFLIGHT The simmer wouldn't have an idea about the full preflight. Some operators have forms that are used for checking the status of the aircraft. You can check the Mx history in them. He would probably know that some items need to be turned on. There are also items that need to be removed. Once again, some sim aircraft simulate removing pins, and covers. The nice thing is that removable items are tagged with red streamers that scream, remove before flight in white. Some items are just red. The preflight turns on/test systems and prepare them for flight. Some things are critical like chocks, parking brake, and gear pins. These 3 will get you in trouble fast. Systems are easy to turn on. Most systems are grouped together and are clearly labeled. Chances are, they are left in the on position. He would have to know the things that are critical to flight. Some jets have hydraulic switches, trim switches, anti-skid, flight control sws etc. From jet to jet, some are always left on and some are turned off after flight. Modern aircraft are also designed in a way that you could easily tell if something is out a place. There are usually four colors that you will find. They are green, blue, yellow and red. We all know red is associated with something wrong. I find that yellow is usually associated with a switch in the off position. Blue is usually an advisory. Blue may tell you that you have selected something on. For example, in the G550, the APU master sws reads on in blue when it’s in the on position. It’s just a reminder that you turned it on and you have to select it off. There will also be a blue cas message that reads APU MASTER. Would the simmer know this, maybe? But he could easy look around and check for yellow and red lights. Most cockpits are designed in a way that when the aircraft is fully configured for flight, warn/caution lights are out and no messages are displayed. FMS The FMS and IRS systems can be interesting. Setting position can be a challenge. Most add-ons simulate this very well. There are some pitfalls. Both systems will be easy to find. Most INS systems will perform a self test on power up. You should turn them on first. Most systems will not accept position until the test is complete. They would have to be in the align or nav mode in order to accept position. The only difference between align and nav is that align will hold and keep the align state. In nav, the INS will start to drift as soon as the alignment is complete. If you load the pos before the 10 to 15 second self test is complete, you wouldn't notice it. They will start the countdown/alignment process. At the last state, the align lights will start flashing at you. The simmer could become confused if this was the case in the type aircraft he jumped in. He can fall into a cycle of this as he reset them. For the most part the FMS system is pretty easy. On power up, most will usually default to the NAV IDENT page. Software version, time, date, and active database will be displayed. You can select pos init from this page. The smart guy would load the GPS position. Another pitfall is the pos format. If you have to manually enter the position, it can confuse you. In older systems, you would load lat first and then long. In the Honeywell, you have to type the lat and long together, but it needs to be in the correct format. You can follow the last pos format and load it and you have a chance. If the jet was towed, you would still be within a mile you hope. The universal is more difficult. There is a specific page and way you have to load it. For the most part, the FMS will walk you through the order of what’s needed. It prompts you through the rest. The experienced guy would have no issues unless he is on an airbus. He could go low level VFR, or direct or add a complex route. At minimum, if he can't get the INS up, he can select ATT which will give you basic attitude ref minus the nav capability. He could also use air charts and navigate by nav stations. FUEL If the simmer can work the FMS, he can figure fuel requirements if the FMS is properly perfed. Adding routes can be easy. He may be savvy enough to be complex. He can also go direct or forgo the FMS all together. 15K or more, he can get somewhere. Less than 15K, options are limited. WEIGHT and BALANCE The BOW weight can be tricky. Most FMS systems will keep the last weight entered. Weight and balance is another issue. I doubt that a simmer can calculate weight and balance. If he is lucky, the aircraft will have a canned weight and balance book on the aircraft. Most smaller aircraft will have a chart that’s based on passenger load. The FMS will usually have weight and balance internally requiring only the basic weight and pax/cargo load. Other operators will use a system/program that calculates it for you. Out on the ramp, you may be out of luck. If you have no way to figure out the weight and balance, you are rolling the dice. If the weight in the FMS is close, you still need to know cg information in order to get a trim setting. Only a person with time around the aircraft might have an idea of how the aircraft sits empty and how the cg moves as pax and gas is added. Every jet will be different based on its configuration. The DC10s i flew had a range from 8 to 29 for flight. Empty, it sat 12 to 15. When loaded, the CG moved aft to 25 to 29. Most aircraft are tested to be controllable in an out of balance/trim situation. Here’s some experience for ya. I was flying a Gulfstream from NY to Shannon. During taxi, my CO had an issue trying to reach tower so I took the radios and got the clearance. On line up i performed the ground spoiler test and armed them. I did a quick safety check and pushed throttles up to takeoff power. As we hit 60 the yoke rose to neutral and the co called 80kts, controls free. I came off the tiller, grabbed the yoke and stated pilot’s controls. The CO called V1- Rotate and I added back pressure. The nose didn't lift. I pulled further back and the nose slowly rose as he called V2. I trimmed nose up while adding firm aft pressure. I glanced at the trim and noticed it was just passing into the green. We cleaned up and continued. During taxi, he had been pushing nose down trim instead of the PTT while calling tower (common). Unfortunately that model Gulfstream has no warning for trim being out of the green. It doesn't sound when in motion either. From that point forward i check trim when taking the runway. WALK AROUND Most simmers have rode in an airliner and watched the pilot complete the walk around. Training will teach you the specific items, but most aircraft are the same. Parking brake, gear/door pins, chocks, doors, panels, covers, flight controls and taxi area are the biggies. Other than that it's general condition. It's a 50% chance a simmer would know what to look for. Would he notice if something was missing? What should be open, and what should be closed? A simmer with ramp experience has about an 80% chance. As long as the biggies are covered, he can make it. ENGINE START Engine start is pretty easy. Bigger question is, would they be able to get the stairs up or pulled away from the aircraft. Some aircraft have an alternate way to enter the aircraft from the ground. If he is lucky, the aircraft may have internal retractable stairs. Most exits and doors have instructions near the controls. There are 2 things required for engine starting. We will need electrics and pneumatics. Aircraft these days are very easy to start. A quick scan of the overhead and pedestal will identify start controls and indicators. Most aircraft will have start arming controls along with starter sws and fuel levers. A checklist would be very helpful with configuring for start. Mainly start systems armed, AC packs off, throttles idle, parking brakes and accumulators set/charged and proper pneumatic pressure (30-40PSI). Most simmers could figure this out. Big thing in the old days was fuel scheduling. My past jets required fuel at 15% N2. Now days sophisticated aircraft will introduce fuel and ignition when the FADEC feels it’s appropriate. Last is to know start malfunctions. Rapidly rising EGT, hung starts, no starts, and failure of the start valve to close were the biggies. I can count on both hands the amount of times I’ve had start malfunctions during starts in 17 years of flying. This shows that they are rare. Modern jet engines start without complicated procedures. I think the simmer could handle this very easily. Also most engines require a 5 minute warm up period before takeoff. Finally one would have to reconfigure the panels after starting. We call this the after start flow. Again, the checklist would get you in the right configuration. Key note is that items in the checklist will most likely have SET written next to them. One would have to know the proper settings. TAXI Taxi can get difficult depending on the aircraft. The many times I’ve seen tire marks in places they shouldn’t be around the airport. Let’s take my beloved DC10 for example. You sit 21ft above the ground. The point at which you can see the ground ahead of you was 55ft away. The point at which you could see the ground out the side window was 35ft away. The nose landing gear was 21ft behind you while the mains were 72 feet behind the nose gear. The wings were 165ft 4in from tip to tip and you could not see them from the cockpit due to the sweep. This made the aircraft difficult to taxi. You had to use many references in the cockpit in order to know where your wing tips, main gear, and engines were tracking along the ground. During 90 degree turns, your body would be physically over the grass before you start turning. You used references to imagine nose tire positions during turns. Turns made some uncomfortable. The most common taxi incident was running over taxi lights or putting a main in the mud due to under turning. The guys I know who did this didn’t realize it until they were called by the airport after departing. Would the simmer know these references? Probably not. Taxiing a Gulfstream is too easy, but as you move up in size so does the difficulty. Transitioning from the sim to the real aircraft creates a challenge. Staying on the taxi line and offsetting during turns will be key. Trouble usually starts when maneuvering around obstructions and other aircraft. Performing single pilot ops or having an inexperienced person in the other seat makes things very marginal during taxi. Is it possible? Probably. Also, taxi speed and brake use can be a factor. Too much speed and brakes can overheat things on a long taxi. I’ve heard of guys riding the brakes and tripping the thermal fuses in the rim of the tire. It’s very hard to taxi with flat tires. This is another great time to have that checklist to help set up for takeoff. Proper flap settings are critical. In FSX, most aircraft will get airborne with improper flap settings. In real aircraft, you can easily find yourself with hands full of stick shaker after liftoff. It’s been proven plenty times that aircraft will not fly with improper configurations. TAKEOFF Ahh, takeoffs are the most important/dangerous part of flight. You have to accel from a stand still through stall speed to get airborne with a high power setting. First we have V-speeds. Most simmers understand V-speeds. The takeoff roll itself might surprise an experienced simmer. Takeoffs in the sim can be misleading. Let’s look at this closely. Power application should be standard. One may find it surprising how spool up rates between engines may differ. This could lead to directional control issues initially. This is why it’s good to align the N1s/EPRs before applying power and applying smoothly. Crosswind controls become important. Some aircraft will weathervane easily into the wind and others tend to roll away from the wind like a barrel. This requires proper input to stay aligned and prevent scraping a wing tip or engine pod. New guys tend to zig zag down the runway. One should know that tiller use is discouraged especially above 80kts. Takeoff should be done with the less sensitive rudder pedal steering. Keeping an eye on speed may be a minor issue. Pilot performing the takeoff should have his/her eyes outside until coming inside during the rotation. Our simmer would have to peep inside from time to time which could lead to control issues. It’s so much easier when you have a CO who states those speeds for you. The next sneaky challenge is the rotation itself. Most jets are trimmed for V2. Initially during this 3 to 4 second rotation, the nose is a little sluggish requiring some input. As the nose lifts, you accel past V2 and the nose begins to rise quicker on its own. At V2+10, you will find yourself pushing forward on the yoke to keep the nose from rising. Experienced real world guys are already leading this issue by trimming nose down at some point during the rotation. You don’t find this in add-on aircraft. So imagine our simmer trying this for the first time. He would not be familiar with the stiff yoke. If he rotates late, there will be even more force to overcome. This situation can easily lead to a power on stall. He could panic and over control the aircraft. The next sneaky situation is speed itself. If you are overwhelmed and caught off guard, you could over speed some things. An experienced simmer my know how to use automation to slow things down. Next are configuration changes. You have to be careful when and how you clean up. Most aircraft limit you to 15 degrees of bank during the cleanup. Anytime you are below min maneuver for your existing configuration, you should limit to 15 degrees. Retract too early and you meet the shaker again. One would have to be ready and on top of things after takeoff. You have 5 minutes on takeoff power. The power may switch to climb, but it’s still a lot of thrust churning. This is where the simmer runs into trouble as the engines could care less about speed limits. This is the regime where real world guys over speed things. You have to keep the nose up (pitch and power) to control speed until you can turn on the automation and enter into a good speed mode. Automation will help greatly with slowing things down as long as one knows how to use it properly. CLIMB-CRUISE Climb and cruise is very simple. There’s not much too it. The biggest threats are over speeding, no/loss of cabin pressure and running out of gas. These are very avoidable if the simmer is good with systems and the FMS. One other threat is weather. Manually loaded flight plans are not winded. This could cause some time and fuel miscalculations. One could take the actual winds and load them along the flight plan points. Last is weather radar operation. You have to dodge cells. He has to know how to paint cells and use the tilt to get a working idea of a cells make up. Day time is easier but the radar is essential when flying at night or in the clouds. One must also know when to use anti-ice. Most sim guys are sharp on these rules. ARRIVAL-APPROACH The arrival isn’t difficult, but it’s the key to a good approach. The simmer would need to plan out his arrival. Most guys are familiar with the FMS and know how to pull info for descent estimation. Late descents lead to fast and rushed approaches. From the old school days I learned to use the 4 times your altitude to lose rule. For example, I have to lose 30,000ft to reach the IAF/FAF altitude. 4 x 30 = 120NM to make it. In this example, I need to start down no later than 120NM from the IAF. This has worked well in all the types of aircraft I’ve flown with idle descent. It also accounts for time to slow to 250 before passing 10,000ft. There are 2 ways to arrive. You have Instrument app or VFR pattern entry. The Instrument app is easy and can be accomplished using the FMS or NAV radios. The FMS is easy to setup and the ILS is easier. The simmer would be very familiar with approach procedures. Minimums/MDA settings will be more of a factor during approaches at night or in the weather. Big thing is knowing when to slow and configure. What flaps to use and when to use them. Flap selections are either driven by speed along a certain leg, distance from the field, or position along the approach. It all depends on the type of approach you are flying. Let’s look at the 737 for example. On initial setup/vectoring for a ILS/FMS approach, you want to be at flaps 1. Approaching intercept, you want flaps 5. At glide slope/path alive, gear down and flaps 15. When the path is a dot above, select landing flaps. The VFR pattern can be just a bit more challenging. You would have to have the proper displacement and altitude as you enter downwind. You would prefer to have the runway on your side of the cockpit. VFR patterns in most jet aircraft are race track patterned. The turns from upwind to downwind and from downwind to final are constant. This keeps you in tight and within the airport airspace. In the jets I’ve flown, we fly the pattern at 180kts. The experienced simmer may not have the practical knowledge for the particular aircraft he may be flying. This is where the challenge resides. I’ve watched real world guys fly very good vectored instrument approaches and fly very sloppy circling and VFR pattern work. It’s very easy to become unstable in the VFR pattern. Misjudged displacement and rapid descents from downwind usually leads to excessive maneuvering and diving during short final. The flight sim makes it difficult to simulate unless you have Track IR. This is how I fly my patterns real world and I’ve used this in every jet I’ve flown. Enter downwind at pattern altitude, no less than 1000 to 1200 feet agl. I have a calibrated eye for displacement but you want to have 1 to 2 miles of displacement. After flying patterns for a while, you tend to know when you are in too tight or to slung out with a glance. You want to be at 180kts with maneuvering/go-around flaps. Turn off the FD and set the heading bug to the runway heading. The FD can be distracting, but the heading bug will give a good idea of how you are tracking in ref with the runway heading. Having the ILS tuned and displayed is a good idea if available even though ILS and visual glide paths may not match at some fields. Keeping an eye on displacement will help you gauge under/over shooting winds. Modern aircraft will display wind direction/drift on the MFD or in the FMS. When you are abeam the threshold, drop the gear. When the end of the runway meets your shoulder at a 45 degree angle, start your turn, descend up to 500fpm depending from your pattern altitude, and start slowing towards your approach speed. Depending on the winds, you may have to shallow or increase your bank angle. As you move through base during the turn, select landing flaps and pick up the visual glide path. At this point you can easily adjust your sink rate to get on the path. Without glide path indicators, you have to eye it by using the 3 to 1 rule (3nm for every 1,000ft). This is why the ILS is nice to have for reference without visual guidance. Aim to roll out on centerline and avoid angling towards the runway. If done correctly, you should be in the slot/good position for landing. LANDING The landing has some pit falls for the simmer. One would be crosswind controls. I feel that FSX fails to effectively simulate an aircraft’s behavior during crosswinds. I am a wing low guy. I like to apply my crosswind controls at short final. I get a good feel of what’s required instead of waiting till the flare. Another would be sensory overload. I even see this with experienced pilots transitioning a new type. There are a lot of things that go through your mind during landing. New guys get into the “penguins on an iceberg condition”. There are only so many penguins that can fit on the berg until some fall off. As you learn new things, you tend to forget old things. The new guys tend to give up crosswind controls after touchdown, because their minds switch to other things. They forget to use the reversers or to go beyond reverse idle. Some forget to fly the nose to the runway. Firm landings tend to freak new guys out causing them to slam on the brakes and get squirrely in steering. If this can happen to experienced pilots, imagine a guy who has never flown before. He may accomplish these things easily in the sim, but now there are other sensory stimuli he could not get from the sim. Let’s take a look at things he would have to wrestle. Once on final, he should be focused on aim point, glide path, and airspeed. Some guys use N1 settings or a given fuel flow to maintain airspeed. This comes from experience. It’s Easy to set a fuel flow that will get you to a speed instead of jockeying the throttles to get there. Depending on the aircraft, throttle movement would affect pitch. The simmer would not have any of these techniques to assist him. Even in the DC10-30 we used 10% of your gross weight plus 23 for a good N1 setting when landing with flaps 35. While he monitors those, he should be going through the landing in the back of his mind. It would help if he has some knowledge of the flight manual landing procedure. He would be thinking of flare and power pull timing, crosswind controls before and after touch down, getting the reversers unlocked after touch down, flying the nose down, up and aft on the reversers, and when to apply the brakes. When these are second nature, it’s very easy to do. When you are new at it, it can be a task to remember all. On approach he will have to fight for centerline while making small corrections to stay there. This is another reason I’m a wing low guy. It’s Easier to judge my track when my nose is pointed right down the runway. Just keep your inside foot on the centerline and you will get there. As the plane enters ground effect, it may act different. In some, the nose tends to dip while others it may raise. I find flare timing easier when done off the radio altimeter call outs. I picked it up in the DC10 and now its habit. Most aircraft only need about 2 to 3 degrees of pitch change in the flare. Again, some add-on aircraft will not give you a good representation. Most planes you add your flare and hold it till touch down. Pumping the yoke for smoother touch downs after the flare will lead to floating and loss of airspeed. If done correctly, the aircraft will continue to sink on its own. The MD80 gets floaty in ground effect and will climb if you pitch a little higher than required. The G5/550 is notorious for this also. It approaches at -.5 degrees and will float if you get the nose higher than 2 degrees. We pull to idle at 50ft in the 5 and 100ft in the 550 because of the slipperiness. We raise the nose a couple of degrees at 20 feet and she settles nicely. TOUCH DOWN-ROLL OUT Once on the ground, the game isn’t over. Flight sim is missing a lot of aircraft characteristics. Let’s look at crosswind controls. When the mains hit the ground, the ground spoilers pop up. On most aircraft, the roll spoilers become ground spoilers. This requires immediate added upwind input. The aircraft is still flying after touch down and will tend to roll away from the wind and drift. Some aircraft like the gulfstreams will weathervane into the wind. This has happened to me with new guys and I’ve had to add aileron or push on the rudder when guys didn’t use enough or totally relaxed crosswind controls after touch down. This can get the simmer into trouble very quickly. Where ever your nose is pointed on touch down, that’s exactly where she wants to go. I’ve been scared enough that I’ve tapped the brake as a new guy broke my comfort zone while drifting on a touch n go. You could scrape an engine or depart the runway without crosswind controls. In flight sim, this effect is missing. The ground spoilers will also affect pitch control. On the DC10 the nose will tend to rise as spoilers deploy. You had to prevent this and fly the nose to the ground. I’ve watched many new guys yanking at the reversers in confusion wonder why the levers won’t all go past reverse idle. The reverse idle interlock for #2 will not release until the nose strut compress and put the aircraft in ground mode. The Gulfstream nose will fall rapidly as the spoilers deploy requiring a quick pull on the yoke to prevent the nose from slamming. One would have to know when to use the tiller. Use it higher than 80 kts and you can get into trouble. Even at 80kts, my hand is resting on the tiller not using it. The simmer would have to know when to use the brakes. Yes, you can apply the brakes after touch down but it would be a shame to have a fire after successfully landing the plane. After touch down, I usually use just slight pressure to ensure operation and then release. I stay off the brakes until 80 kts unless I need to stop rather quickly. When braking, you apply even pressure till moderate deceleration is felt. The simmer could get into trouble while braking and using rudder. I find that new guys tend to sway and zig zag during this time. Usually it’s crosswind rudder that causes them to apply more pressure on one brake than the other. This causes the guy to modulate the rudder leading to oscillation. Too much of this and off we go for a ride off the runway. It’s not uncommon to have hotter brakes on one side during crosswinds. Thrust reverse use is pretty simple. On some aircraft, one reverser may open quicker than the other or they may spool at different rates. This could lead to control issues if it’s not quickly countered or stowed. For the most part that’s it. SUMMERY-CONCLUSION We talked through what an experienced flight simmer might face when it comes to operating a real world aircraft. Some items such as weight and balance would be a big issue. It’s difficult to pick up weight and balance if you are not familiar with it. I remember my first attempt at a manual weight and balance form. It was no fun. Once I tried it a couple of times, it became easier. If my computerized version was to fail, I could knock one out by hand very easily. As I mentioned before, it’s a crap shoot. If the simmer has flown his aircraft in a realistic manner, he would have a chance. It’s an uphill battle but it’s possible and the odds would be against him. As long as there weren’t any failures or aircraft issues, he may be able to pull it off. Add 2 experienced simmers and the probability increase greatly. Rick1 point
-
IXEG B737-300 ANA Wings View File All NIppon Airways's fictional livery. Super Dolphin is for B737-500 (2.4m shorter than -300) Submitter obochi Submitted 05/07/2016 Category IXEG 737 Classic Livery For Click Here For Aircraft X-Plane Version(s)1 point
-
ANA Gold for IXEG 737-300 View File ANA's Gold Livery B737-300 for IXEG! Submitter nellhama Submitted 05/10/2016 Category IXEG 737 Classic Livery For Click Here For Aircraft X-Plane Version(s)1 point
-
Egypt Air for IXEG 737 Classic View File Based on the Boeing 737-500 livery of Egypt Air. The flags on the fuselage are a little offset from the real plane, as an anomaly on the right side fuselage causes the flag to distort. Small text might also be a little off, but this is however a fictional livery for your enjoyment. Thank you for your support. Submitter SpeedBirdNam Submitted 05/10/2016 Category IXEG 737 Classic Livery For Click Here For Aircraft X-Plane Version(s)1 point
-
American Airlines ASTROJET View File American Airlines "Lightning Bolt"or "ASTROJET" Livery. Simply drop in the Liveries folder. Please do not use my work without my consent. I can help combining my work with yours. Just ask. Thank you and enjoy! Submitter scubajuan_new Submitted 05/10/2016 Category IXEG 737 Classic Livery For Click Here For Aircraft X-Plane Version(s)1 point
-
Orth4XP does indeed create a new nesh and so all other meshes are disabled and can be removed from disk, in order to save space. HD mesh and UHD mesh, however, have some elements that Ortho4XP will not generate by default, like roads and autogen scenery; in order to recover those elements you must instruct Ortho4XP to sniff either default x-plane mesh or HD mesh, so, you should only remove the latter after having generated tho overlay for that area. José1 point
-
thanks for "Aufklärung", Jan1 point
-
Do you use Control Pad (iPad app for x-plane) ? That's giving me stutters, but as said above there are more possiblities.1 point
-
The original wind noise was a default X-Plane one placed in by mistake if I remember right. The new wind noise is straight from a hi-def recorder placed in a 737 during flight. You'd prefer the non-realistic version over the real 737 recording then? I suppose you could perhaps swap the audio files around. I'm sure Nils will investigate any type of looping anomalies if present.1 point
-
@crisk73 I couldn't agree more. The cool thing about flying with another pilot, besides the element of task management being added, and having someone to talk through procedures with (as opposed to trying to force yourself to just talk out loud to yourself) is that after a short while you no longer see the cockpit as something you are just simulating. Because it is shared, it is real, and you feel you are flying in someone else's plane. In the very beginning it felt a bit like there was a ghost onboard flipping switches for me, but very quickly I felt like I was in a plane I had stepped aboard and I was lending a hand to get it from point A to point B safely and efficiently! Very cool indeed.1 point
-
Imho Smartcopilot+online+IXEG=best flight sim experience ever. Only a Level D full motion can be more immersive (maybe). [emoji6]1 point
-
Tom, take all the time and have a good family-time!1 point
-
Tom, please put your family first. We have more than enough at the moment to keep us happy. Congrats on your graduation, and hope the medical issue is not too stressful on your good self. Take care. Jude1 point
-
@ OP When performing a RNAV approach, set a speed constraint at FAF : Vref+5kts+1-3kts depending on the wind. You really want to do a stabilized app. So be sure to be at Vapp 1Nm before FAF (gear down and Flaps30/40). then check your approach chart, it should give you the V/S depedning on speed, at 0.2 NM, set the V/S accordingly to the value given by the chart. then check the VDEV indication on the EHSI and change the V/S accordingly but don't try to be pintpoint accurate on the middle and check the PAPI/VASI lights also. when AP/AT has correctly trimmed the aircraft and trhat the N1 is stable, disengage AP/AT and fly manually1 point
-
Hi sirs, just to confirm: Same effect on my side changing the cruise alt on the FMC when enroute and in VNAV. It manages to show the desired flightlevel on RK1, MOD lights up, EXEC lights up, but frames to 0.2 or less. Mouse lost, spinning wheel. *If* I manage to get the click through, back to lovely 30 fps. But putting the plane back to VNAV directly after this does not make her climb (MCP set correctly), using vertical speed to climb works as intended. When up, engaging VNAV brings the plane into descend on the right point, working fine. May be pilot error / misuse... Bassy regards Benjamin1 point
-
No worries happy hunting these damn bugs ! It is the perfect 737 sim so far.1 point
-
I could say "we are simulating that the pilots put on their noise-compensated headsets now" - would that make you feel better? (but it would be a lie...) We will check, Jan1 point
-
Hi Morten ! I tested pitch and flight path angle and deduced AOA assuming angle between wing and fuselage is 0. The average offset between tables is approx 1 deg and seems fairly constant, so looks like a quick fix to be better. Things may be a tad more hard for glide path at light weight. To me the debate XP vs FS is more and more meaning less now that external FM in both world exist. Only the result and quality have a sense. Concorde on Xplane is one of my dream Cheers, Philippe1 point
-
Hi If I'm not mistaken, engaging VNAV before flaps up is not a normal operation on classic. Use LVL CHG as usual. Not CDU like NG : There is only THR REDUCTION in Takeoff REF 2. There are many Noise Abatement Takeoff Procedure. PROC A is used in many airport in Europe and ur country : France. http://www.b737mrg.net/downloads/b737mrg_noise.pdf From runway to 1500 feet AGL : - take-off power - take-off flaps - climb at V2 + 10 to 20 knots (or as limited by body angle) At 1500 feet AGL : - reduce to climb thrust - climb at V2 + 10 to 20 knots (or as limited by body angle) At 3000 feet AGL : - accelerate to Flaps Up speed - retract flaps/slats on schedule - accelerate smoothly to en-route climb speed That's what I use often, as in Nice departure a+1 point
-
Hi Jan, Thanks. I've been retired now for 20 years. I flew BAC-11, B727, B757, B767 and MD11 and props before them. I guess it is a feeling - "seat of the pants" - thing. Maybe, my memory is getting a bit foggy. Ah, those were the good old days. It is good to see the ixeg B737 in XP-10 in such good detail. Keep up the good work. Flight simulators have come a long way.1 point
-
Interestingly, it seems to have been modelled differently at some point in time:1 point
-
Or maybe Aliens, riding along....1 point
-
There are no "real" GPS approaches in the 733 as in the NG. Use LNAV and VNAV/VS/FLCH to fly the vertical app according the charts. Remember that you can not set the GA Altitude in that case.1 point
-
Like the title says I purchased 2 copies of the IXEG 737. One for myself and another as a gift. It's so nice to finally get an amazing bird for X-plane 10. Does anyone know if they will be releasing a freighter version down the line? Thanks again to everyone involved with producing the 737.1 point
-
 I would have appreciated if you'd have checked with me about using my work in yours. At least you give me credit, But I could have helped you either by providing the clean texture so wouldn't have to clone parts that are obvious and make a sloppy result, or incorporating your work int mine. I started making the American Airlines Astrojet that you requested by the way.1 point
 -
Sometime last year 2015 I was flying home from Oshkosh as a simulated flight back to KWJF. And on my flight path I witnessed this and I got excited because at first I did not know what it was first hand, then it hit me. So I looked it up and I was more excited and how this got into X-Plane. So I thought it was cool and I thought I would share with you all. So share your pictures that X-Plane got you by surprise. This surely did and was definitely not expecting that. Cheers Dion Markgraf AKA: Dionsol https://skyvector.com/?ll=35.02819710736435,-111.05419921449561&chart=301&zoom=1&fpl=N0262A175%20KWJF%20ETHER%20V12%20HOXOL%20KINW1 point
-
1 point
-
Let us know how that goes! Jan1 point
-
Hi jsnapp and dr_nerdrage. I am happy: no more alone with this file! 1 Weather: Seems to me that during final, hand flying by the slave, it is better to have winds, shear and turbulence continuously synchronized (not each 5 seconds). This is the settings I use since one year or more. Is it better ? Debate is opened, but I think yes. About bandwidth, datas are transmitted only if values are renewed. So, no problem here. In fact, the best and luxurious way (more expensive), is to delete everything about weather, and use on both side FSRGW + Sundog plugins. So, each pilots have the same visual and visibility, same spots on the weather radar ( which is a wonderful part of the simulation). 2. NAV2. Good new, I had hard time with radios. There is a mystery with some knobs. If we sync the knobs theme self, (ixeg/733/radios/radios_nav1_mhz , ixeg/733/radios/radios_nav1_khz ), we can’t set some values For example, 114.xx is not doable, only 113.xx or 115.xx. Same with the speed knob (ixeg/733/MCP/mcp_ias_mach_act ). Here 250knpts is not possible, only 249 or 251. But ADFs, altitude… are right. 3 TOGA: good catch. 4: Check list: better. It was already on my to-do list. Claude.1 point
-
Don't be so sure.1 point
-
@3rdwatch Just to be sure i edited the script for you and put 127 & 128. If it doesn't work i give up with jetmax note: editing the lua scripts with improper editors like notepad may lead to the script not loaded properly. Here is the script if you want to test it just to be sure. joystick.lua1 point
-
ok @3rdwatch here you go... put the attached script into your /xplane 10/Resources/plugins/FlyWithLua/scripts/ folder. Launch xplane and test. Comments: The script will run single time everytime you load a new aircraft, if it senses you are loading the 737-300 it will set the handlers accordingly. As per your screen capture 128 is the ID for handler engine 2 so i would assume 127 for handler engine 1. Lua is -1 so i put 126 & 127 on the script Lua is very powerfull if the script works for you and you are happy, you can use lua to sense what aircraft you are loading and based on that set on a per aircraft basis your axis, nullzones, sensivities, buttons, keys, custom mappings, anything. So you do not have to reasign manually every time you load a different bird. Let me know how it works joystick.lua1 point
-
Well, I'm happy to report that I have this working! When you cross a one-degree tile boundary in X-Plane, cloud systems will no longer change positions on you when using Real Weather Connector. The next revision of SkyMaxx Pro will have this change in it. Before you ask - no, I have no idea when that will be yet!1 point
-
Alright... Seeing that nobody is up to the challenge! I will try it myself!1 point
-
As of today, the UHD Mesh Scenery v1 series has a new region: Japan The main differences (and improvements, compared to HD Mesh Scenery) are: High resolution DEM elevation data. Based on the AW3D (© JAXA) 30m data, and where AW3D has holes, filled up with SRTM 1sec (30m) data. Latest landclass data based on the "AVNIR-2 high-resolution land use land cover map 2016 February release (version 16.02)" (© JAXA) Massively increased mesh density ... by roughly factor 2.5 to 3! This is not only beneficiary to the better representation of the higher res DEM data, but also - once more - improves landclass and forest detail! Because of this, the "UHD Mesh Scenery v1" Scenery is very heavy on hardware resources and will only run smoothly on modern, higher end PCs. Its very important - before even considering a download - to have at least 16 GBytes of RAM and a modern / powerful GPU! Detailed infos and download links are here: http://www.alpilotx.net/downloads/x-plane-10-uhd-mesh-scenery-v1/ There is also a "release video" on youtube, to give you a impression about what to expect: If you are - only - looking for comparison screenshots, here are the official ones accompanying the release of UHD Mesh Scenery v1 - Japan. Just follow the link to my Google Photos album: UHD Mesh Scenery v1 - Japan (most screenshots in the first part of the album come in pairs - they are comparisons between UHD and HD quality! The first of each pair is HD, the second UHD - but there are also caption for each picture to make this clear)1 point
-
You must postulated to fly with it last time. We can make a petition to lufthansa if you want1 point
-
Hey, in 20 years people will have same sentiments for the 320neo What's so bad about the neo though?1 point
-
If a topic is deemed irrelevant based on when it was started then maybe it should be deleted so nobody else can post to it. Otherwise, shouldn't any thread be fair game to post in? While I think it's bad form to dredge up old topics, I find no harm in doing so. He's an X-Pilot newbie and, as such, he's just catching up on the tons of stuff already posted. This thread apparently struck a chord with him and prompted a response. No harm. No foul.1 point