Leaderboard


Popular Content
Showing content with the highest reputation on 08/06/2022 in all areas
-
Understand your sentiment Marc and many times, these bugs do seem silly, even to me. I'll keep fixing though and we'll get through this phase soon enough. -TomK2 points
-
Another one for today
 2 points
 -
I thought it would be fun to add some RL pictures from time to time. . Here our Chaly is on the way in the Belgrade FIR.
 1 point
 -
Updated docs (bug tracker) to reflect work done towards 2.0.2 update. Should roll through remainder very quickly, within day or two at most. -TomK http://togasim.com/mu2docs/supplements/bug_tracker_201.html1 point
-
Here is my temporary solution to keep Bravo correct (until the official version is out). 0) Download lua file: TB_MU2_TB_2_01.lua 1) put the lua script in the folder: ..: \ X-Plane 11 \ Resources \ plugins \ FlyWithLua \ Scripts \... 1a) Reload scripts FlyWithLua, or preferably start XP. 2) Assign the commands appropriately as I showed in the screenshot: 3) set the axis curves # 3 and # 4 as shown in the screenshot: Now after pressing button # 14 (originally TOGA), when you are close to the beta range, the Throttle axis will raise and move down slightly (no matter how long you press the button) In positions # 9 and # 10 (i.e. when you move the levers to the bottom button in your Bravo) - then the maximum Reverses will turn on. (You can now (with the press of a button) move any throttle to the Beta and REV ranges) In GUI Performance, check the option: "Auto-stop power levers at detent": It also improves the behavior that after starting the engines (from the C&D state) the "LOCKS PROP" locks remain blocked (although after starting the ENG Torque 1 and 2 indicators show RPM - and I do not know if this is correct). To release the Prop Lock, the Throttle levers must be moved to the Reverse range.


 1 point
 -
So one by one (as long as it allows me to translate the google translator well ). I will describe it for one of the throttle Bravo axes (the other one behaves identically): 1) upper range: from 100% to 50% of throttle range - axis Bravo works normally for throttle Alpha range. 2) going down - to a value of about 50% (here my lua script checks if Bravo axes are between 47-53% of the power range by checking the parameter - "xscenery / mu2b60 / manips / L_power_lever_rotate" (lines 16 and 24 in lua script) 3) when I move the Bravo throttles down (without pressing the button) nothing happens -> the power remains at 50% - which prevents accidental entering the Beta range during the flight 4) when you are between 47-53% power ("xscenery / mu2b60 / manips / L_power_lever_rotate") and you press the "MU2_LIFT_BOOTH" button then: 4a) if you are outside the range of 47-53% - pressing and releasing the button and "MU2_LIFT_BOOTH" does not change anything 4b) when you are between 47 and 53% of power and press and release the "MU2_LIFT_BOOTH" button, then the lever is raised (dataref ("PULL_L", "xscenery / mu2b60 / manips / L_power_lever_pull", "writable") -> PULL_L = 0.013 - line 18 of lua script) and it will move to the Beta range (THR_L = 0.50 -- lines 19 and 27 in lua script). 5a) If you move the Bravo lever back up, you will return to the Alpha range again 5b) if you move the Bravo levers down, you will decrease the power in the Beta range. 6) in the Bravo profile (THROLTTLE 3 (4) AXIS RESPONSE CURVE)) there is a horizontal line between 40 and 50 set to a value of 49 to provide a margin of "inertia" when you move the Bravo lever. In other words, you have "more space" to effectively use the "MU2_LIFT_BOOTH" button. 7) on the left, extreme side of the THROLTTLE 3 (4) AXIS RESPONSE CURVE profile, I have set the minimum value to 10, it prevents entering the maximum reverse range. The value "10" is my individual setting, in which you smoothly (being in the Beta range) control the low power of the reverse, which is convenient during a taxi. 8) At the very bottom position of the Bravo lever there is a hidden switch (no. 9 and 10) that activates when you slide the Bravo levers all the way down. I assigned the command "MU2_REV_L" (and similarly MU2_REV_R) to this switch. When the Bravo throttle is still down (the button is still pressed), then the reverse thrust power increases continuously (if (THR_L> 0.0) then THR_L = THR_L - 0.002 ----> lines 47 and 58 in lua script), until the maximum reverse thrust is reached. 9) When you flip the Bravo levers back up (the button is released) and the power is controlled again the Bravo axis in the Beta range I'm sorry I can't describe it better. There are a few people who have tried my solution and are happy with it, so perhaps someone with a good command of English can do a better description of these steps. At this link there is a short video for download, that shows how the throttles MU2 behave with my solution: https://mega.nz/file/Q7pCwZIR#CDOniuNOnzDj7V0EHWF1yq756G0FAmWpWalIaI0APKg1 point
-
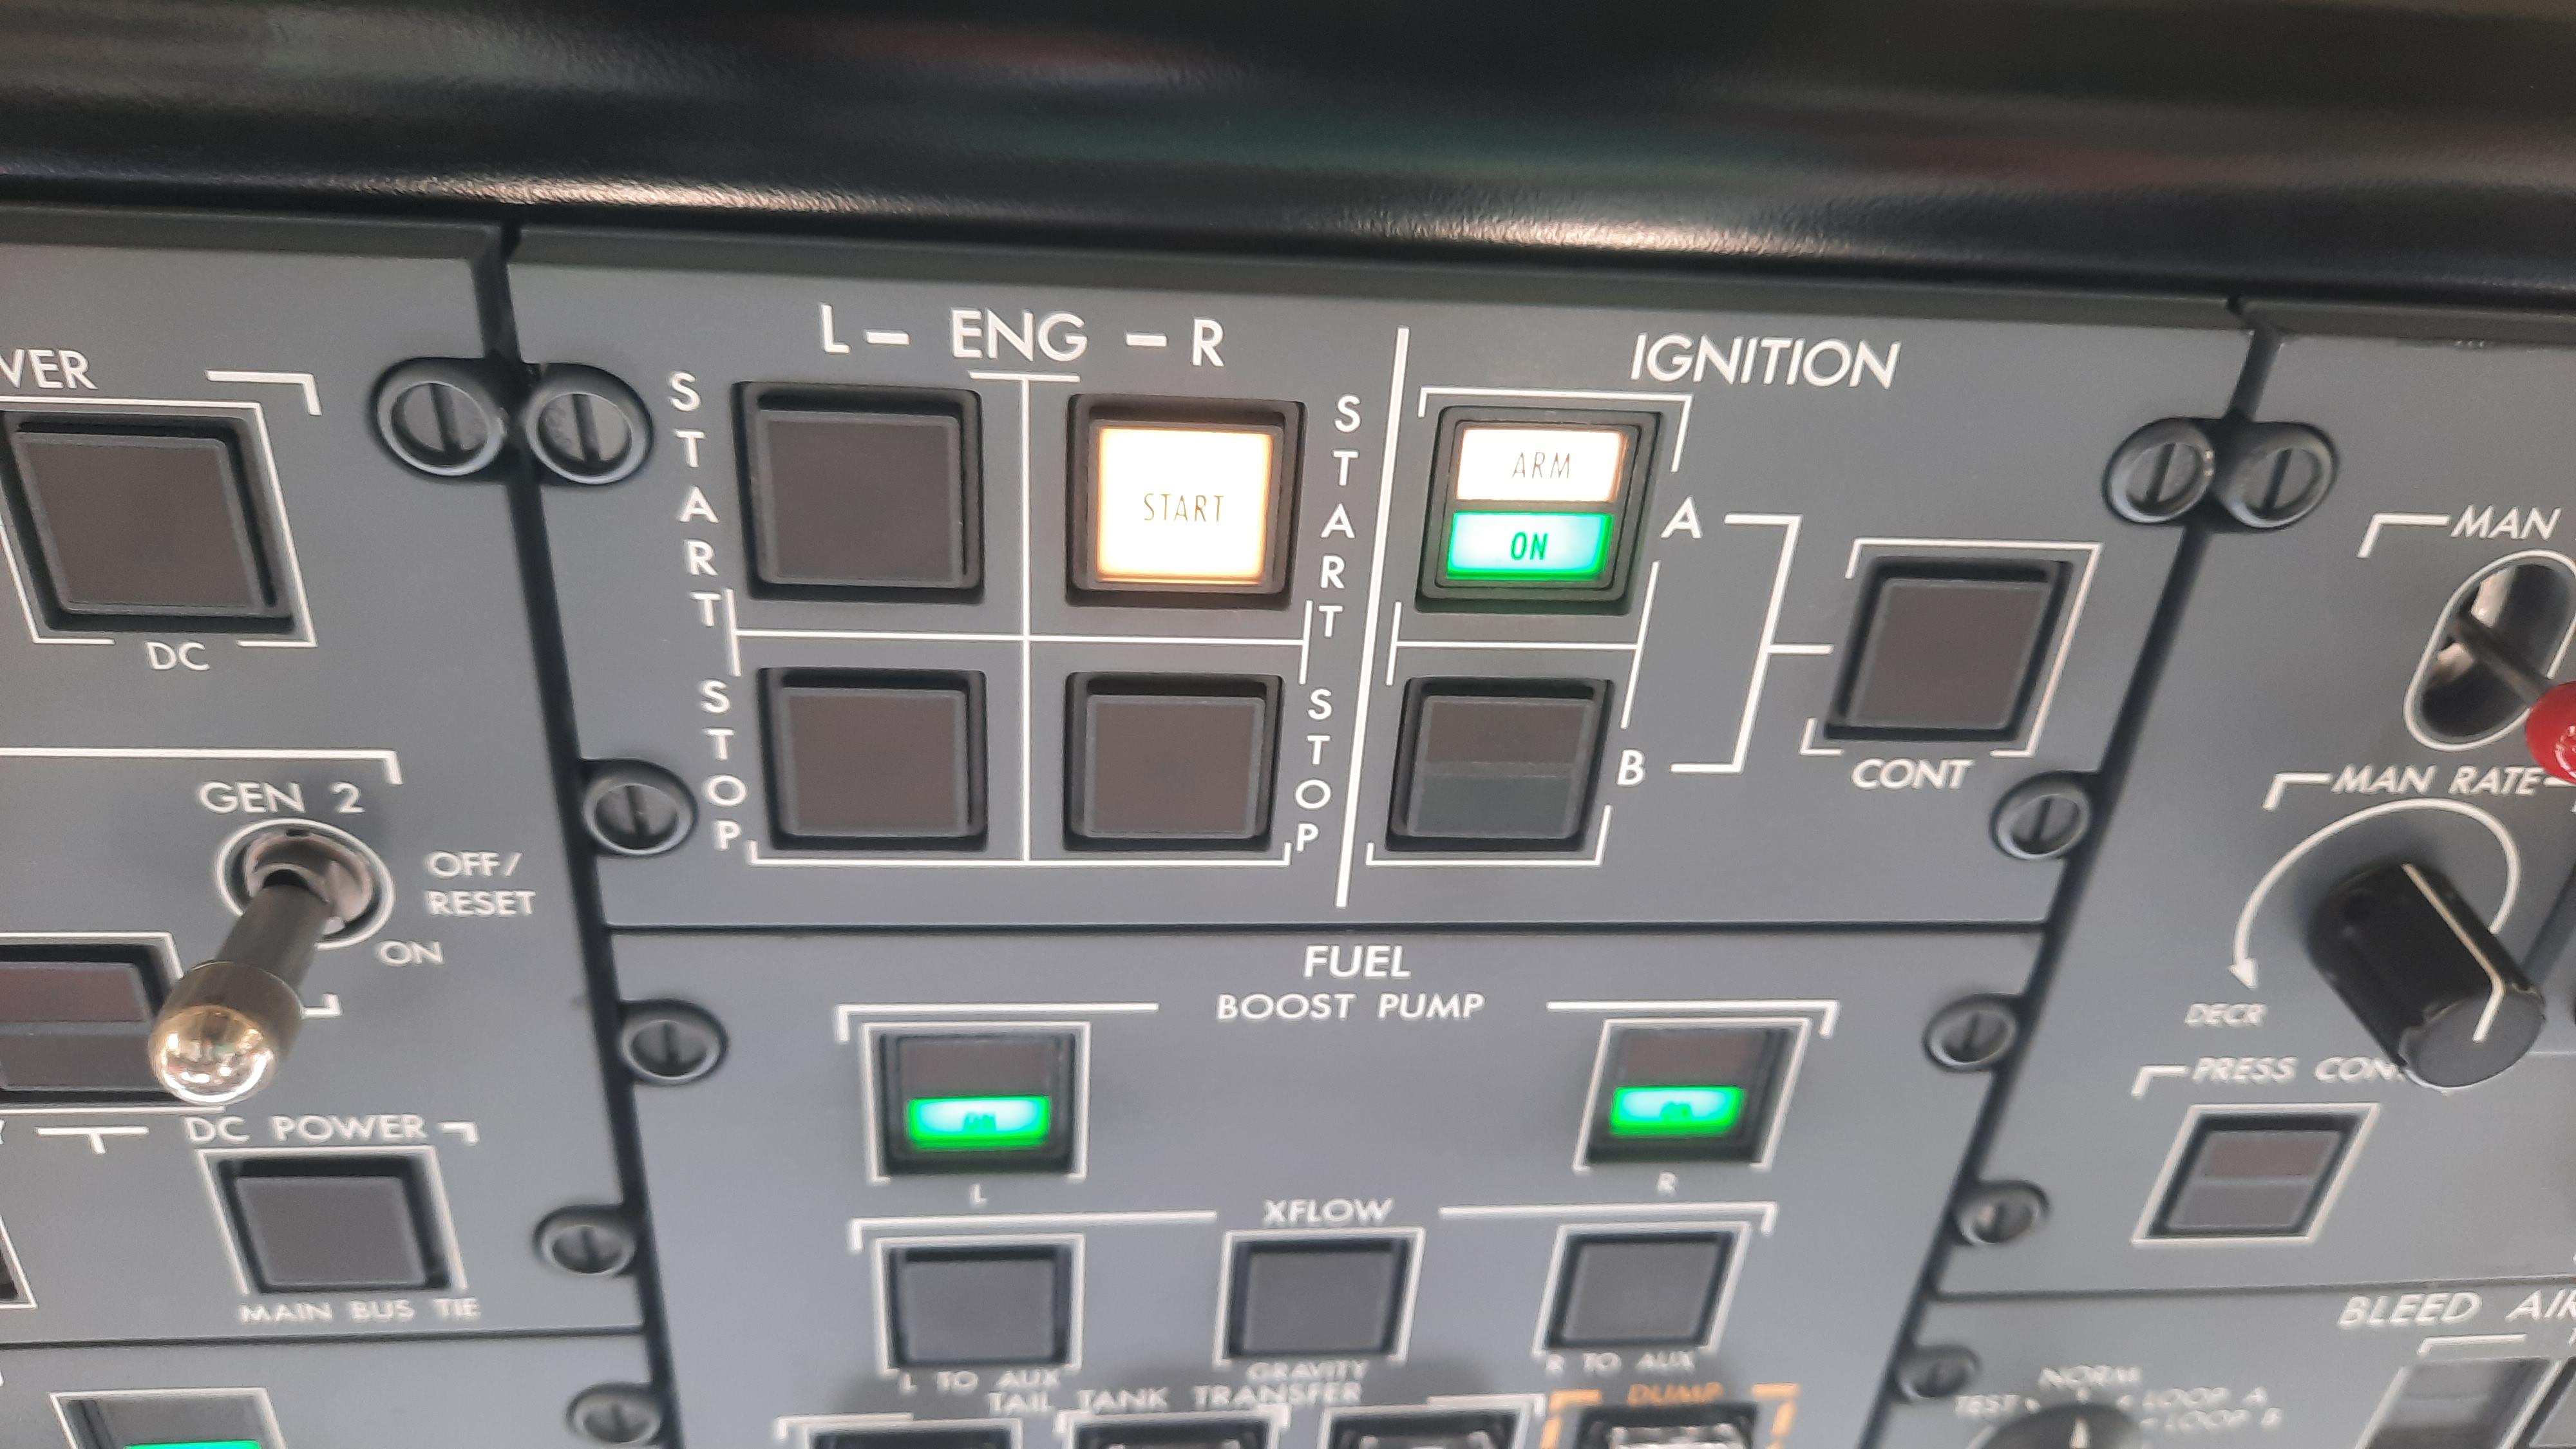
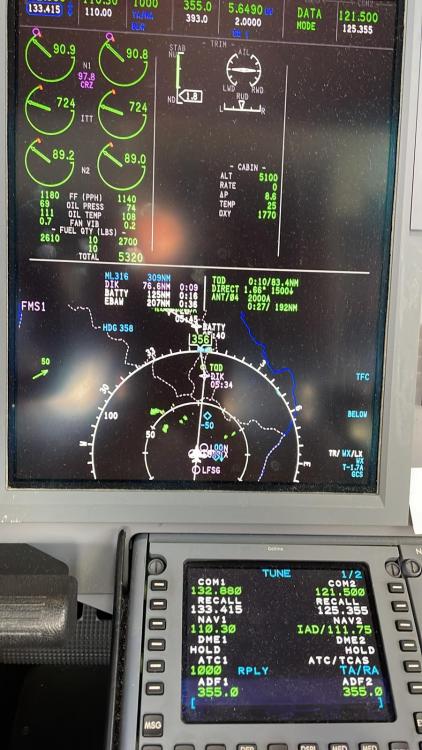
Default commands now drive the alt preselector Added 3 commands for this switch Those default commands do drive the barometer knob/values for me. Default commands drive the DH knob/display now.1 point
-
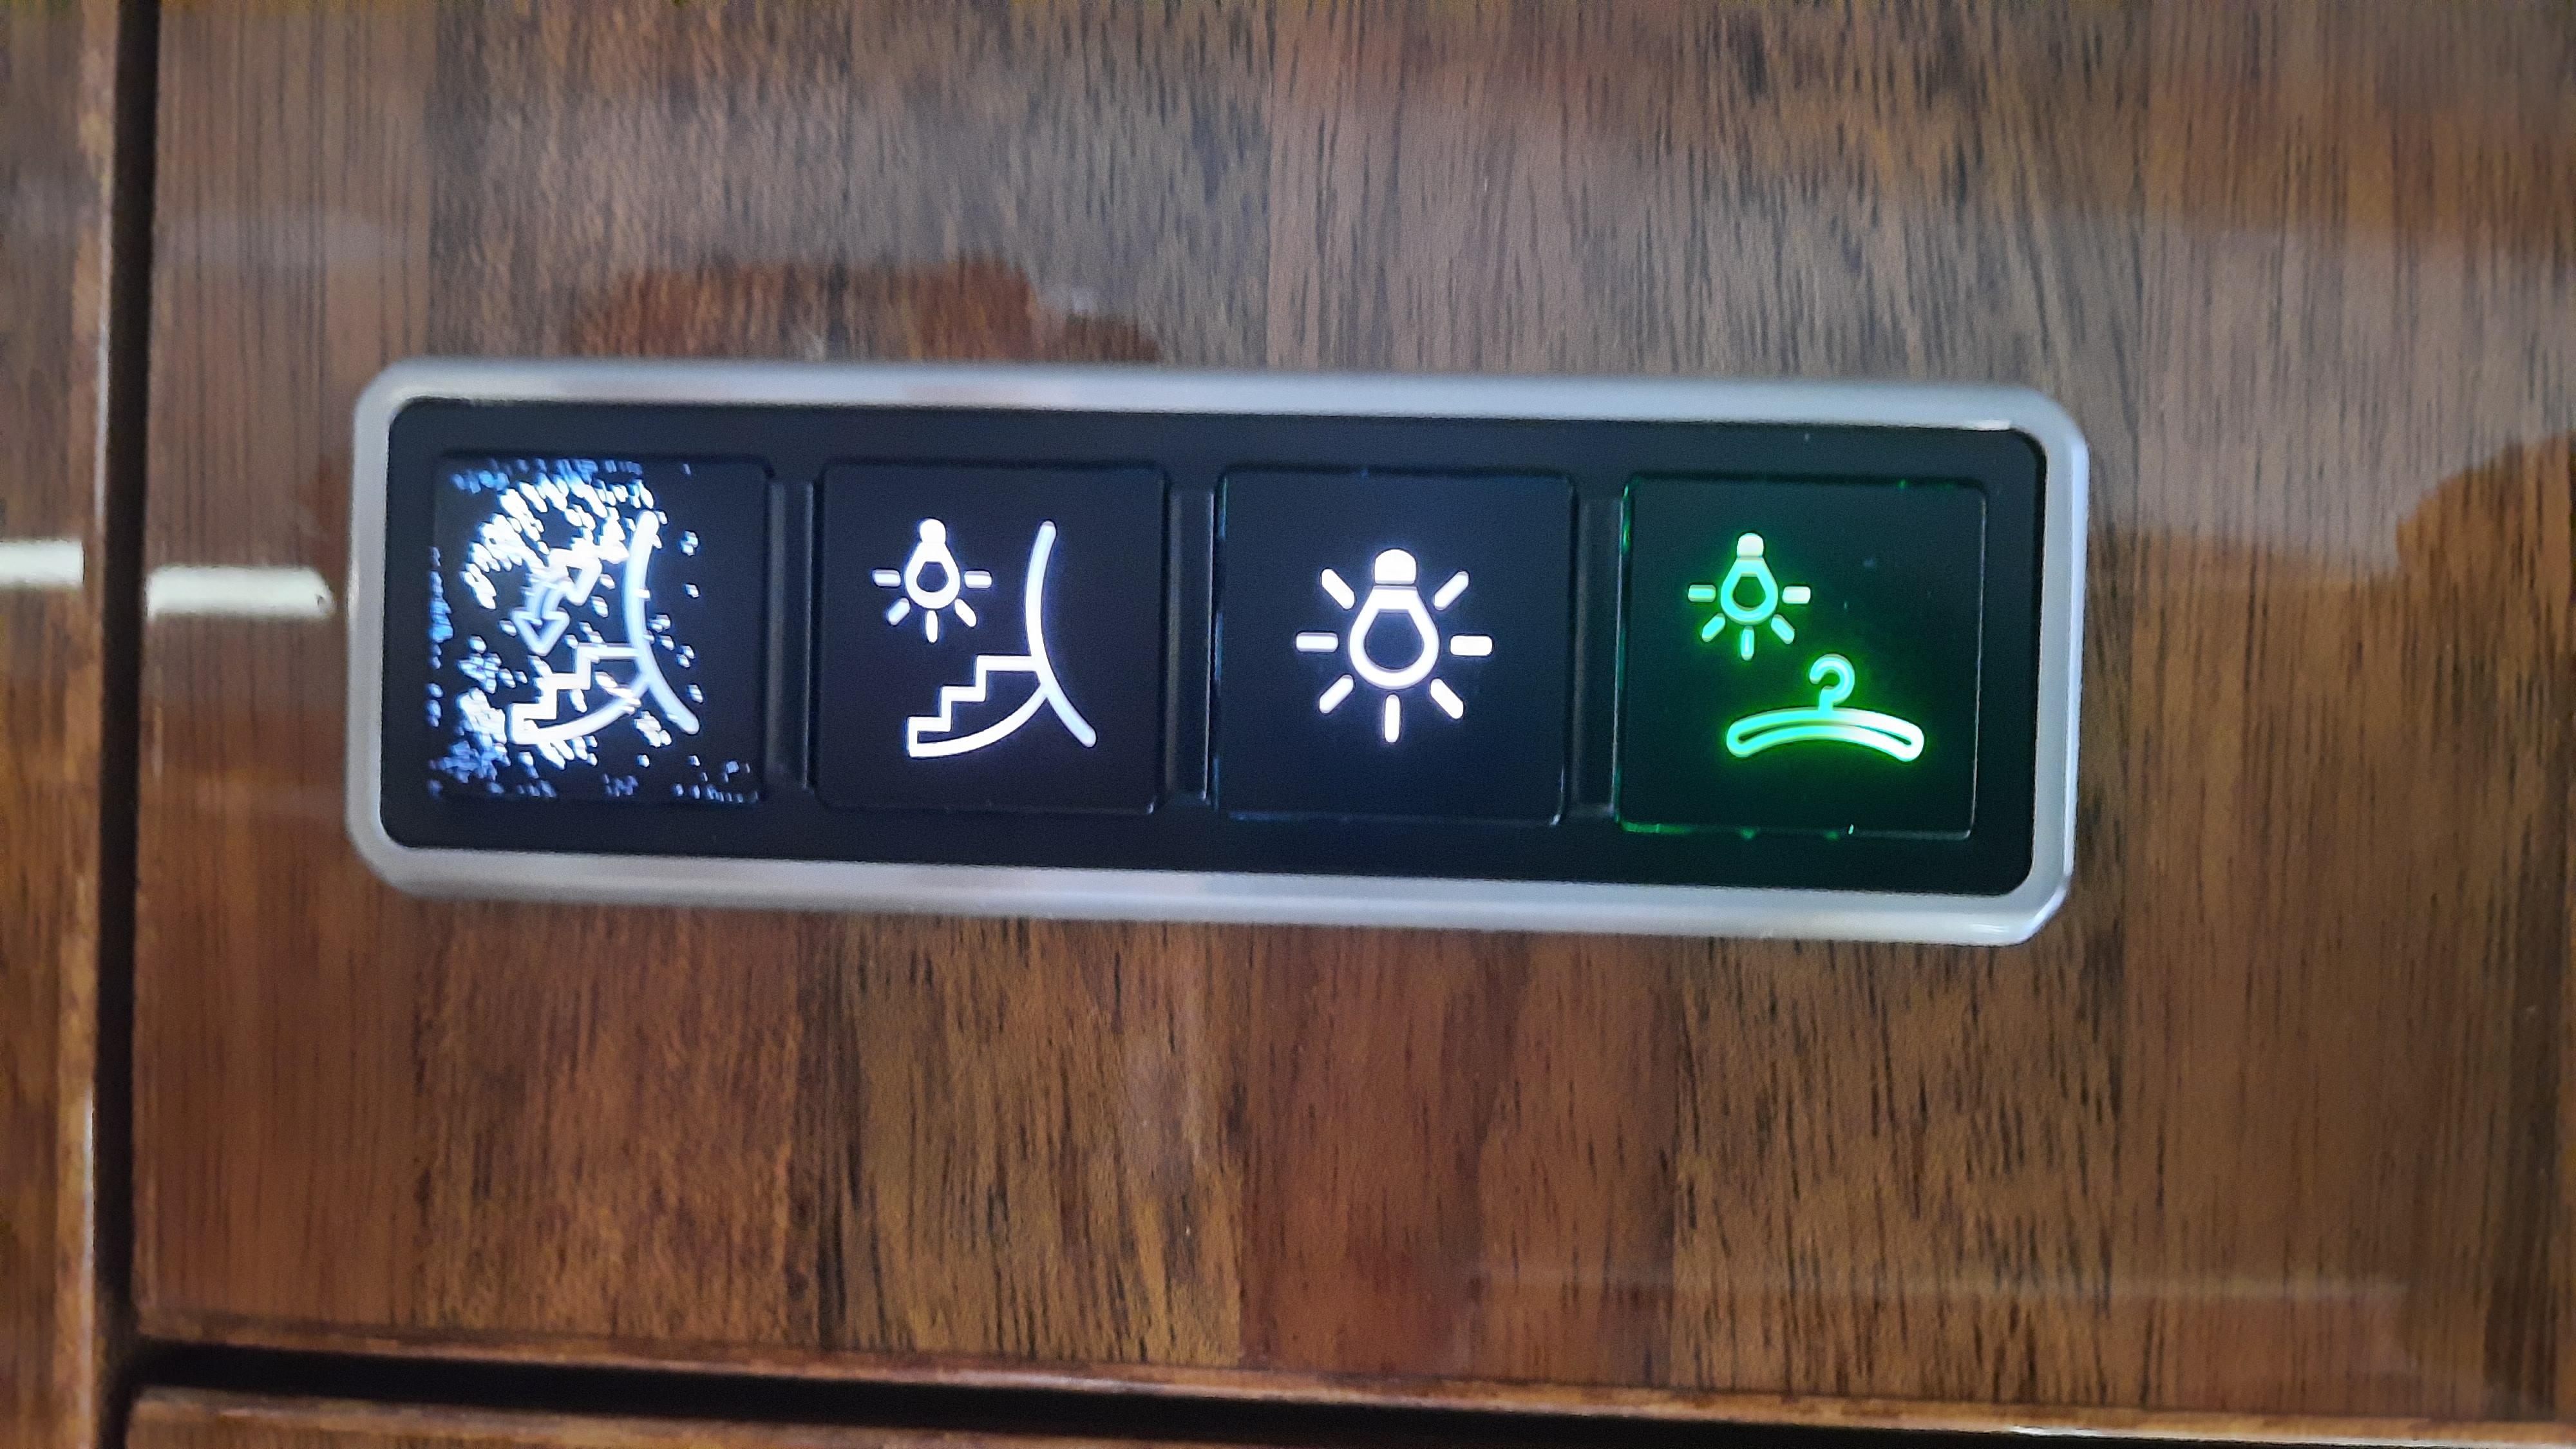
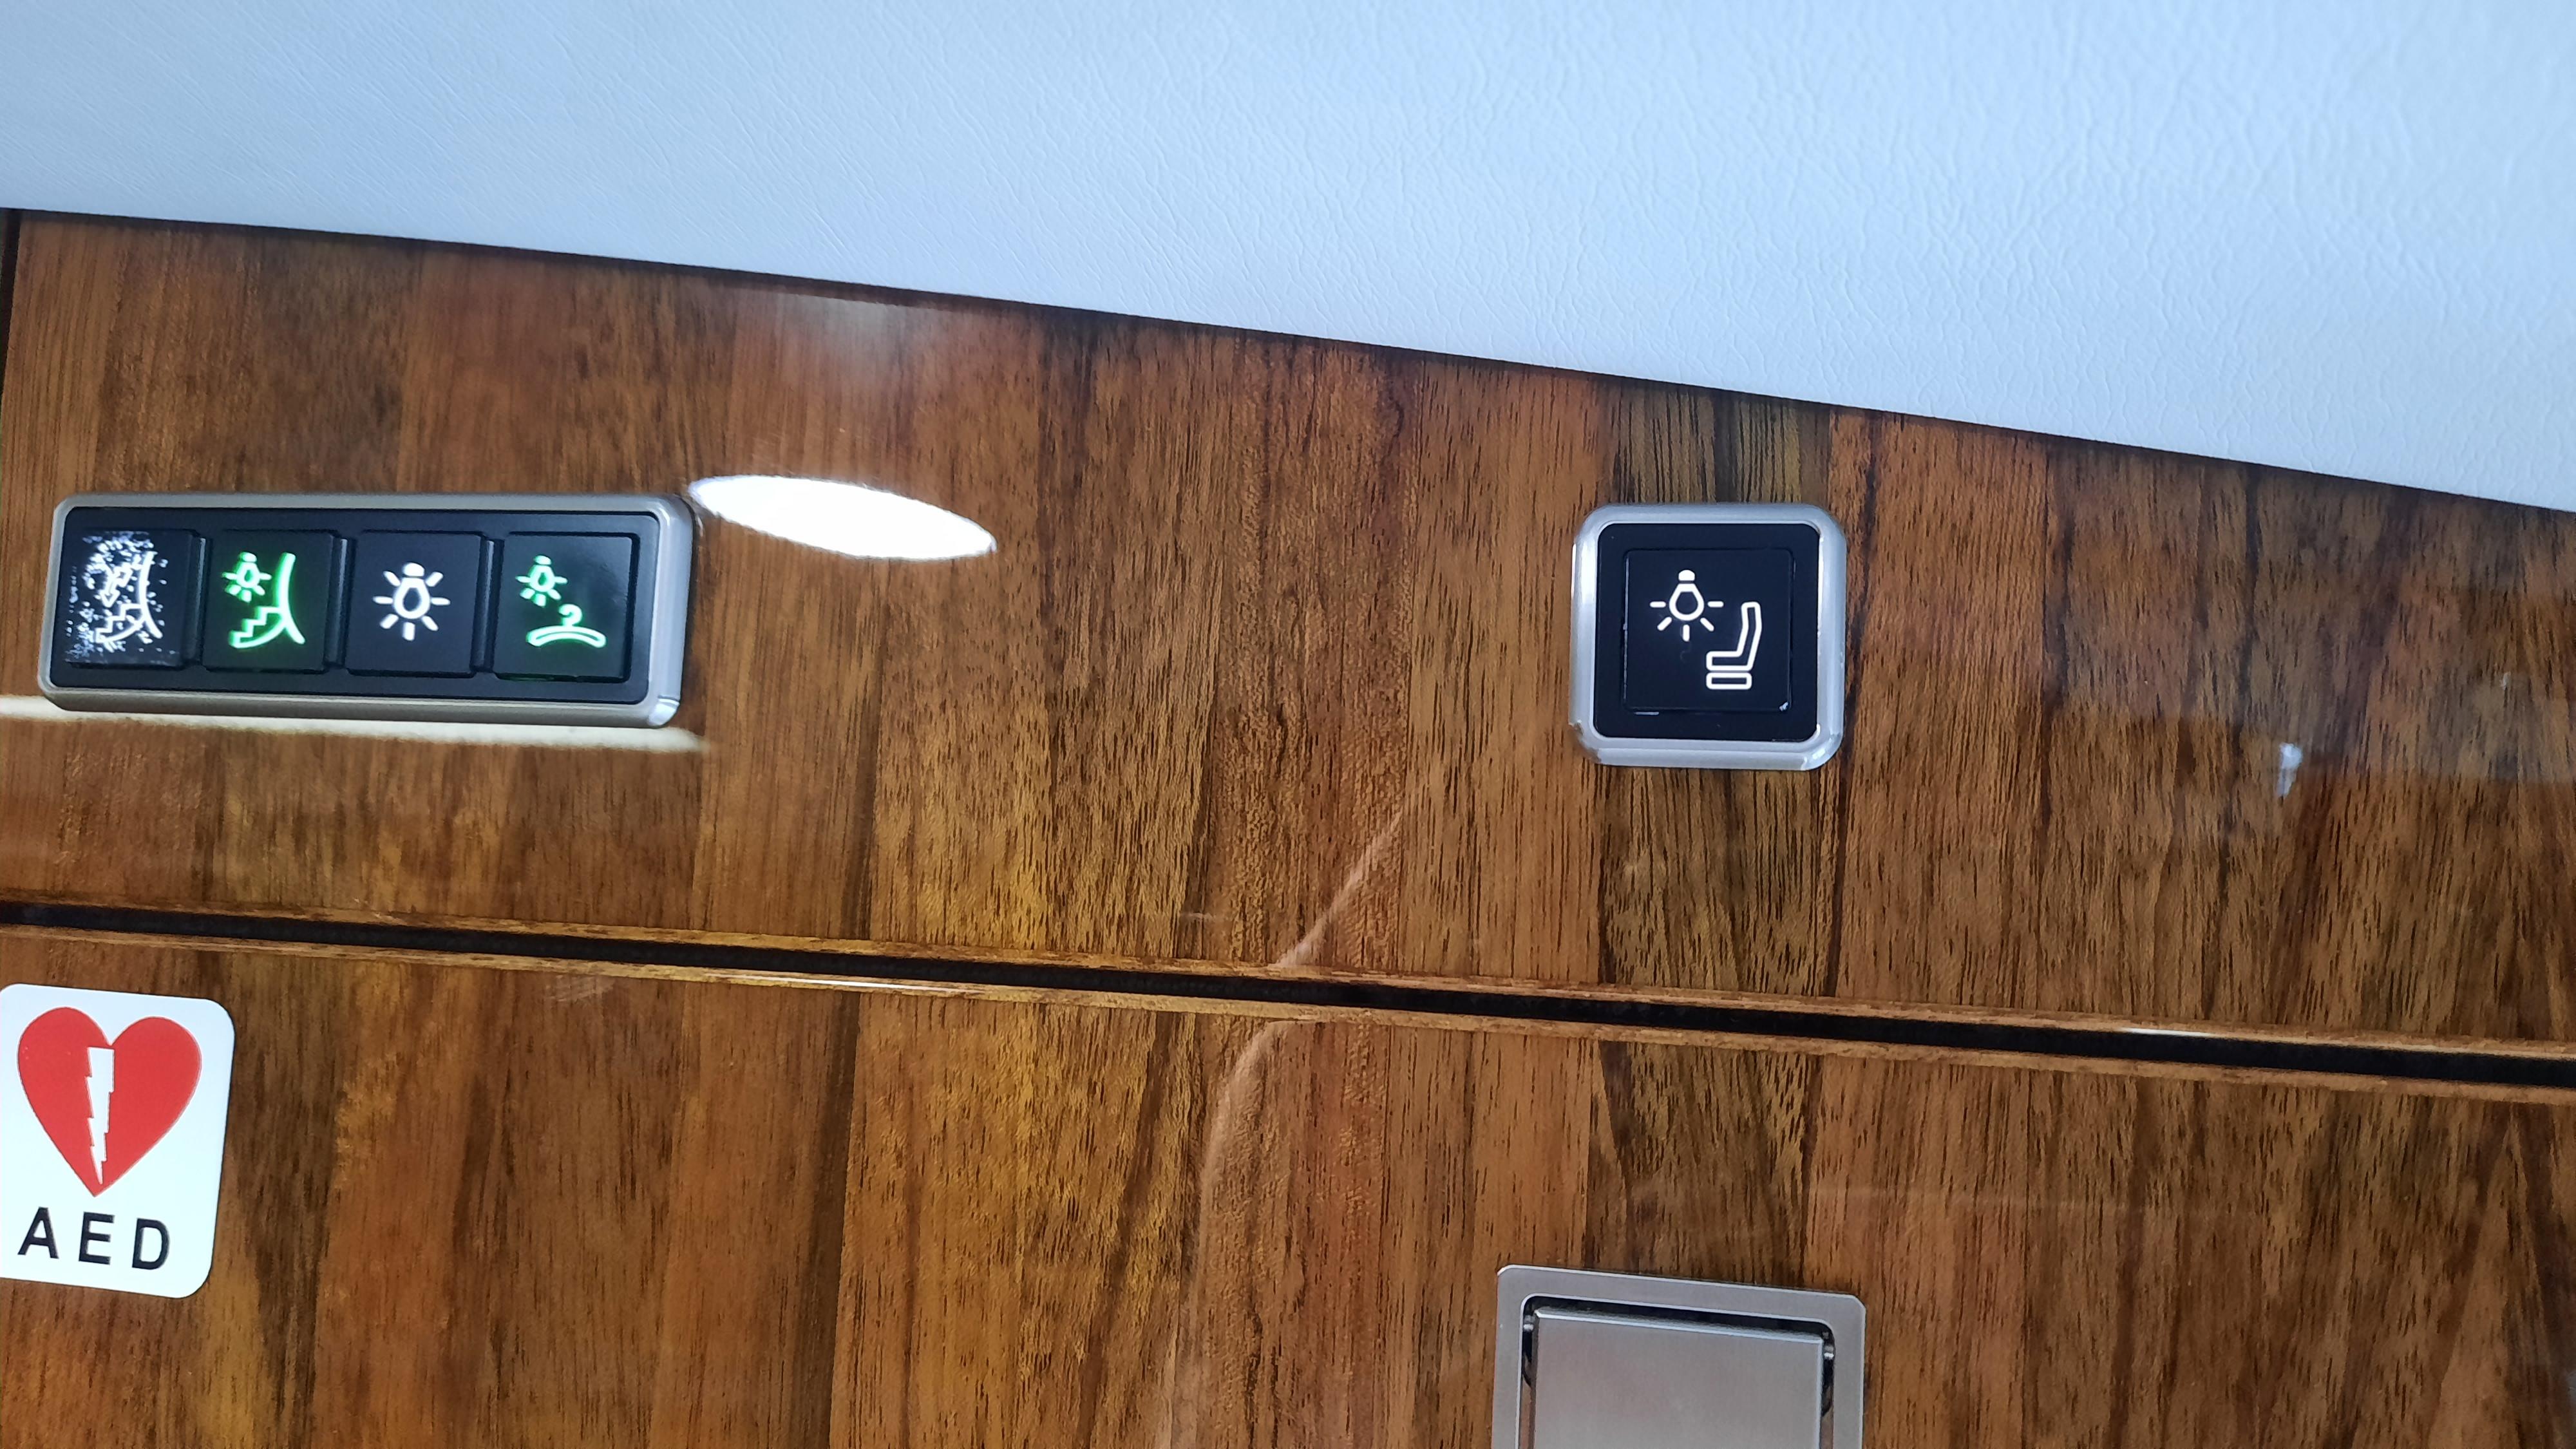
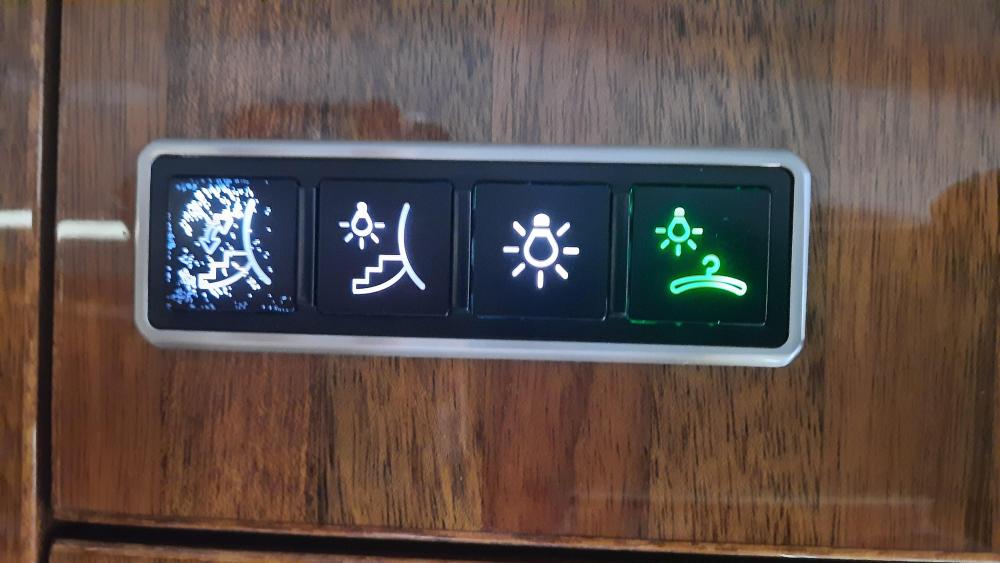
Hi Pils, additionally there is light switch to the right of the above panel
 1 point
 -
https://discord.gg/TRbdUhmD1 point
-
Hey, why not another one, starting no 2


 1 point
 -
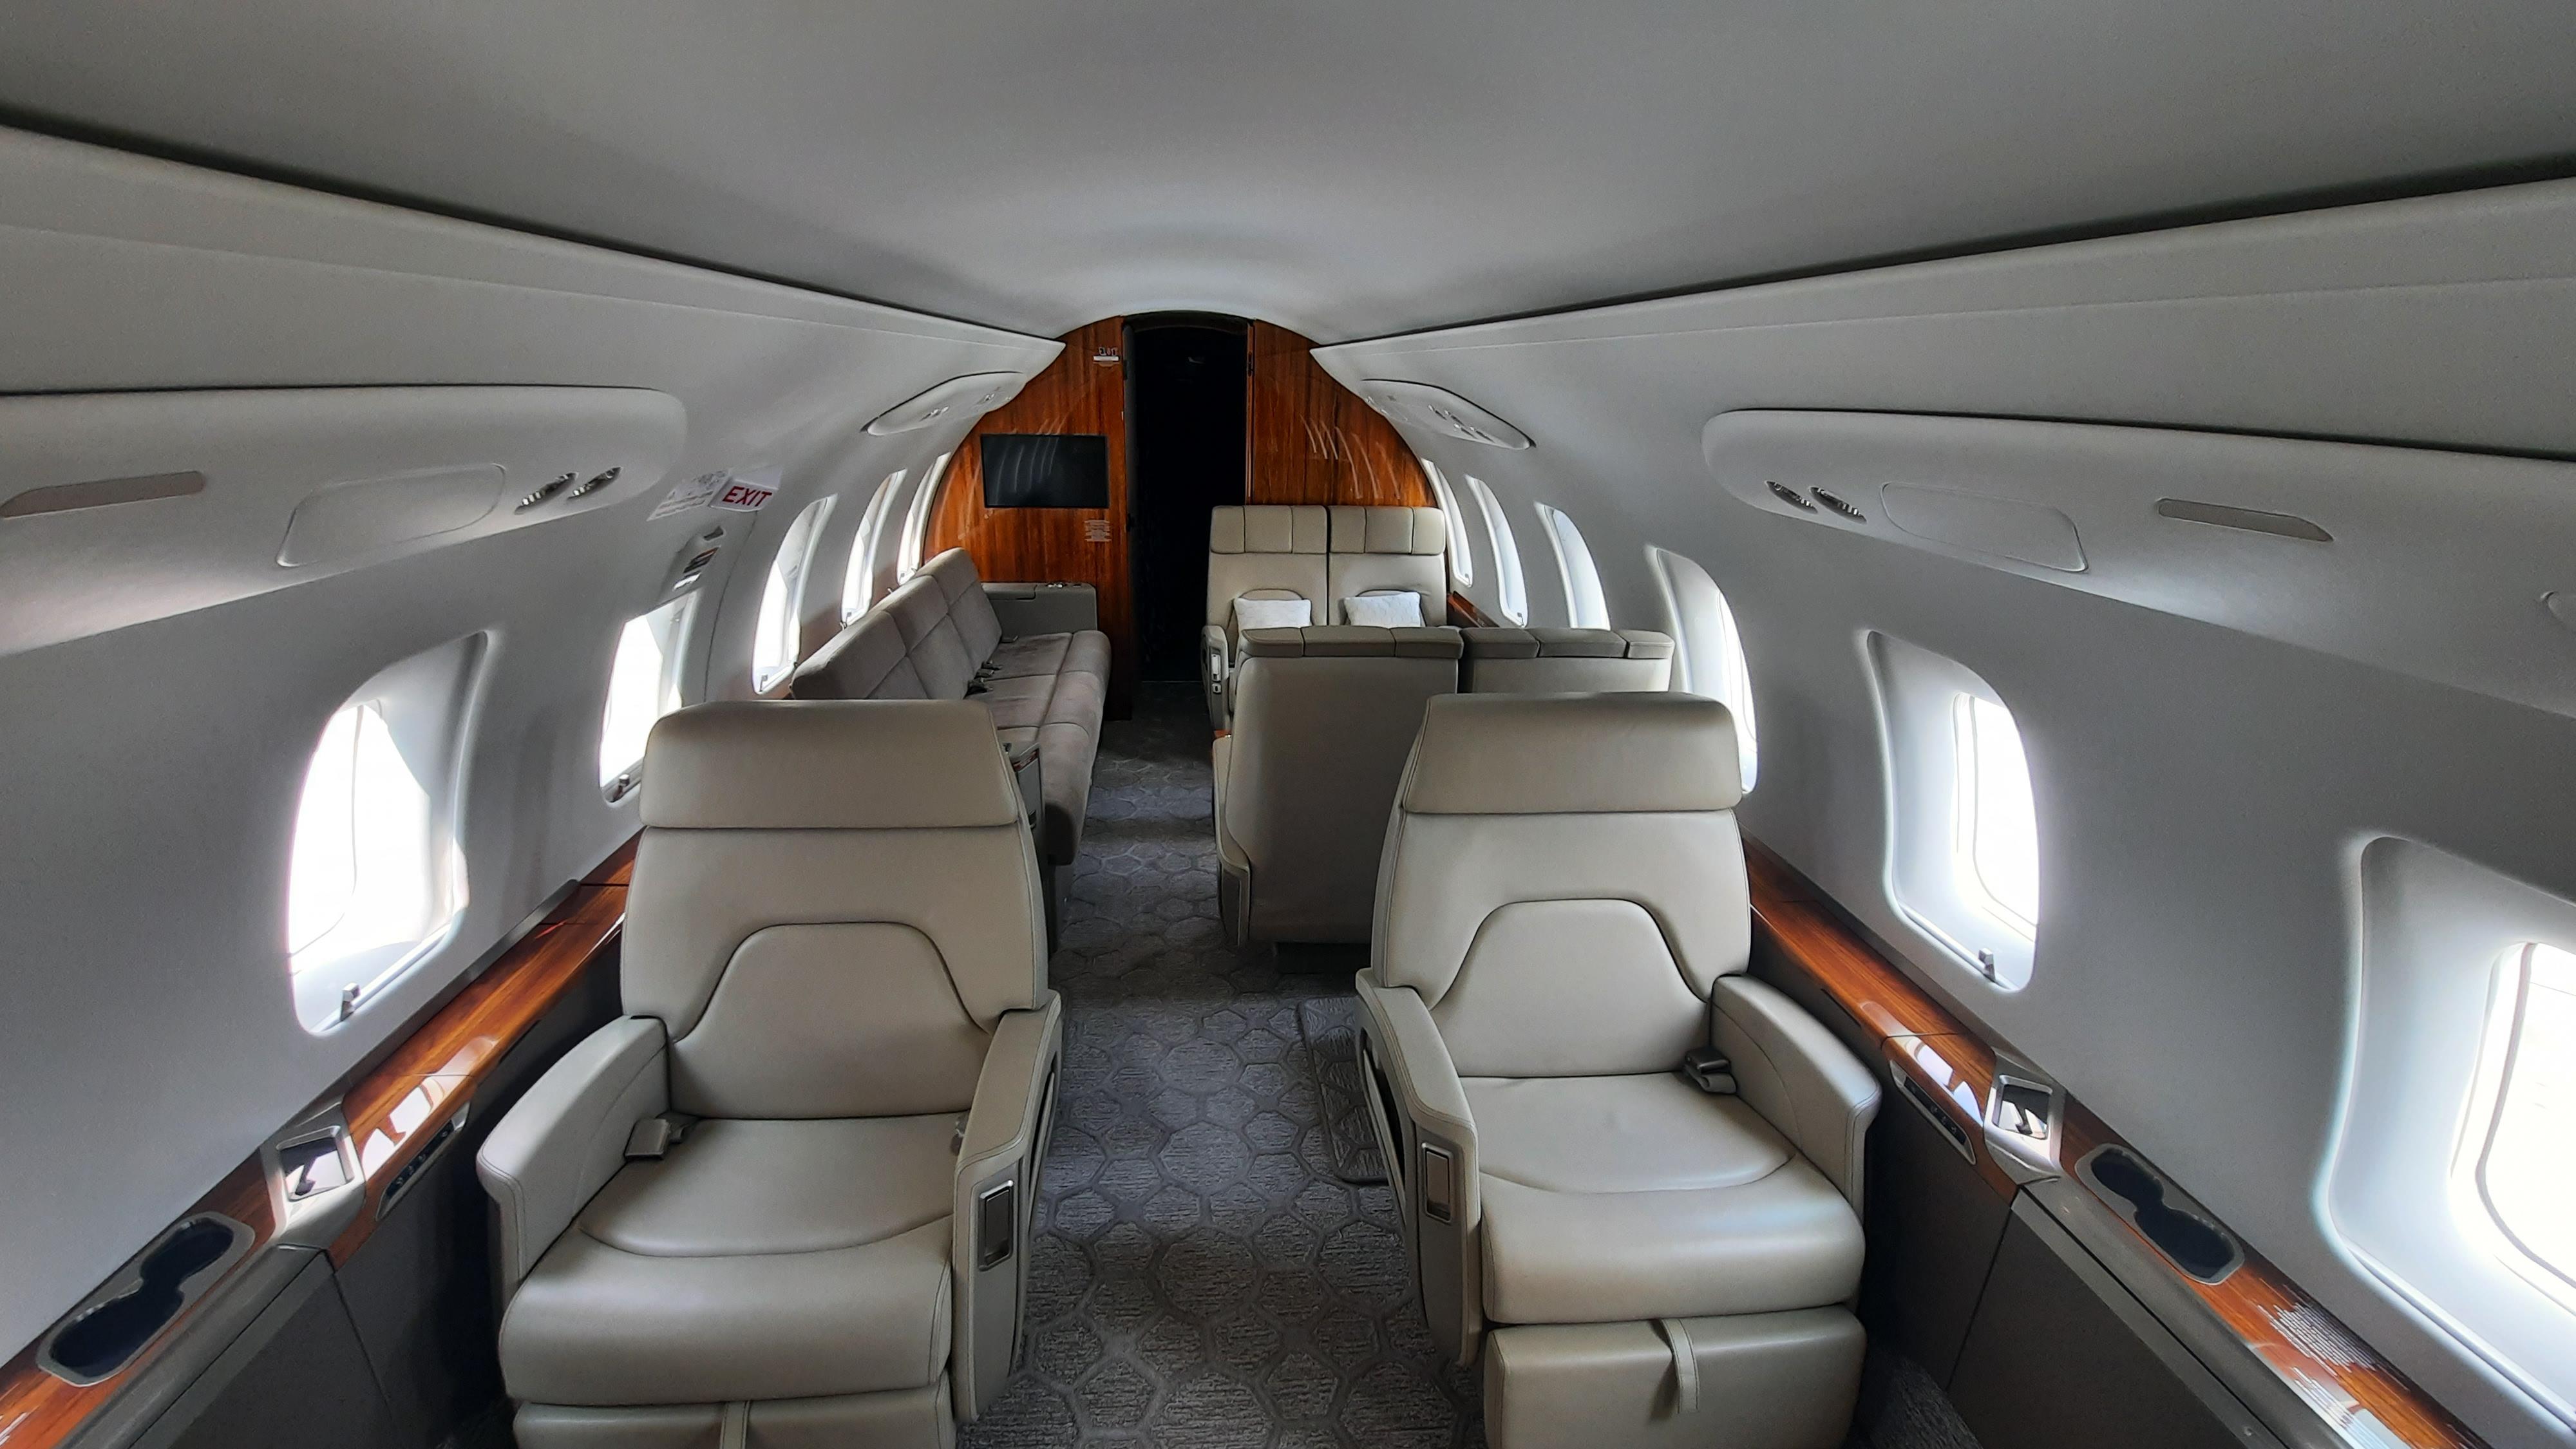
Looking as new on the BBA tarmac in EGKB !
 1 point
 -
And another one, before start on the ground at EGKB
 1 point
 -
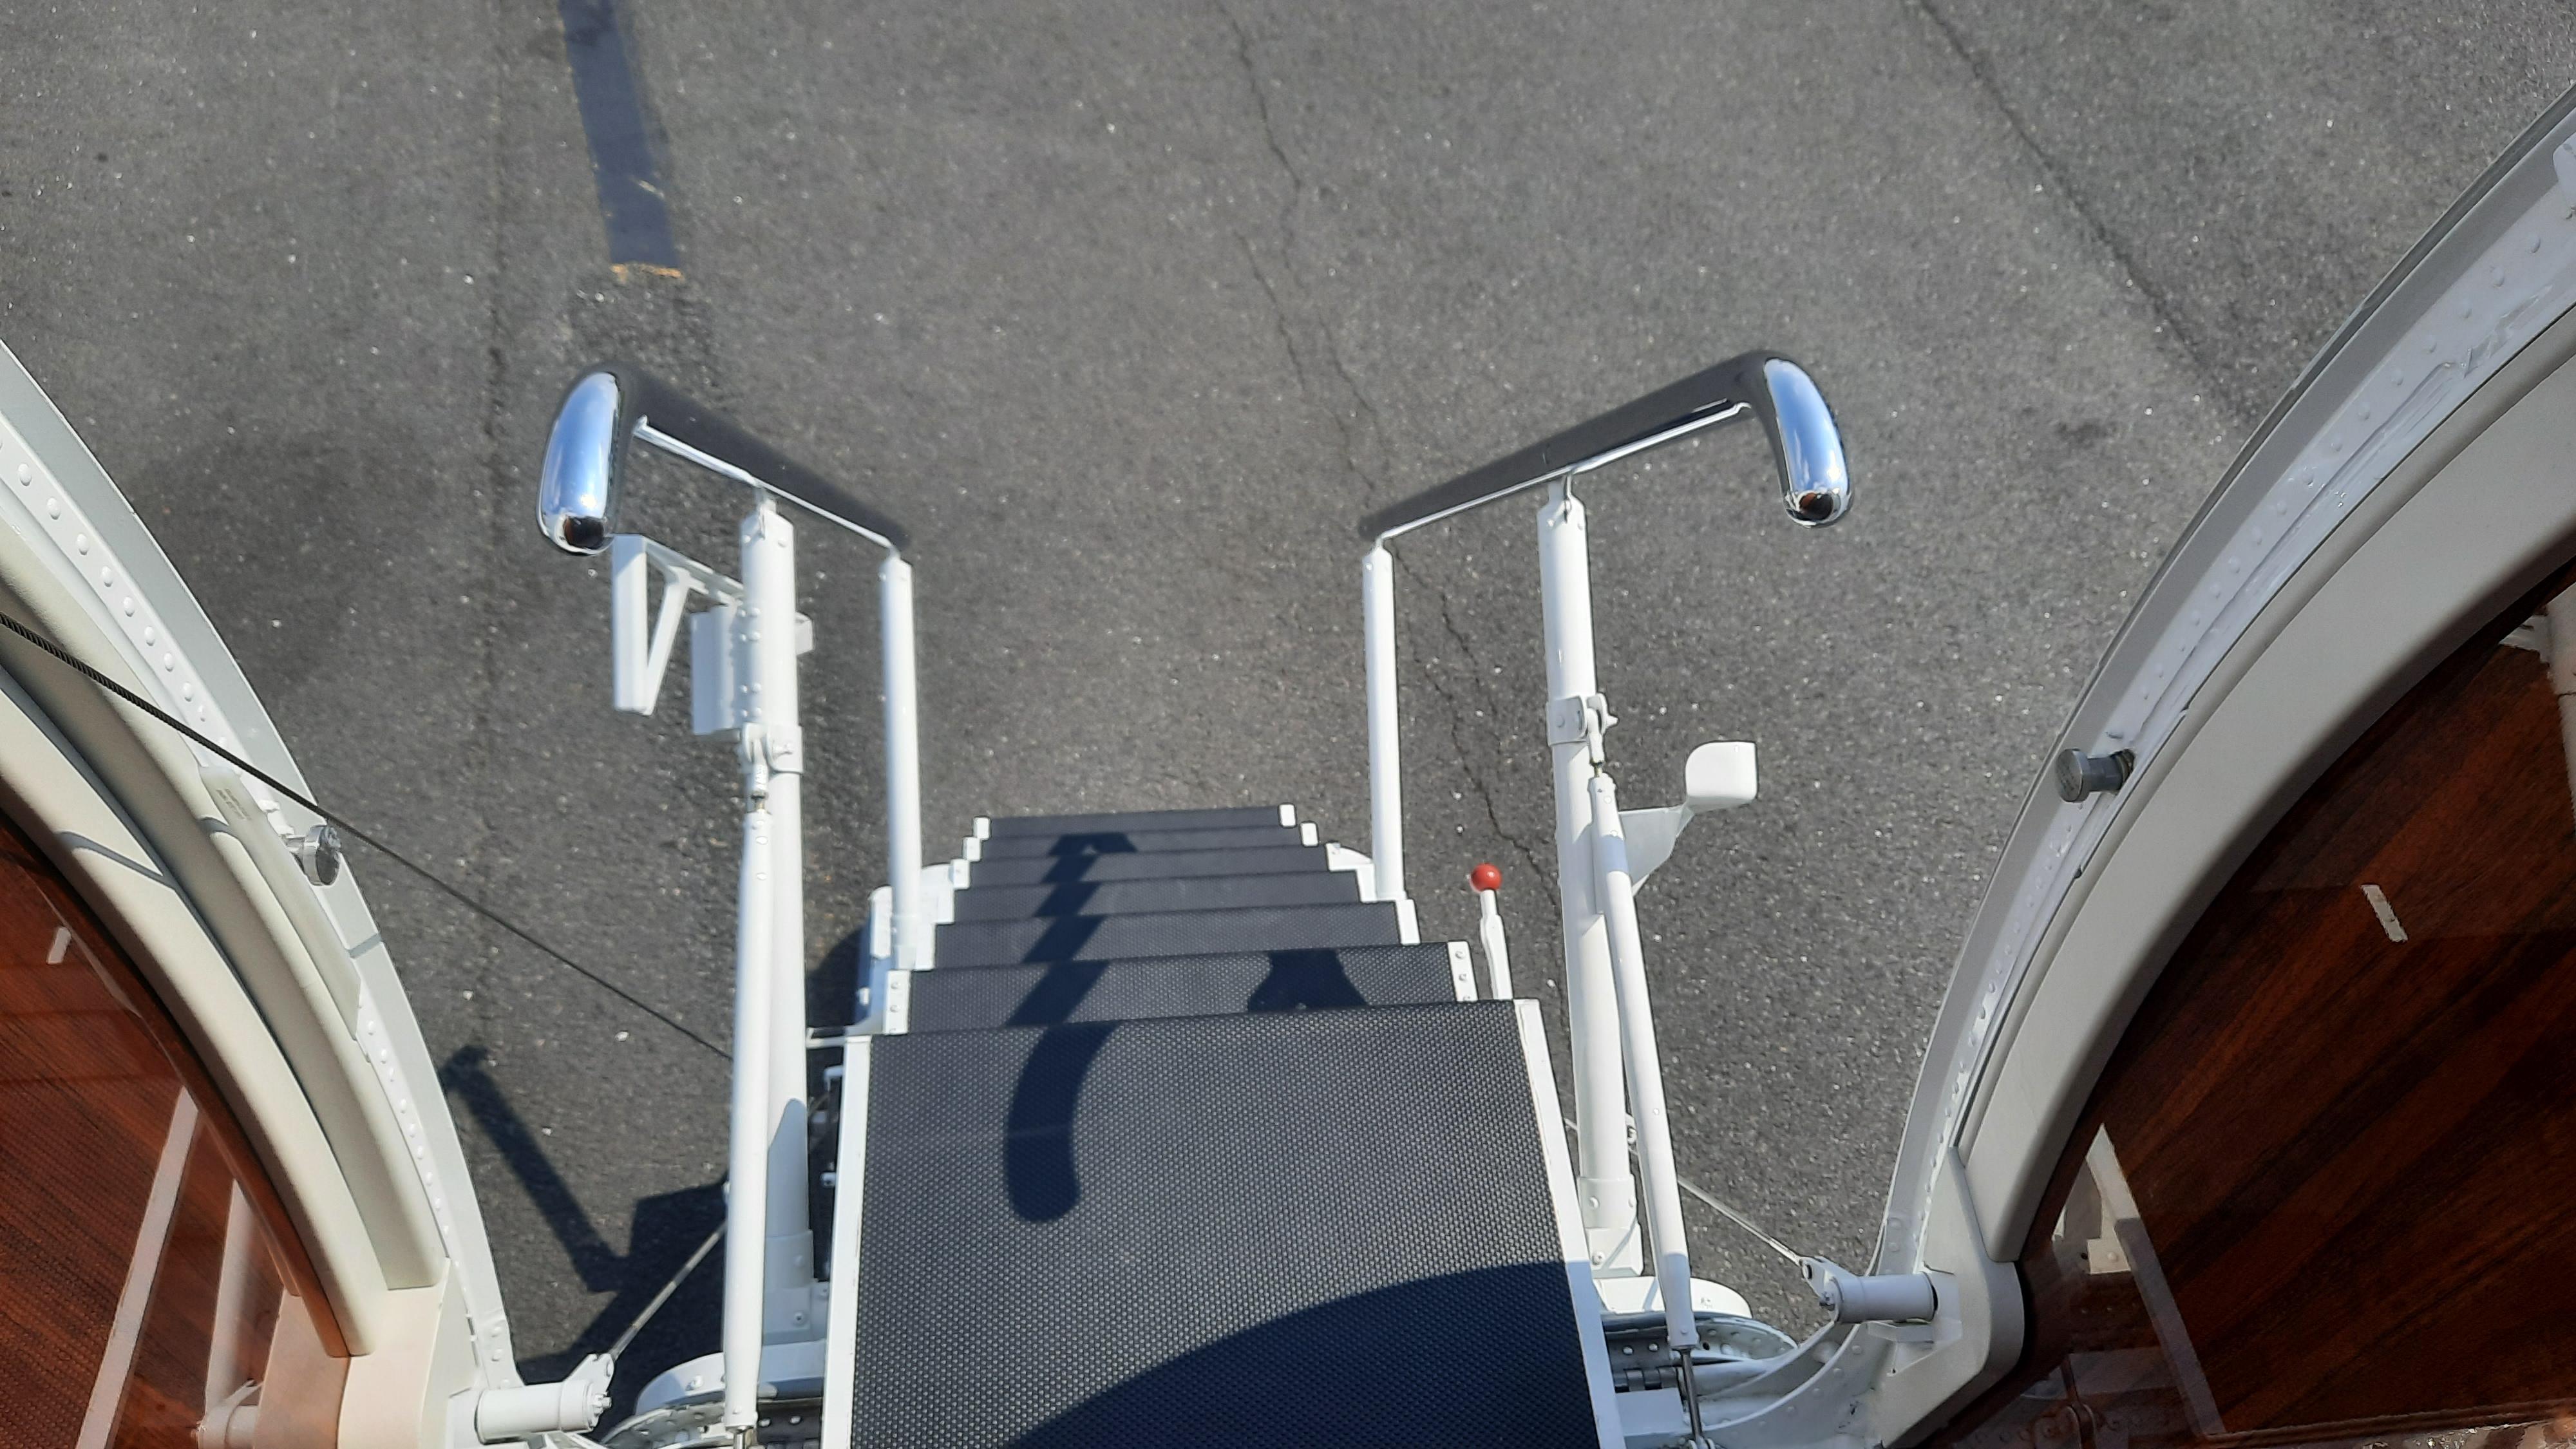
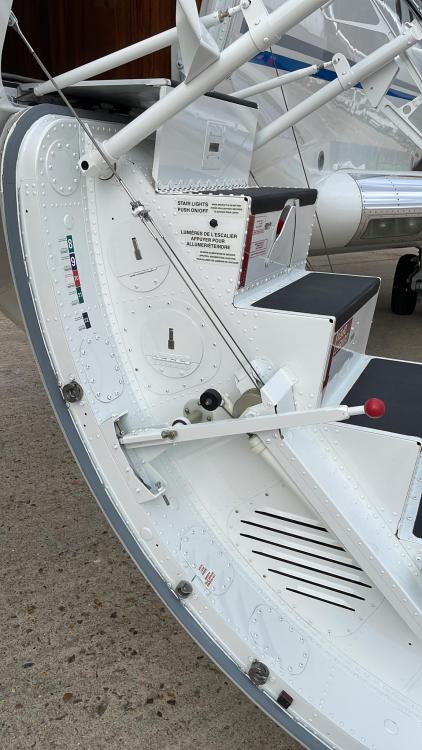
Side view of the main door/steps
 1 point
 -
And here is another one, approaching SE Italy, sorry Rich but the chevrons are back!
 1 point
 -
Version 1.0.3
1,881 downloads
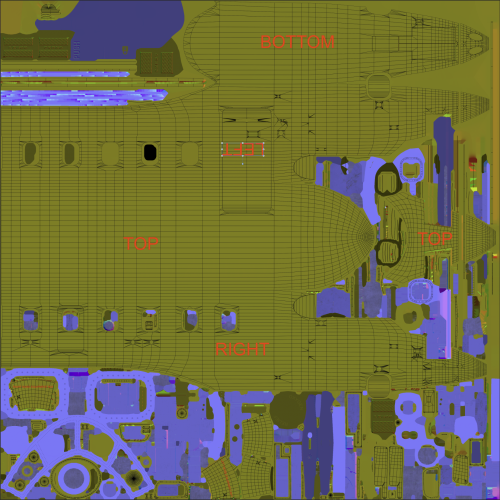
This is the official paintkit for the Hot Start Challenger 650. This paintkit assumes you have previous knowledge of painting in PSD (Photoshop) files and/or afphoto (Affinity Photo) files. DISCLAIMER: Upon opening the zip file containing the paintkit, you have agreed to the terms that follow. You may do ALMOST whatever you wish with these files. Create, share, modify, post on forums, all without restriction. You may NOT charge money for any textures created with these files. You may NOT sell this paintkit. (Unfortunately, it has to be stated.) If you choose to alter any files other than the empty layer between the Ambient Occlusion and Albedo layers, you do so at your own risk, and you do so, assuming you have made backups of the original textures. The only layer designed for changes or additions is the layer between the AO and Albedo layers. You may add as many empty layers as you wish, but make sure they are located between the AO and Albedo layers to achieve correct results. The wireframe layers that are included are a guide to the areas you can paint in. Anything outside of the wireframe is NOT to be painted on. If there are any questions, please visit the forums at forums.x-pilot.com or our discord. Happy painting!1 point -
Kirk, In regards to the IRL engagement/use of the ATS, I've never heard of any technique or SOP whereupon TOGA is selected on the runway as the throttles are manually advanced through 25%. Would need more context to better understand. Typical SOP dictates we wait until taking the runway to select TOGA / N1 TO to avoid an unintended engagement of the ATS during taxi/ (although TOGA / N1 TO is often selected during taxi to the runway despite SOP) We can save that 'normalization of deviation' discussion for another day. 2 methods to engage ATS for TO that are commonly known or used IRL: (prerequisite = the ATS MSD indicates N1 TO) Slowly advance the power levels manually until ATS engagement (75% N1) - and thence let the ATS set TO thrust - with the PM checking that TO thrust has indeed been achieved by 80 knots. (most common). Press the ATS engagement button when on the runway and cleared for takeoff - and let the ATS take them all the way from idle up to TO thrust. (rare) My observation from your video is that you are advancing the thrust levers manually and quite aggressively compared to IRL. We do not advance the thrust levers that quickly. We also do not 'firewall' the throttles and rely on the ATS to trim or set power - that technique would probably trigger exceedances similar to your video. Reference this video from the 2 minute mark. I'd say this is very representative of a typical CL60 ATS takeoff IRL: From initial advancement of thrust levers to ATS engagement is about 7 seconds. (green lights illuminate either side ATS engagement button) Total time from initial advance of thrust levers to takeoff thrust is about 11 seconds. (vs about 4 seconds in your video) Time to 80 knots is about 14 seconds give or take. The point I'm moving towards is that ATS on this airframe was an afterthought/option that is not fully integrated. I think of the ATS as a 'helper' that has to be managed. The ATS IRL does some odd stuff - and we have to keep an eye on it. It often will overshoot the thrust targets, it won't keep up during approaches on gusty days, it won't keep up with speed changes, especially on the mach to IAS transition during descent. Then there's the airframe specific 'oddities' - such as ours where the throttles will split at low power settings triggering an occasional ATS disconnect. We have to help it / manage it quite a bit. The ATS limitations on the CL60 illustrate it's helper status. We can't use them for GA, CAT II, APR, steep approaches, or touch and goes. (to name a few, the list has 16 or so bullets) As such - relying on the ATS to trim thrust or prevent an exceedance on takeoff by firewalling the throttles - you're seeing what would probably happen IRL. I see you've troubleshot the ATS disengagement down to a saved state root cause - but if your goal is to emulate IRL technique - I hope this information will be helpful.1 point
-
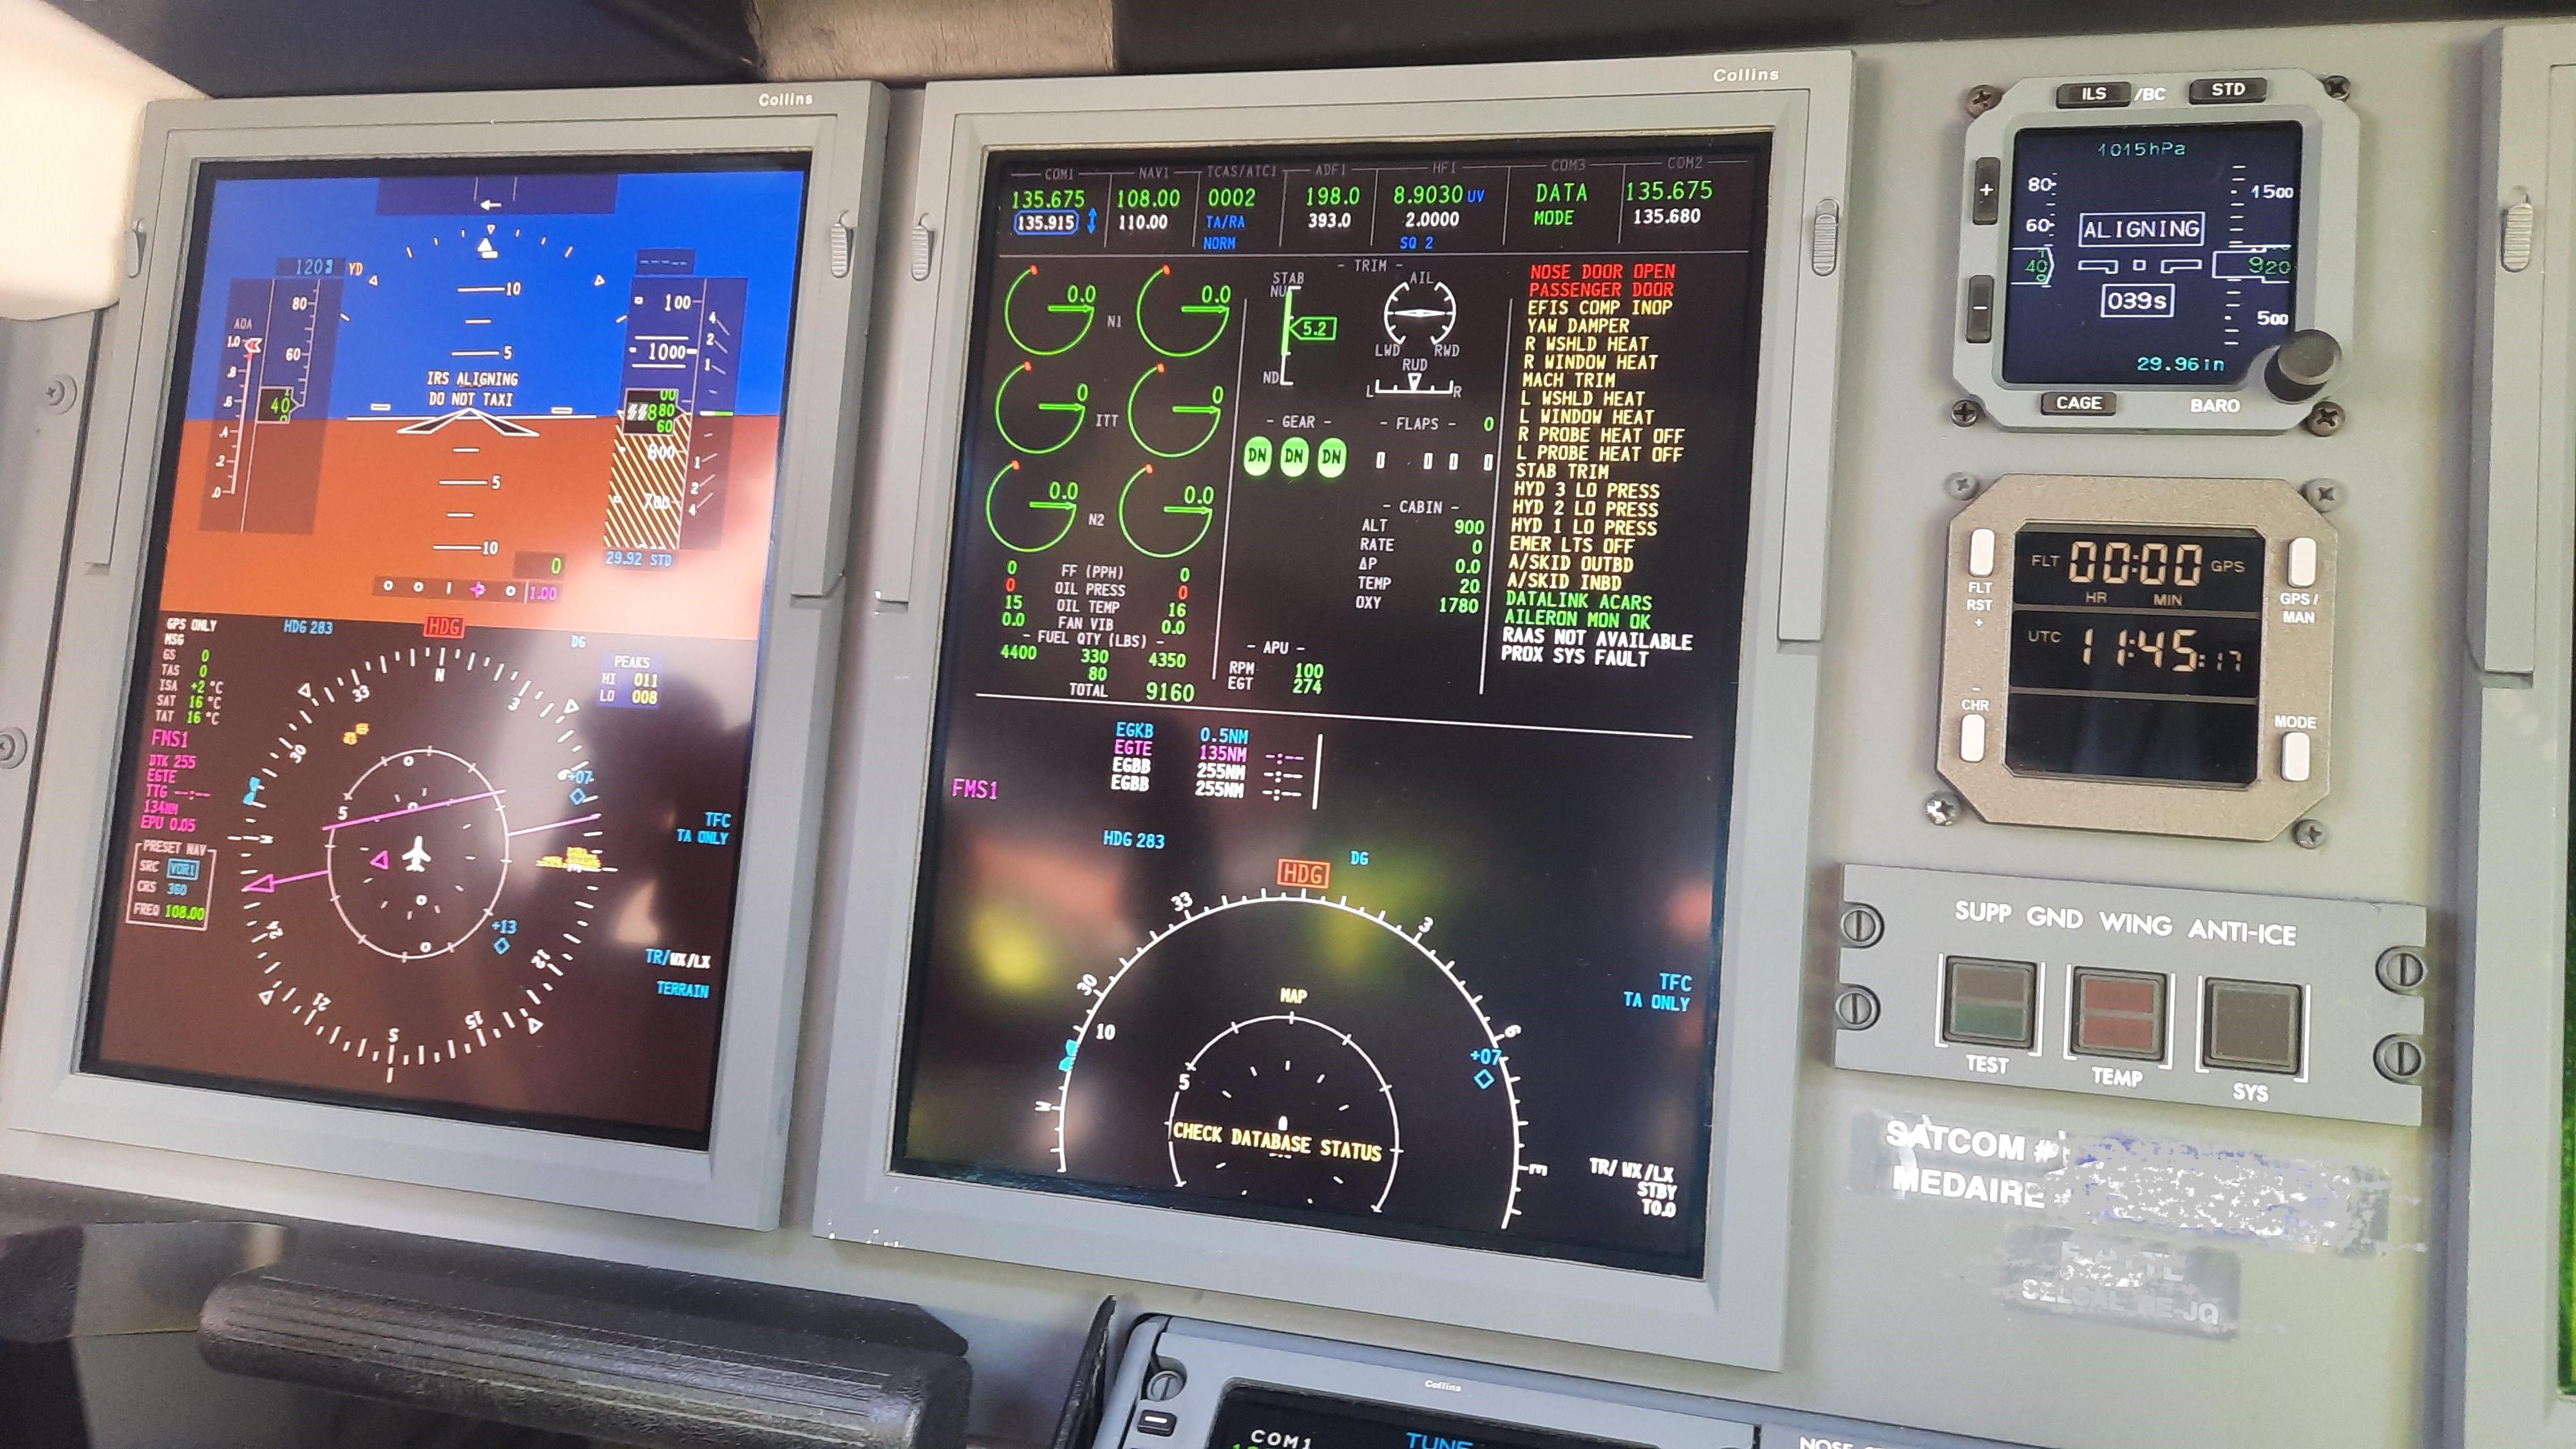
On the CDU (FMS) go to PERF then THRUST LIMIT page. You’re not setting thrust, rather the thrust limit for the autothrottle.1 point
-
And for those needing the figures, here they are
 1 point
 -
The engines sounded so more powerfull in 1.1.0, but in 1.1.1 they sound too weak, exp. in the outside view. I guess there is a lack of bass. Will there be an update for the engine sound?1 point
-
Yes, a update would be nice.1 point
-
I totally agree. The sound doesn't sound like a BN-2 anymore, there's actually a lack of bass and also the rattling. I hope for an update there as well.1 point
-
I second this, engine sound is much to weak in cruise flight now, it may be more realistic then before but not enjoyable to me, no matter what I do to the noise cancelling it's getting on my nerves pretty soon while I really enjoyed the older engine sounds. I see there are some subtle improvements in the sound overall, the second fuel pump for example is now audible and when taxiing it seems more polished now but engine sound in cruise is a step backwards I think. Further, there was a pretty cool engine crackling sound after shutting down the warm engines, this is barely noticable now. And at last the left fuel tank selector does not produce any sound while the right one does.1 point