Leaderboard


Popular Content
Showing content with the highest reputation on 01/17/2023 in all areas
-
FYI.....still full time on it. still on schedule...still have our same 'target date' not too far on the horizon. Again, more than a few weeks, but less than several months ( minus the weeks since last report) . TK2 points
-
When the condition lever is in emergency stop, it opens what is called the "feather valve", which drains all oil from the prop governor, forcing it to feather. Unfeathering requires oil pressure. Its like trying to fill up a sink with water but with no plug in the drain. All the oil gets pumped into the governor and right back out again through the open feather valve. Moving the condition lever out of emer stop and forward of the taxi position closes the valve (puts a plug in the drain) and allows pressure to build in the prop governor when the engine is running or unfeather button is pressed (with electrical power of course) -tkyler1 point
-
Those are "lever locks", which keeps the handles from moving on their own due to vibration (in the real thing). If you move them forward to lock the levers in place in sim, you'll find you won't be able to move the levers. I've written some preliminary code (currently commented out) to retard the levers ever so slightly based on vibration/turbulence.....but the real conditions that cause levers to move are a bit more varied based on differing aircaft models and maintenance, tensions etc....so I haven't decided just how I'll go about implementing "lever movement due to vibration/turbulence"...but I will at some point and will document it. At the least I need to document those handles in an orientation capacity. Thx for the feedback. -tkyler1 point
-
I think (but I may be wrong) that it performs a similar function as well as a similar lever on the right. This one on the right blocks the PROP levers. So by analogy, I'm assuming that the one on the left is blocking the Throlle levers. ;-)1 point
-
Hi Tom! Thank you very much! I had a good time doing this, so pleasure is mine! First off all I'm really surprised I missed this model of Mu-2 while going through buy-n-try of other paywares from that-big-xplane-store-you-know, for my round the globe trip. Your Mu-2 is fantastic and deserve more attention both from development and users. Regarding GUI and other stuff - I would be happy to help wherever I could. Yes, this particular code if literally programming nightmare, tho I deliberately avoided all that nice looking things and optimization just to save time and make it simple. I'm also bit concerned about manipulating with model and sharing parts of it as results since I yet not have your permission to do so. So if you have any idea you think worth trying - just drop me a note. I could try to make it with LUA (also bit familiar with textures), prove the idea and produce general approach for solution. Or small fixes here and there. Then you could incorporate it to next version. This will also allow end-users to try something new, provide feedback and make some noise. Thank you again, and Best of luck!1 point
-

Version 1.0.0
449 downloads
Based on real world CL650 OY-LLG operated by Sun-Air. I had to take some creative liberties with the cheatline as it did not fit 100% on the model as per the real airframe and I couldn't get the line to intersect the nose, cabin door, overwing exit and APU area closely to the real airframe without it - I hope the end result is ok! The registration CANNOT be changed due to limitation of this airframe having a wing registration so I opted not to use the built-in registration feature and painted the registration on the livery itself. NOTE: Painted for XP12's new lighting engine - NOT tested in XP11. Appearance may be unsatisfactory in XP11 Features: Custom airframe-specific placards Adjusted AO layers Custom cabin interior based on real airframe with custom carpet normal maps Not to be distributed or copied without explicit permission.1 point -
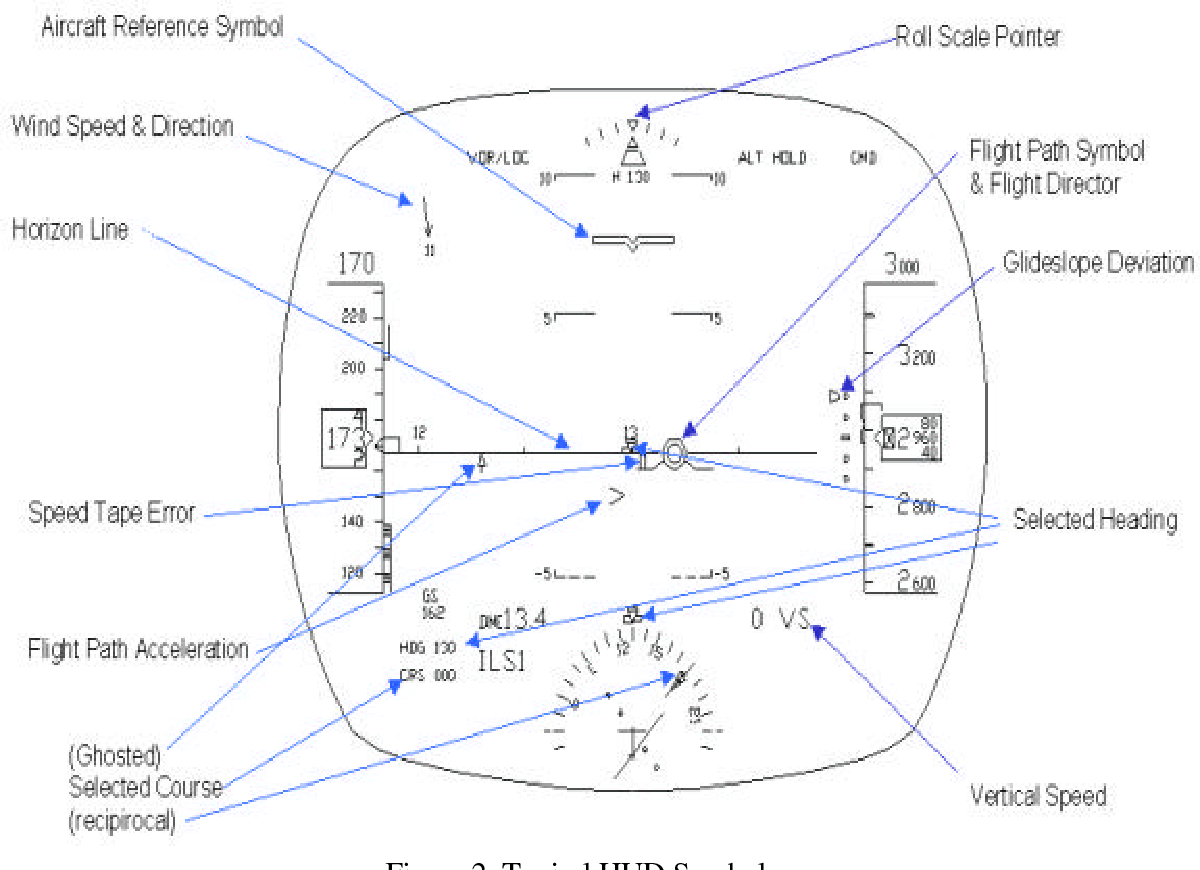
The large circle is your flight path vector and the small circle is the flight director commanded FPV. If you align the large circle over the top of the small one, you’ll fly what the FD is commanding.
 1 point