Leaderboard


Popular Content
Showing content with the highest reputation on 02/04/2013 in all areas
-
0 out of 10 for doing it and hurting 3rd party x-plane developers in the process. Just what this community needs - another reason for developers to flee.5 points
-
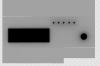
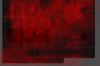
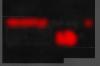
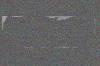
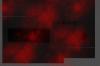
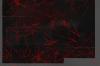
In this tutorial I'll try to introduce how to make real dirt/used/aged/worn textures. Here is the final product we are making: First of all, let's examine how things are layered up on a surface in reality. 1) First layer, from inside to outside is the object itself. It has a material, in cockpit's case: metal, mostly aluminum. 2) Second layer is the painting, in our case black. Well, in reality, black is not back It's black and ALL the colors mixed together. If you take a photo from a black material, then you zoom in it, you'll see something like this. 3) Third layer is the fat from fingerprints. Where-ever you touch a surface, you leave your fingerprint which is a small amount of fat and sweat. 4) Fourth layer is the dirt, smudge which sticks into the fingerprints. 5) Fifth layer is all other dirt: dust, coffee, wiping trail from cleaning before, etc. 6) Sixth layer is the scratches. Not just in the paint, but even in the dirt layers. 7) Seventh layer is more like layer 0, because it's the worn. The missing parts from the paint. 8) The "cleaner" parts where you did not touched the surface, so there in no dust, no fat, no scratches. So how can we achieve this in Photoshop? Let's make an UV wrapped fake instrument, with almost white material, and bake the texture. We get a good start: Then using google, find as much dirt, dust, scratch brushes as much you can. Download and install it to PS. I mark the upcoming layers in red, full opacity to see it easy. 1) Let's do the fake "all" coloring Add a new layer, fill with black, and add noise. Reduce the opacity to about 15% 2) The paint layer Add a new layer, fill with black and reduce opacity to match the color you want to achieve. Mine is 89%. 3) Dirt - the big ones The first layer, which gives us a simple used, dirty texture. Don't be generous. Use 2-3 brushes. Small ones, big ones, paint with it then erase randomly. Then reduce the opacity to barely see it, around 3%. 4) Dirt - the smaller ones Add some smaller dirt "puffs". Randomly, where ever you just want, but watch out, don't cover too much on the big ones - you can easily get a "full painted" areas where all dirt layer matches, so it will be too homogeneous. About same opacity as the big ones. 5) Dirt - darken Add some middle sized dirt puffs again, but now with black, or dark brown color. It helps to make it more non-homogeneous and more real. Opacity about 50% 6) Dirt around edges Now, this one is a little tricky. Think about where dust can stay: where you can't touch it. Near inner corners, near small switches. These things can "hold" dust as they not touched when using the instrument. These dusts can make like islands: Opacity about 7% and the color is a little yellowish white - since the dust is mostly sand and other small parts in the air. 7) Scratches You can make scratches in paint layer to if you wish, but to be realistic, make scratches in the dirt! Make with a black layer then reduce opacity about 20%. So it will overlay and darken the parts which scratched by keys, by your shirt, etc. Of course you can erase from dust layer, but it's harder to fine-tune later. 8) Fingerprint fat, clean parts Just above, there are parts - mostly bigger flat parts - where you barely touch - that means, it will stay more or less clean. Add like the scratches for later fine-tuning possibility: black layer and cover the big flat parts, about 35% opacity. 9) Optional: rust Under the painting - if it's not an aluminum part - rust starts to eat up metal. Or if it's aluminum, it can be base-painted (or prime-painted) with a brown paint. Sometimes when the original paint wear out, the base paint becomes dim. Add a layer with dark brown-orange mix, and paint the corners. Opacity is about 25-30% 10) Worn This is a little tricky. Since we want to maintain our PSD file and not to suck with later changes, we have to make a layer for worn. Simply paint on the edges, don't be generous where you touch the edges: like under the switches. Use use your thumb or wrist to fix your hand, so it get used and paint starts to crack then wear out. After painted, CTRL(or CMD on Mac) click on layer in Layers window. It makes a selection by the clicked layer. Switch to black paint, then hit delete. So, we kept shadows and all things that comes from the baked texture. If you make an other layer for worn, you have to repaint shadows in it. With this simple technique, you can keep, and can simply maintain the PSD later on if some change has to be made. If you precise, you can add inner shadow and outer glow to the black layer, like a sharpen to fake the thickness of the painting. It makes more believable it is a paint-worn, not a texturing error 11) Labels White is a tricky thing too. The white is not white Well, not full white. it's a little grey and/or yellow. You can make it more real if you add some yellow - or I think red if you live in the south hemisphere. Seeing white Could not find this study, but there is one, which states that people on north hemisphere sees the white more real if it has a little blueish color in it. But on south hemisphere, they see more white if it has a reddish color in it. If you find this, please link it I hope this little tutorial helps how to make real aged textures. If you have any questions, let me know. The PSD and the Blender file is attached in a zip file, to study the tutorial tutorial-src.zip PS: sorry for my english. If you find it hard to read, I'll try to re-phrase if you make suggestions how to express myself -- Mihaly

 2 points
 -
Well, like Cameron so eloquently points out, there's good and bad on both sides for sure. I don't like some of the batles over there either. But I don't like some of the immature name-calling and foul language here either. So, I ignore it all and just get on with my hobby. With a dash of common sense and respect, which serves just as well in the real world. Cheers, bc2 points
-
Hello, We just started the 747-8, it will be a legal conversion from POSKY thanks.1 point
-
Hello, Post everything regarding the x-plane DreamTeam MD-11 development here. website: REMOVED DUE TO COPYRIGHT VIOLATION. Thanks1 point
-
1 point
-
a co-founder has almost the same amount of power/rights as the founder, and that includes rights to post pictures.1 point
-
And you can always ask for particular airports from the community. Someone just asked for KGSP last week and greggerm threw one together. Someone asked for C99 poplar grove -I tossed it together in an hour for them. Luckily the xplane universe is full if helpful idiots like us (no offence Greg). EDIT, easIert way to search is byICAO code. Scenery developers generally post the ICAO code as part of the naming by convention. i.e. searching for "Ernest Rutherford/Lower Wakari Kakaori international Airport xplane" may not work, but "xplane NZDN" does immediately. I just had a look at the google search you tried. I would never do it like that (and expect it to actually work). Heh. Know your ICAO codes.! These are where planes fly to. Humans are just ballast and/or cargo.1 point
-
That's a good team of talented aircraft builders you guys have! Wish you all the best guys! Go get 'em.1 point
-
Lights.txt file Look for the size column in the w-w light definition. Change from 0.8 to something like 2.6. HDR heavily affects the sprite size. Known bug which I've submitted to Ben and the boys. I've hacked my own lights.txt file to drastically increase the spill width and billboard sizes for the sprites. Looks much better now.1 point
-
That is up to your team member founders to decide.1 point
-
Thanks Wrote a long post, then deleted. Will do later today a little tutorial with sample psd file1 point
-
the 787 is crap anyways1 point
-
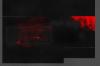
Flying over the city of Woodland, just west of the Sacramento Int'l Airport (KSMF), and northwest of the Sacramento metro area. Many of these central valley towns have a very sudden change between the urban area and the surrounding agricultural landscape, such as shown here.1 point
-
Judging buy the picture on the website you guys might want to try texture baking the texture of the md-11 for v1.11 point
-
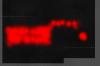
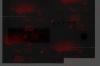
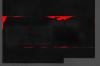
News: February 3rd, 2013 So here it is: finally, after the data-loss fiasco, I have everything back, and it's working better than before. The only scenery that I have in my X-Plane folder is my own and that done by Aerobridge and Chris K (none of which interfere with mine). I spent a good 6 hours re-exporting orthophotos to cut down on size, the download will still be over 1GB. I have also decided that I will release a full Oahu scenery to go with this in the future because the default X-Plane scenery does not match what Hawaii really looks like, and that is truly visible in the pictures below. Hawaii may be green, but not 1997 Mazda 626 green. There is a lot of grey, yellow, brown... pretty much any colour. That shouldn't take long now that I have a good place to get square GeoTIFFS from, which will make it probably no more than a week long project and a month to put in coastal buildings. Without further ado, here are today's photos. Also there is a really crappy video made - my graphics card just can't handle PHNL and QuickTime recording at the same time very well. On average, with "Very High" graphics, I get between 20 and 30 FPS, and I have a 3.5 year old computer with a below average video card even for that time. Cheers! A demo will be released soon with only the southernmost runway included (the one on the islet). VIDEOS: https://www.youtube-nocookie.com/embed/jwJMtAxsSeQ?rel=0 PHOTOS:1 point
-
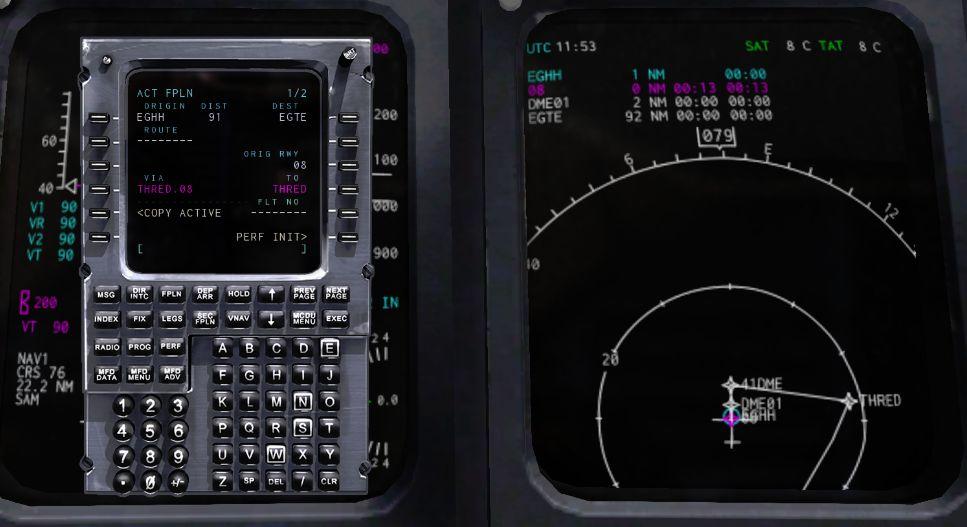
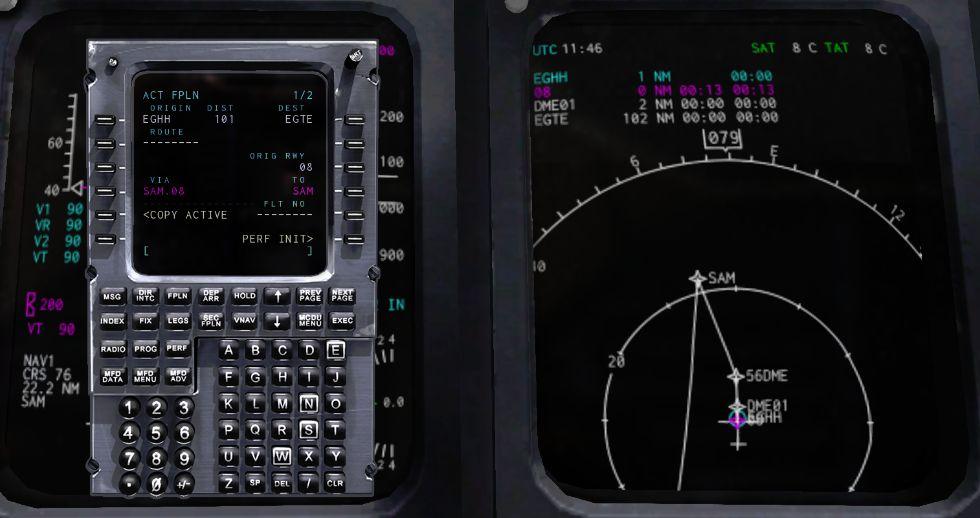
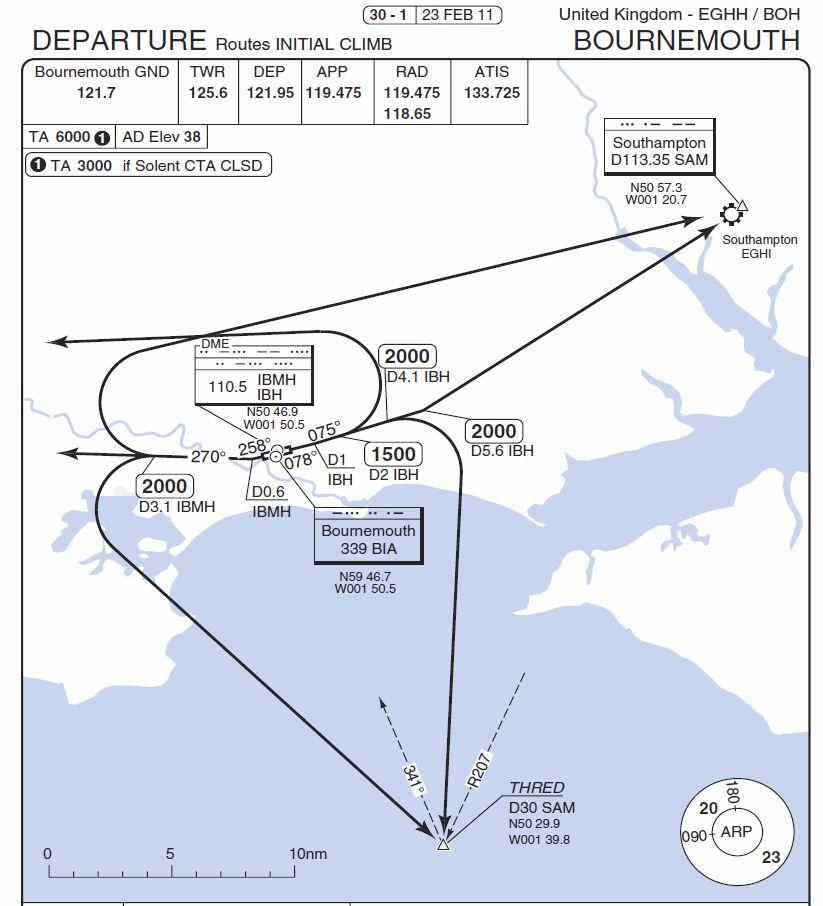
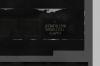
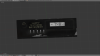
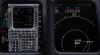
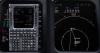
Have a look here: If you use the [DEP ARR] button on the CDU, and select the DEP, RWY then SID it will appear as shown above. In my example, the last Fix of the SID went into the "TO" slot at 4RSK on page 1 of ACT FPLN. If there is no SID available and you just select the Rwy using [DEP ARR], you will get Via DIRECT To "the Rwy selected" (eg at EGHI no SID's listed so just pick the Rwy eg.02). cessna729
 1 point
 -
Mean this one? http://www.realscenery.com/movies/enhanced/scenery.html1 point
-
Actually i can tell you from actual use of both a mouse and joystick the joystick has a 100% gurantee that it will at least triple your amount of realism and really you'll probably have more hassle using a mouse then you will using a joystick not to mention that they are pretty cheap my first one (a logitech extreme 3-d pro) cost me $5 and worked like a charm the entire time i used it however be warned you may reconsider not wanting to upgrade after this (i have invested another $1,500) also to get such a good deal check youre local goodwill i use goodwill specifically by the way because i can tell you for a fact that they test the electronics they sell to make sure they work1 point
-
There will be shortly. I'm working on the King Air Autopilot this week...as well as a few other quality control things. We've been revamping our export tools to ensure one-click export consistency for the entire aircraft and it should help keep things reliable. Tom K Laminar / IXEG1 point
-
And if you prefer to fly online with other pilots without ATC, you could try NetFlight or X-FlightServer: http://netflight.sir.../NetFlight.html http://x-flightserver.net/ But PilotEdge has professional quality controllers if you're looking for a very immersive and realistic experience. They even have a series of ratings flights that will teach you almost everything you need to know to communicate with ATC and navigate through the SoCal, and soon NorCal, air space.1 point
-
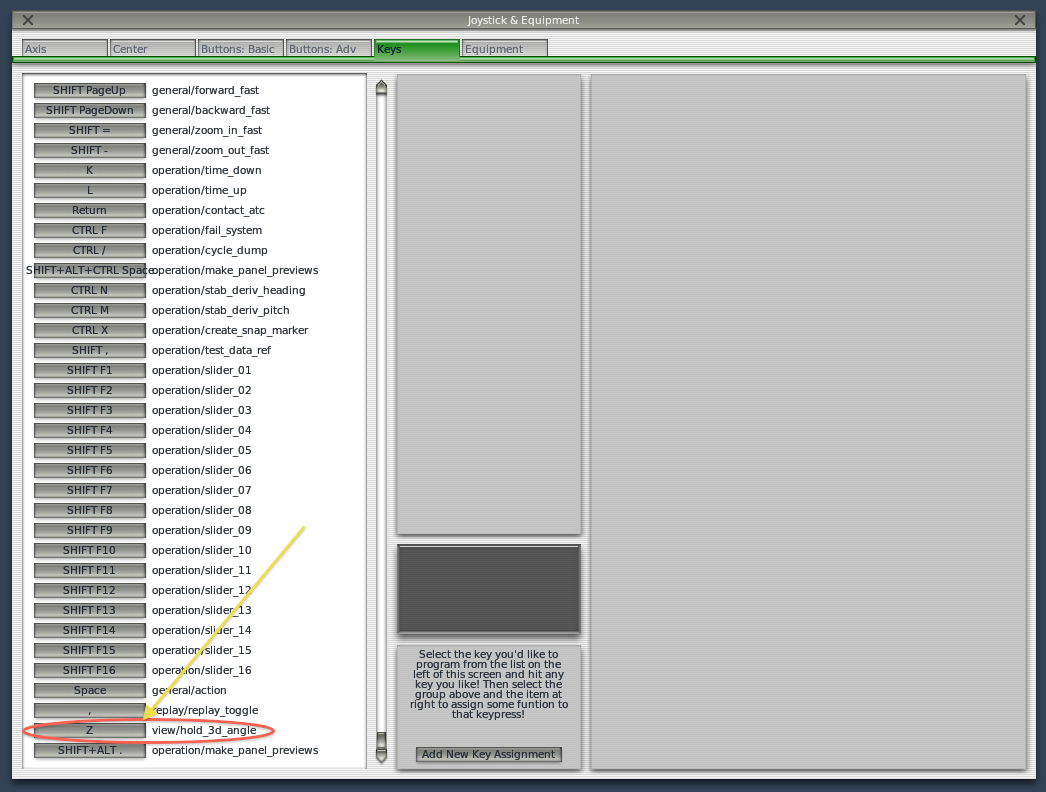
You can also program a key to "freeze" the 3D view (temporarily) while holding the key down. Go to Settings > Joystck, Keys & Equipment Under the "Keys" tab you can program any key... Here is an example...
 1 point