Leaderboard
Popular Content
Showing content with the highest reputation on 11/06/2013 in all areas
-
4 points
-
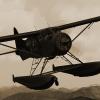
Hi Gary, Partnering with Khamsin is a great thing, because it allows both of us to concentrate at what we are really good at. Khamsin is a great artist, doing awesome 3D and texturing work and due to my background as a professional aerospace and flight simulation engineer I have a good knowledge and understanding of aicraft systems simulation, flight modeling and coding. So it will be a nice combination, because we complement each other. Also my opinion is, that for a one man development team it will get harder and harder to keep up with the quality and fidelity demands of current and future customers. So also here, me partnering with Khamsin is a step in the right direction, considering future development. And what is also important, we are interested in the same types of aircraft. Concerning your input on the wing setup, of course the Beaver wing is split up into several sections and I will try to make the stall and the general flight characteristics as close as possible to the real aicraft. I am in touch with several Beaver pilots, who have actually flown the Beaver for a good amount of time or are still flying it and there is also a former Beaver pilot in the test team. So far the high level comment on the flight model is "Yes, she feels and flies like a Beaver". Bush flying is one of my main interests when it comes to PC flight simulation, so you can be sure that I will try my best to make it as realistic as possible. Pete3 points
-
Its the HDR environment X II pack. I have that installed while waiting on SkymaxxPro. But we made it to Houston!2 points
-
2 points
-
2 points
-
So Nicholas made a typing error. I guess no one else, in the world, has ever made an error of such profound importance...1 point
-
Don't mean to rush you, but is there any estimates on how much this bird will cost? Looks AMAZING!1 point
-
1 point
-
1 point
-
1 point
-
1 point
-
The guy takes the risk of saying publicly to his (if you're right mostly MSFS) audience, one of the biggest flightsim vlogs on the Tube that he believes it's probably time to give up on FSX and start exploring the potential of XPlane and you dismiss him as a nobody who's just trying to get free stuff to go with his $300 equipment? That's disappointing.1 point
-
Hey All- It's been quite some time since I've done a tutorial, so I figured I should give something back. So, here we go! In this tutorial, I will be describing the basic steps (as taught to me by Tom K) for UV mapping, and Ambient Occlusion render baking. To begin, let's go over some terms: UV Mapping (As described in blender wiki)- The best analogy to understanding UV mapping is cutting up a cardboard box. The box is a three-dimensional (3D) object, just like the mesh cube you add to your scene. If you were to take a pair of scissors and cut a seam or fold of the box, you would be able to lay it flat on a tabletop. As you are looking down at the box on the table, we could say that U is the left-right direction, is V is the up-down direction. This image is thus in two dimensions (2D). We use U and V instead of the normal X and Y to avoid confusing the directions with 3D space. When the box is reassembled, a certain UV location on the paper is transferred to an (X,Y,Z) location on the box. This is what the computer does with a 2D image in wrapping it around a 3D object. During the UV unwrapping process, you tell Blender to map the faces of your object (in this case, a box) to a flat image in the UV/Image Editor window. Ambient Occlusion (as described in blender wiki)- Ambient Occlusion is a sophisticated raytracing calculation which simulates soft global illumination by faking darkness perceived in corners and at mesh intersections, creases, and cracks, where light is diffused (usually) by accumulated dirt and dust. This has the effect of darkening cracks, corners and points of contact, which is why Ambient Occlusion is often referred to as a 'dirt shader'. Okay, so now you know what the purpose of doing all this is. When combined, the process is loosely refered to as "Render Baking" because you are essentially telling blender to "render" the shadows etc to the UV map, thus creating what is called an ambient occlusion map. Why do all this? Well, if you skip ahead to the last image, you will see that you end up with what is essentially a black and white texture for your object. Once you have this, all you have to do is add color, details, text (if applicable), etc and you have your object's texture...and best of all, you don't have to hand shadow the thing, thus saving HOURS. So, now that we all know what we're intending to do, let's get down to the nitty gritty... For use in this tutorial, I have created a simple, two-tierd knob, as you would see on many radios. Step one: UV Map As you read above, UV mapping is essentially telling blender where to "cut" the various surfaces in order to make it flat. Simple?...not so fast buddy. Developing an understanding of how to do this simply takes time and practice. There is no set method of doing this, you simply have to learn the nuances of how your cutting will affect the final mapping/texture. Here are some general rules to remember: 1) If an object is flat in any view (IE the top of the knob), you're going to want to separate it. This applies to flat surfaces which meet curved surfaces...so cylinders only. Boxes etc. can be cut as a long continuous section. Examples--> (http://wiki.blender.org/index.php/Doc:Manual/Textures/UV) 2) Cylinders should be cut both vertically, and at the meeting edge of the top/bottom, and the curved vertical segment. 3) For all non circular surfaces, you should do your best to make the map of the faces be composed of nice regtangles/squares, with equal sides (all angles=90 deg)...this is by FAR the most difficult thing to get down, and often takes some creative cutting to make happen. Okay, now that you know the "tips", let's look at how to actually put them to use. In edit mode, you want to hit alt-tab->edge select. Using the guidelines above, you will select edges/edge loops, and hit ctrl-E->mark seam. If you did this correctly, the seams will turn orange. Now that we have all of our edges marked, were going to move over to the UV/Image Editor window, hit "new", and create the background and texture file to which we will do our baking. Now, go back to the 3D view window, and hit the "U" key, and click "Unwrap"... As you can see, the sides of the cylinders have come out EXACTLY how we want them, but it seems all the circle parts are not. YOU DO NOT WANT TO LEAVE THEM LIKE THIS!! So, we're going to have to go manual here. What you're gonna do is hit the alt-tab key again, and go into face select mode. Find yourself a skewed region, and press the "L" key while the pointer is over the little square indicating a face within that segment. By hitting the L key, it will select all the faces within that UV segment...remember that...its awesome, and works in both the 3D window, as well as the UV/Image editor. Keep in mind that you need not hold the shift key and "L" while selecting multiple regions in the 3D window, but you will need to use Shift-L in the UV/Image editor to select multiple regions. Now that you have your region selected, change the view in orthographic mode (hit the number keys, 1-9) to find the view in which the face is flat. In this case, I hit the 7 key (top down view) and then pressed the "U" key, then clicked "project from view". Once all of your faces are nice and pretty, you will now enter the second part of the process in which skill is required to achieve the best results. When doing a UV layout, you're going to want to cram as much as you possibly can, in the smallest area you can while still maintaining adequate separation of segments as to ensure you don't get texture "bleeding". Also, the bigger the region is, the more detailed the renderbake of that section will be. This means surfaces which will recieve the most attention (such as the top of the knob) will need to be a bit bigger than the others. For the purpose of this tutorial, I just make them all the same size, but typically, the UV map regions would take up about 1/8th of the 512X512 texture I created, with the top of the knob being bigger than the other sections. WHOO! You have just finished your first UV map...you should save, and then take a moment to be proud. Now comes the easy part...the baking itself. Now that you've created an outstanding UV map, you will need to set up the ambient occlusion settings. Essentially, blender sets up the majority of things for you, except for three settings "Samples" "Energy" and "Distance". Samples-This is how many times per a specific area blender samples the light. The higher you go, the more detailed, but the slower it takes to renderbake. Typically, 16 is fine for larger objects/maps, 18 for medium, but for the case of a small knob, I like to use 20 or even 22. Energy-This is how much light the object will reflect back. You typically want to set this at 1-1.5, but when you have objects that are surrounded by many other objects, thus making it in a shadow, you may want to turn this up depending on your taste. I rarely mess with this. Distance- How far away from your light source is this object. The default setting is 10...bad. Set this to less than 3 for the purpose of cockpit objects. For external objects, 10 will work...but typically I'll turn it down a slight bit. Setting up the ambient occlusion settings can be seen here: Now, you've done all the leg work. Go to the window where you would typically initiate a normal render. If you click the right tab of the box to the right of the render button (entitled "bake") a nice big button appears with the word "bake" in it...go figure. Hit this button, and wait. The baking process should begin shortly, and will take more or less time depending on factors such as texture size, complexity, object size, etc. And voila, you've done your first render baking. Should look like this: **Note: You may notice there are some funny lines on the object. Well, this is due to a setting called "Bias". Since this knob is MASSIVE (because I didn't take the time to scale it appropriately) the bias is off. This will typically be a non-issue, but will be discussed in the next tutorial. BUT WAIT!!! BEFORE YOU DO ANYTHING, IN THE UV/IMAGE EDITOR WINDOW, HIT "IMAGE->SAVE" Okay...now do whatever you want . Keep in mind, there's a lot more to this, especially when you get into much more complex objects/groups, but for the noob, this should give you a good starting point to learn the basics of this ESSENTIAL technique. I will be adding some more details sometime soon.1 point


