


Goran_M
-
Posts
5,646 -
Joined
-
Days Won
231
Content Type
Profiles
Forums
Latest X-Plane & Community News
Events
Downloads
Store
Everything posted by Goran_M
-
If it started rolling violently, I would suspect the weather being the culprit. Try to replicate, and if it happens again, please post back.
-
Did the ATC ever work in the TBM on your system?
-

Can I get a invite for the hot start discord
Goran_M replied to mike10's topic in General Discussion
https://discord.gg/yBkKgynX -
screen flickering issue with dual monitor
Goran_M replied to PattyGenius's topic in General Discussion
Is this in general, or with a specific add on? -
Very nice. If you need more dimensions, let me know. And keep us all posted on progress.
-
[Logged 2747] Crash when shutting down engines
Goran_M replied to pilotdeviation's topic in Crash To Desktop
I'll note that one. -
[Solved] Doesn't Want to Hold Cruise Altitude
Goran_M replied to jomama's topic in Flying the Challenger
The only thing I can think of is some kind of external hardware or something in your preferences. Do you have some kind of hardware that might be causing this? -
Lavertory Reading lights Light Bulbs effect goes not off.
Goran_M replied to Marder1986's topic in Technical Support
Noted. Will fix for a coming update.- 1 reply
-
- 1
-

-
Can you try running the TBM under Metal and see if it still crashes?
-
Not as far as we know. It's simply a case of conflicting plugins, but without knowing where the conflict is, it's impossible to determine a solution. We'll keep an eye out for any further cases, and if we come up with some kind of solution or workaround, we'll be sure to post it. In any case, with XP12 coming out soon, things might change.
-
[Logged 2747] Crash when shutting down engines
Goran_M replied to pilotdeviation's topic in Crash To Desktop
We need the log.txt file. -
Next step is to install the demo version of X-Plane, followed by the TBM, then load it up at SCIP. You will have no problems with activating the TBM. Please try this, and post back results. The reason I want to do this is to eliminate any other possible plugin conflicts causing the stutters. A clean install is the best way of finding this. It may also be a good idea to leave the demo version of X-Plane installed for further testing of other add ons, later on.
-
I see you have OrbX installed. Can you try loading the TBM at SCIP and observe if you are still getting stutters.
-
I'll try to reproduce tonight and investigate further if it happens on my end.
-
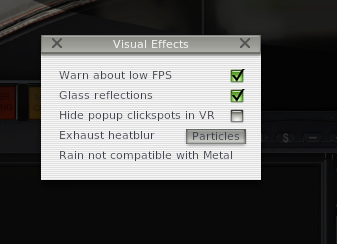
Make sure you have Glass Reflections enabled under the TBM visual effects menu.
-
Can you post a screenshot of your Graphics settings?
-
A = 14.4cm B = 12.2cm C = 66.4cm D = 38.1cm E = 25cm F = 31.8cm
-
Pretty much what Pils said, but also, it has the least amount of scenery, so load times are much quicker. It's the developers choice of airport when it comes to testing add ons. It very well could be. Just keep an eye on things, and make a note of the crashes. I know other people have X-Life installed, and they haven't had any problems. But it's impossible to know what causes the crashes without physically being at your PC. The only solutions are to test at default airports, or vanilla X-Plane installs. Keep us posted on what happens.
-
Give me a list of what you need, and I'll do what I can.
-
Does this happen regardless of location? Try to not compare other add ons. The Zibo 737 is built upon the default 737, and is coded differently. The TBM could be conflicting with some traffic or scenery bug. Before digging any deeper, try loading the TBM at SCIP and see if the problem persists.
-
You have a lot going on in your log file. You also have quite a lot of plugins installed. The biggest concern is a crazy amount of lua errors trying to read datarefs that don't exist. The only thing I can suggest is to do a fresh/clean install of X-Plane. The other option is removing all the plugins you have, and then adding them, one at a time, and reloading X-Plane each time, until the problem presents itself again. Unfortunately, with the amount of plugins you have installed, it's almost impossible to nail what is causing the problem without a clean X-Plane install.
-
That's an incredibly short log file. First of all, completely remove Skunkcrafts Updater and place it somewhere outside your X-Plane directory. Re-test. If that doesn't work, I suggest downloading a demo version of X-Plane and install that, without scenery, somewhere else on your PC, reinstall the TBM and then try to run it on the demo version. Please post back results.
-
At the current moment, I'm not sure what can be done about these, as it is indeed an X-Plane issue. If it is, what I THINK it is, I'll try a few things and see if I can hammer something in there to stop these bleeds.
-
Oh Jesus. Ok. I'll fix it as soon as I finish punching myself in the face for 15 minutes.
-
Closed the gap at the top of the cabin sliding door. The visors might be tricky. I mean, they need to go somewhere.
