ilias.tselios
-
Posts
943 -
Joined
-
Last visited
-
Days Won
88
Content Type
Profiles
Forums
Latest X-Plane & Community News
Events
Downloads
Store
Everything posted by ilias.tselios
-
 This time I will talk about the project status, and how we are moving forward. I will not give specific ETA! They only thing I can say is that this my daily and only focus. Goran’s job is almost finished, and the project is on my shoulders! So, ETA will be as soon as possible will be ready! The “general status” of the aircraft at this point is that is operational, you can do flight from cold and dark, VFR and IFR flights with the use of the 2 VORs and 2 ADFs, use the simplified autopilot we talked last time. Some of the systems are done, most of them are in progress. There are no systems with zero progress. With a late addition in the team of guy with a huge experience in DC3s, we are reviewing some of the systems, and fine tune the behavior. To give you an example, we fine adjusted the operation of the engine cowling flaps. DC3 cowls controls have 5 positions, CLOSE-OFF-TRAIL-OFF-OPEN. Close and Open positions are self-explanatory. In the OFF positions, you lock the flaps in the position there are at the moment you go to OFF position, so you can fine tune it. In the TRAIL position, the flaps are spring -loaded to open. As the aircraft accelerates, the cowls, due to the aerodynamic drag starting closing, until become fully closed at a certain speed. And the opposite, as you decelerate. Currently I’m close to finish the major elements of the electric system, with a fully custom behavior of all components, down to all lights dimming, depending of the current feeding the Main DC bus. We have added things like the batteries loosing charge as the days are passing and you don’t fly the aircraft! So make sure, when the time will come, to take her out for a ride to recharge the batteries! Fuel is free! A few for the initial version, though will be a dedicated development update for those as well. Beyond the core simulation, will be include a maintenance module, that you have to execute maintenance of the aircraft after specific flight hours, and a failure module. Those 2 modules in the initial release, will be “simplified”. In subsequent updates, more elaborate versions will be added, including “wear-and-tear”, depending of how you operate the aircraft. Also from the initial release, each aircraft will be unique! Every aircraft will have her own flight and engines hours, within a certain range, representing how many hours such an aircraft would have today. We are trying to make the aircraft “alive”, to need you care, but on the other hand, not shift the focus from flying! Another thing that we have is the option to choose to have a GPS and a more modern autopilot, so you can fly any flight plan you like, if you want to do so, but without removing the vintage feel of the aircraft! That’s all for now guys! Take care and be safe!
 -
 I wish I could, but I'm missing 2 things. The documentation of the EVO and the time to do it. Also a EVO pilot to help me with that.
 -
Some problems with 2.1
ilias.tselios replied to diamonddriller's topic in Beechcraft Sundowner C23 v2
This is a very valid point and I can't understand how I missed that. I will have in mind to do that for the next update. Already added in our bug tracker. Hope you get your iMac soon and enjoy X-Plane with the Sundowner! -
KEYW scenery now has an issue with xplane 11.5
ilias.tselios replied to clif737's topic in General Discussion
@YYZ342 see above. With 11.50 Vulkan some new rules have been implemented, that might flag some objects for some "illegal" text. But just that. No other problems. -
@Torbinator
-
KEYW scenery now has an issue with xplane 11.5
ilias.tselios replied to clif737's topic in General Discussion
I have looked at it and it is not a real issue, rather X-Plane "complains" about an grammar error in 3 files. You can use the scenery normally, and I will take care to make a patch to fix this. -
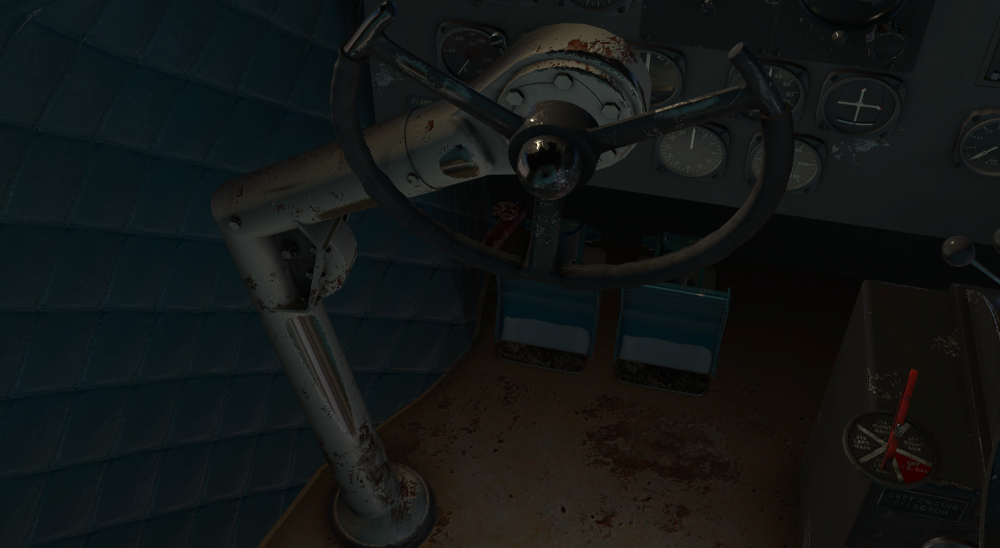
Hey all you! Been about 1 month and a half since the last update. Due summer, family vacation, and a couple other obligations, the development speed was at minimum, but now I am cranking the speed up towards the final stretch. Also the rhythm of development updates, will return to normal, around 1 per 2 weeks. Enough of that, let’s move on, and let’s talk about Auto(matic) Pilots! HISTORY The original DC-3 was equipped with the Sperry Type A-3A Automatic Pilot (see the difference in the wording?), a 1930’s system. I will not analyze the operation here, but in a next update, dedicated to the original version that will be simulated as well. In short, The automatic pilot, based on pneumatic operation, was developed to correct the angular deviations from straight and level flight, so WWII era bombers (like the B-17 Flying Fortress) become somewhat stable platforms for weapons (bombs) delivery. RATIONALE You can might imagine, that the operation was not very accurate, which led to development of the A-5 version later, during the WWII. During the development of our simulation, and after a long hunting for gathering good information since the use of the automatic pilot was mostly avoided(!), was obvious that in a flight simulation environment, will be extremely difficult to perform a controlled flight with ease. Overcompensation due to slow roll rates was a thing in the real aircraft, imagine in the sim! This led us to the decision to have a simplified version of the automatic pilot as well, as an option. Again, this does not means that the simplified version will allow to perform complex navigation tasks, but an “easier” method to controlled aircraft’s attitude, by the same means with the original version. SELECTION You will be able to select the mode you want to through the menu, where you will find a short description. Make sure that you select the version of the automatic pilot you want to fly with, either before flight, or with automatic pilot disengaged, to avoid any unintended flight path changes, or loss of aircraft control. OPERATION By selecting the Simplified mode, we can now fly! Here are the steps: Fly straight and lever and trim the aircraft to hold this attitude. Engage the automatic pilot (knob on the left lower part of the pedestal). The aircraft will enter into pitch and roll hold modes. Use the AIL (aileron) knob to roll the aircraft left or right. A small tick mark will move accordingly (not shown in the picture) to indicated the commanded roll. Use the ELE (elevator) knob to pitch the aircraft up or down. Small tick mark on the right side of automatic pilot’s attitude indicator (not shown in the picture) will show the commanded pitch. The RUD (rudder) knob, controls the aircraft heading, once you are in heading mode. On the left side of the automatic pilot panel there are 2 heading scales or cards. The lower card should be set to the aircraft heading as in magnetic compass, with the cage button/knob below. The top card is the automatic pilot heading command. To enter the heading mode, before engage the automatic pilot, you should trim the aircraft in straight and level flight, and use the RUD knob to match both scales. Don’t have to a perfect match, a couple degrees off still will work. But more than that, the automatic pilot will enter the roll/pitch mode. Then turn the automatic pilot on to enter heading mode. From this point on, you can use the RUD knob to fly to the desired heading. This of course is short description, with more information in the manual that will come with the aircraft. That’s all for now folks! See ya in a couple weeks! Cheers!

- 1 reply
-
- 2
-

-
No worries. I'm here to help.
-
Seems that you have not installed Gizmo. If you read the description says: Do that. Also when you have a problem, post your Log.txt and if exists the GizmoLog.txt files.
-
Happens to me as well. Investigating the cause and I will update you.
-
Version 1.0.0
129 downloads
ITX-D Lights Controls, gives you the control of X-Plane night lighting in a very intuitive way. By dragging the sliders you will be able to achieve the result you want, live. Also includes a custom lights.txt file with bigger light coverage. FPS impact in most cases will be one, or very minor. REQUIREMENTS: FlyWithLua INSTALLATION: Unzip the downloaded file into X-Plane 11 folder. Will request to overwrite the default lights.txt file. Note: In case of an update, the updater would like to overwrite the file with the default one. Don't allow to do it, or after update, re-install this utility. USAGE: Go to Plugins -> FlyWithLua -> FlywithLua Macros and click on the ITX-D Lights Controls. A window will pop up (as seen in the images) to set the values you like. Once you are happy with the results, click the Save Settings button to save the settings. From now on X-Plane will load with those settings, automatically. Note: Using extreme values, will drop fps significantly and make the output unrealistic. Use with care! Strongly recommended to use with Extended Night Lighting, as seen in the images below. ] -
ITX-D Lights Controls View File ITX-D Lights Controls, gives you the control of X-Plane night lighting in a very intuitive way. By dragging the sliders you will be able to achieve the result you want, live. Also includes a custom lights.txt file with bigger light coverage. FPS impact in most cases will be one, or very minor. REQUIREMENTS: FlyWithLua INSTALLATION: Unzip the downloaded file into X-Plane 11 folder. Will request to overwrite the default lights.txt file. Note: In case of an update, the updater would like to overwrite the file with the default one. Don't allow to do it, or after update, re-install this utility. USAGE: Go to Plugins -> FlyWithLua -> FlywithLua Macros and click on the ITX-D Lights Controls. A window will pop up (as seen in the images) to set the values you like. Once you are happy with the results, click the Save Settings button to save the settings. From now on X-Plane will load with those settings, automatically. Note: Using extreme values, will drop fps significantly and make the output unrealistic. Use with care! Strongly recommended to use with Extended Night Lighting, as seen in the images below. ] Submitter airfighter Submitted 08/29/2020 Category Plugins and Utilities
-
Some problems with 2.1
ilias.tselios replied to diamonddriller's topic in Beechcraft Sundowner C23 v2
@diamonddriller regarding graphics and performance, C23 was optimized to absolute best possible with Vulkan in mind (which also should see benefits in OpenGL), without degrading the quality. Thumbs up to Laminar for the great tools they are providing, due to Vulkan/Metal transition. Now we can have actual metrics on many things that helps us greatly to improve things. About NAV. The S-TEC 55 autopilot, a quirky piece of kit, has some idiosyncrasies, one of which is that uses the heading bug as tracking reference, rather the course indicator value from any source (VOR/ILS or GPS). You must always set the heading bug to a value close to the desired track, otherwise the behavior might be erratic. There is nice video from Philip explaining the operation of the autopilot. I will also hope soon to be able to do a live stream, to answer any question regarding the C23. About the COM situation, the aircraft meant has only one COM radio, and kept the buttons and knobs on the GNS430 for convenient, so , in your case use the stby frequency as ATIS and switch between the 2 as you like. The "hardcore" version of me, would like to go and rip off those button, and even lock the possibility to switch between stby and main frequency, so you have to dial the frequencies back and forth! Also, convenient, is the reason I put an autopilot. The base model has no one, but later many was retrofitted with some autopilot model, many with the S-TEC 55 (source beechcraft forums). With those older aircrafts, nowadays, you almost cannot find any typical layout. Most of them (to be able to fly today) have passed through a "modernization" phase with some newer avionics. So, with the V2 update, we also "modernize" her a bit! I will see what I can do for the lighting. -
Version 2.0.1
118 downloads
Avitab integration for FlightFactor's A350-900. Uses OIS charts page to display the Avitab screen. REQUIREMENTS Avitab plugin (version 0.4.1 or higher) INSTALLATION Unzip the file into FF A350 folder. NEW FEATURS Now uses xLua plugin for easier installation. With the new Avitab version, you can now use Avitab in both side and center displays. Set automatically the proper cursor type. USAGE Go to OIS charts page to access Avitab. -
AVITAB for FF A350-900 View File Avitab integration for FlightFactor's A350-900. Uses OIS charts page to display the Avitab screen. REQUIREMENTS Avitab plugin (version 0.4.1 or higher) INSTALLATION Unzip the file into FF A350 folder. NEW FEATURS Now uses xLua plugin for easier installation. With the new Avitab version, you can now use Avitab in both side and center displays. Set automatically the proper cursor type. USAGE Go to OIS charts page to access Avitab. Submitter airfighter Submitted 07/29/2020 Category Plugins and Utilities
-
Newsletter, not. But you can go here https://forums.x-pilot.com/forums/forum/242-douglas-dc-3-v2/, and on the right top side is a 'FOLLOW' button. Click it and you'll get a list of option to get informed when something new is posted here.
-
XP12? We may assume that is coming, but who knows? I'm eager (just for fun) to say "will be released with XP12", but what if the new version has no more serial number, and be just... 'X-Plane"? Then we can postpone release ... indefinitely!
-
If you mean if it as available on X-Aviation store, it is not yet. If you mean if it is on active development, yes very much!
-
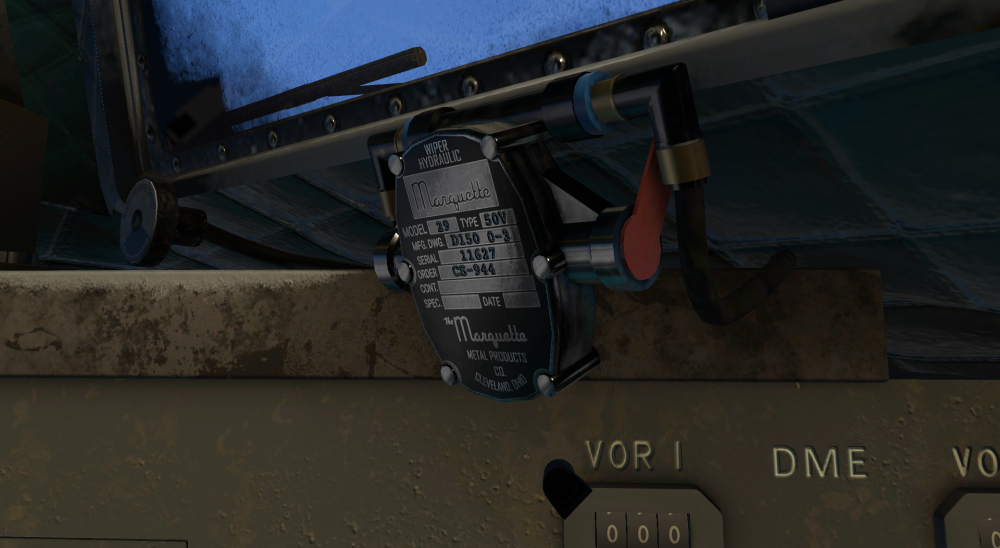
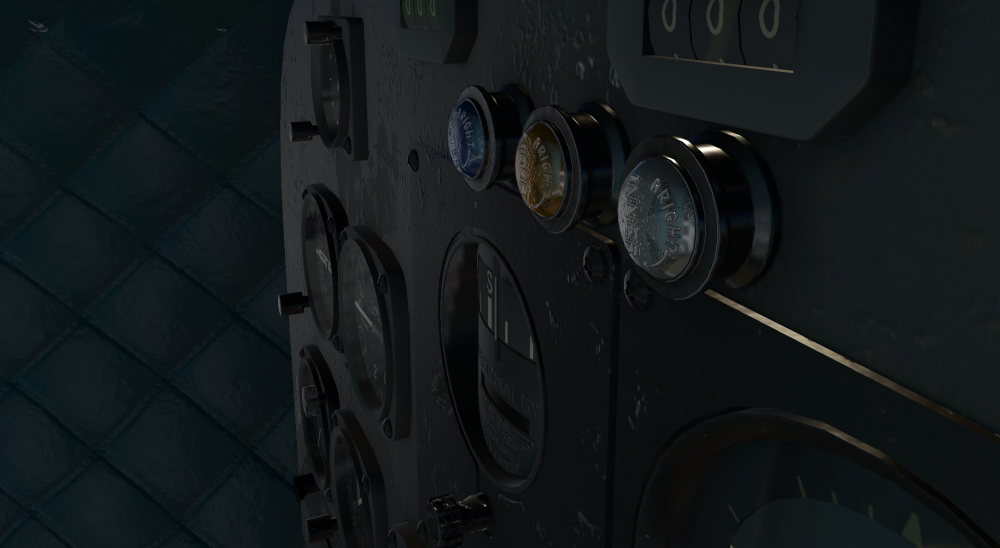
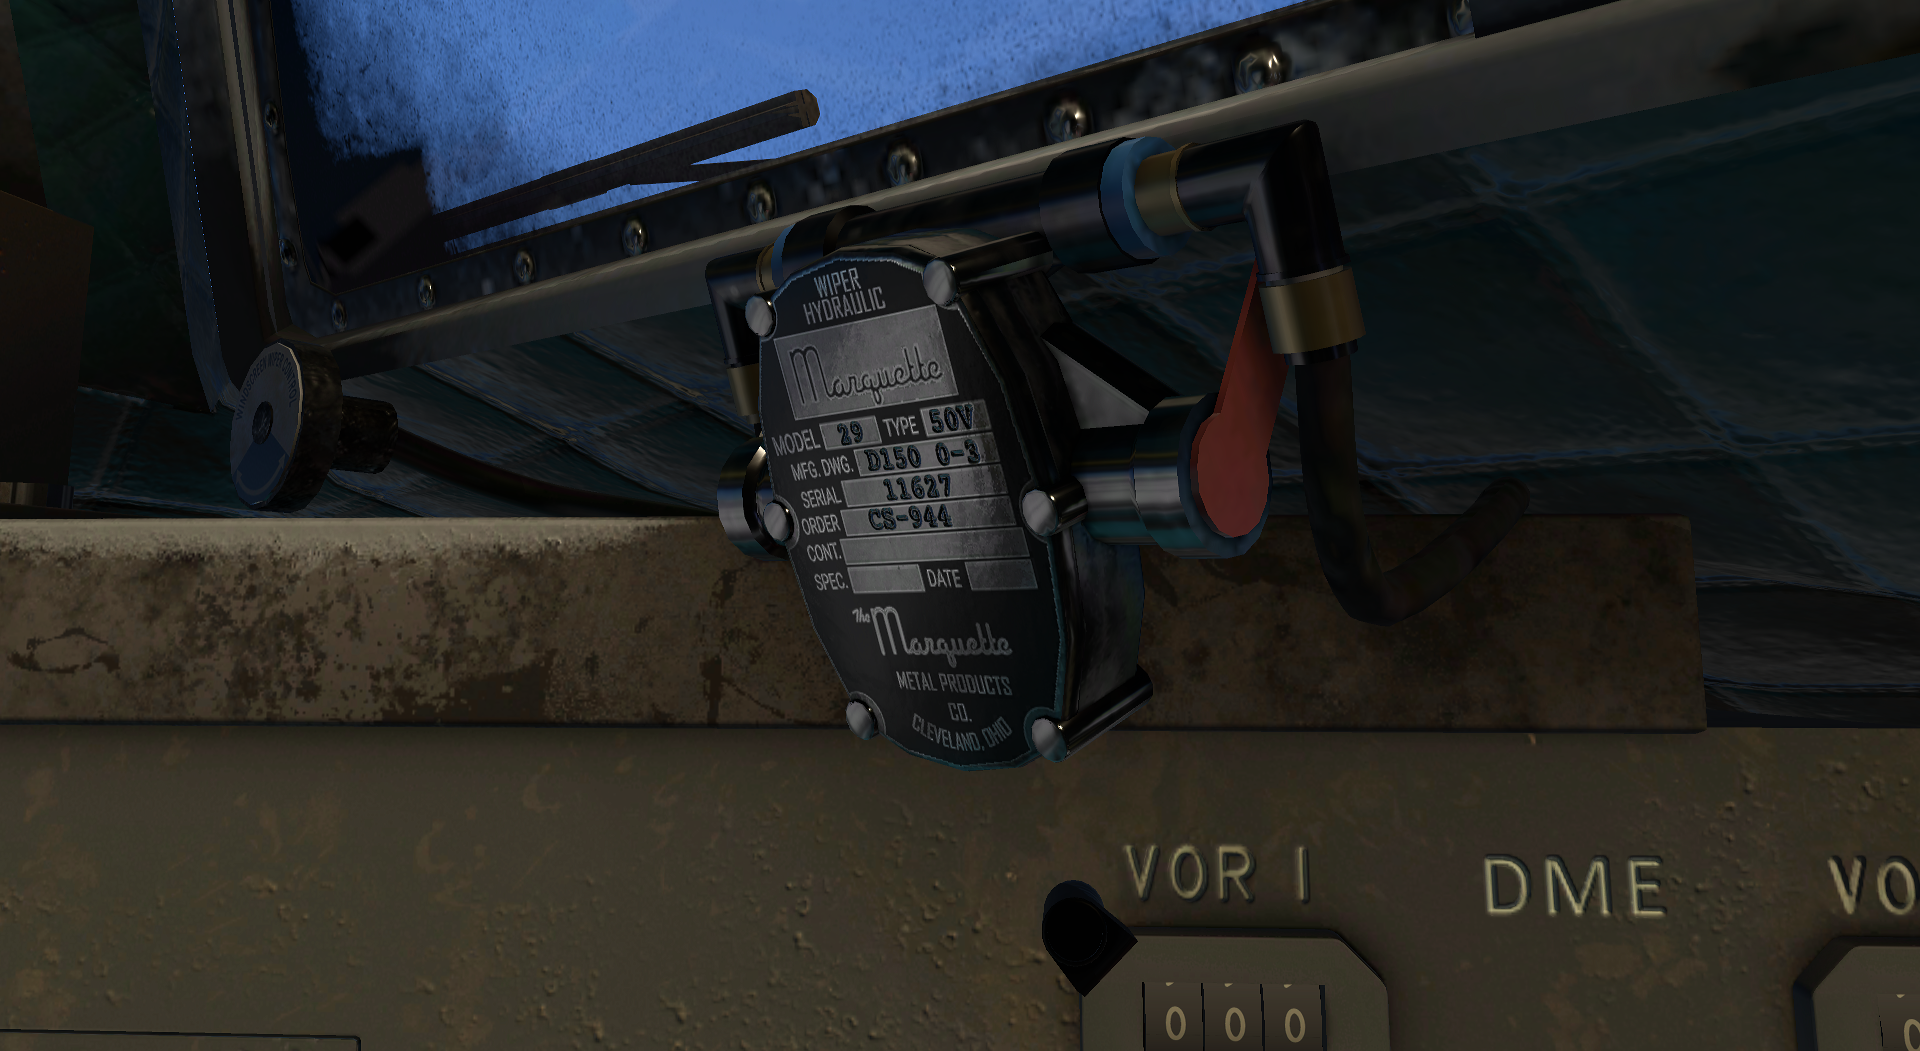
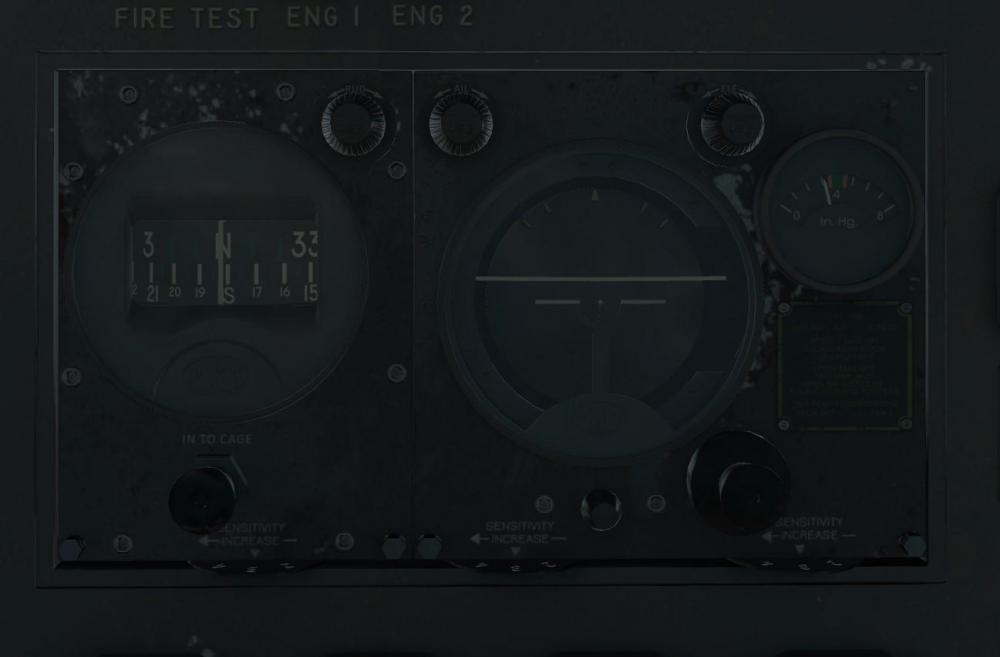
Although the ‘Gooney Bird’ is not the most complex aircraft in existence, the systems simulation has its own, unique challenges. X-Plane offers a generic way to simulate systems, so most of the times, you have to expand or adapt with the implementation of extra logic(s) via the use of plugins. The developer adds complexity to systems, which most of the times it is about newer automations that does not exist in X-Plane “default logic”. As you might imagined already, here the situation is almost the opposite. The added complexity has as target to reduce automation! Aircrafts from that era, do not enjoy automations we take them for granted in the recent years. One example is the landing gear extension/retraction operation. In a normal aircraft, you manipulate a lever, and in the background, electromechanical components, do the job of extending or retracting the landing gear. In the DC-3, you actually operate the valve that sends hydraulic fluid to the one or the other side of the hydraulic cylinder to retract or extend the landing gear, leaving aside (for now, we will talk about it in the future) that you have to manipulate up to 3 “things” to complete the operation! This leads us to the need to override X-Plane’s behavior with our custom one. Building the proper logic requires knowledge not only of how the systems are operating, but also intricate details, beyond of what is written in the manuals. We are very honored to enjoy the help and advises from a guy that both flew and maintained DC-3s and C-47s! His insights drives us to add a huge amount of extra details in the systems simulation side, way more that we had originally planed. So if you have the question “why the update takes so long?”, now you have your answer. Because examples help understanding, here is another one that might shed light upon the level of detail we are putting in, something we’ve already shared in our discord channel. Those old aircrafts are equipped with some old generators that must come up to temperature to provide the maximum amount of voltage they can. Taking into account various factors (environmental, time in operation, etc) we calculate another factor that plays role in the generator output, and if will connect or not to the main bus (despite if you have put the switch to ON position), as function of the voltage regulator, which we also simulate. That’s all for the introduction of the DC-3 systems. In the next updates we will look closely every system and its operation. While I am trying to post updates as dense as possible, sometimes you have to progress the work first enough, and then talk! Stay safe and enjoy flight simming!
-
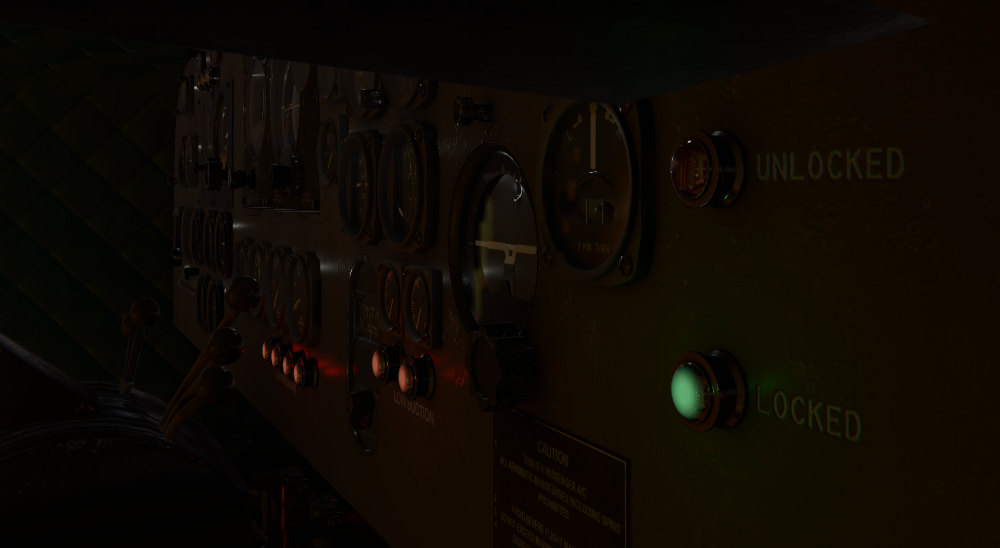
If everything is turned on fully, then this is the fullest possible brightness that they have.
-
-
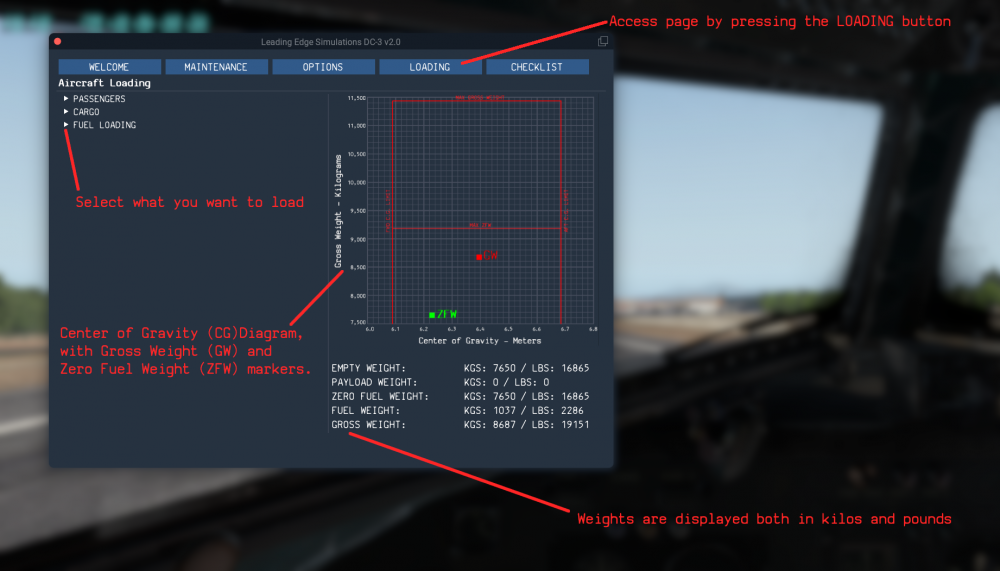
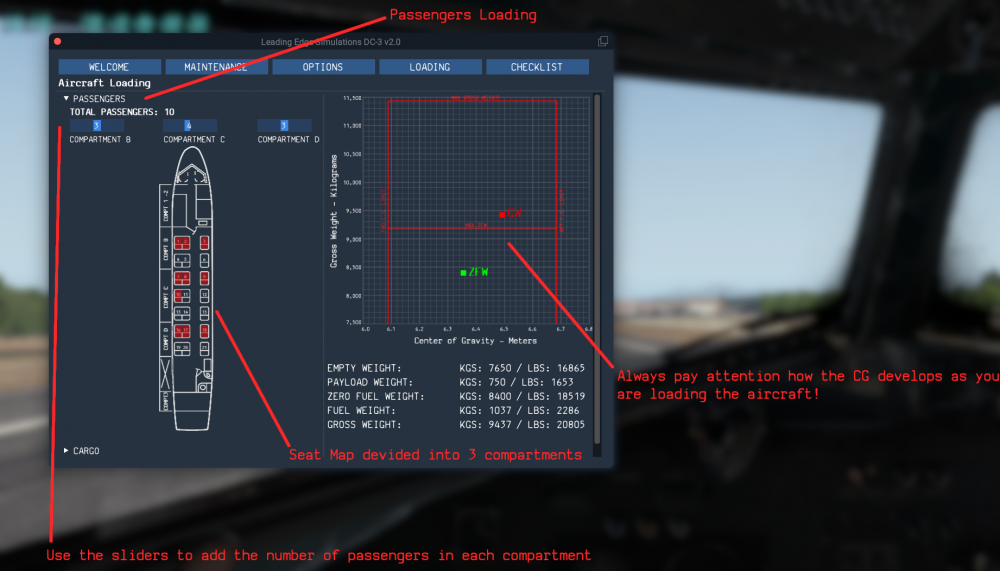
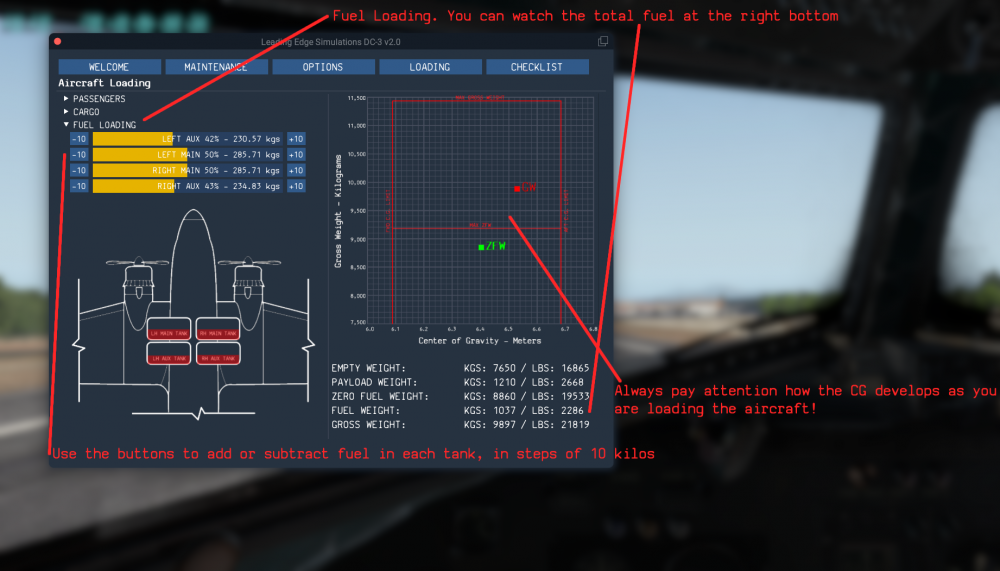
With the power of newest Graphical User Interface (GUI) available on X-Plane, we build what we believe is a clear, simple, easy to use, but also informative way for loading the aircraft. LOADING PAGE LAYOUT The loading page is divided in 2 columns. On the left column is the area of ‘actions’, where you do the loading. On the right column is the area of ‘information’, with a Center of Gravity chart (CG) on the top, displaying the Gross Weight (GW) and Zero Fuel Weight (ZFW). On the bottom is a numerical representation of each weight category, in both kilograms and pounds. PASSENGERS LOADING The passengers section is divided in 3 compartments, B, C, and D. Using the sliders in the top of the seat map, you can adjust the number of passenger, per compartment, as you want. The seat map will display the seat coverage, as you adjust the passenger. Always pay attention to the CG chart! You are the responsible to proper load the aircraft! CARGO LOADING The cargo loading also happens in 3 compartments, 2 in front of the passengers area, and 1 aft. For clarity, the seat are not drawn here. Keep in mind that the aft cargo area (compartment 3) is way back of aircraft’s CG, so adding a lot of cargo there, will move the CG far aft! Load with caution! FUEL LOADING Last (but not least!) is the fuel loading section. On the top of the section is the representation of the 4 tanks (2 main and 2 auxiliary). Left and right of each tank there are buttons to adjust the fuel weight, per tank, in steps of 10 kilograms. Also in the map below, each tank with the relative level of fuel is represented in their actual position on the aircraft. Again, pay special attention on the CG chart! IN CONCLUSION Loading the aircraft is an act of balancing, no pun intended! You have to consider how much fuel you need, the payload (passengers and cargo) you have to carry, and load the aircraft properly within the limits. Act responsible… and before start your engines! After starting the engines, you will not have the ability to alter anything of the above!

- 1 reply
-
- 2
-
-
If by the custom damage model you mean failures or something like this, we are up to something, but I will do a dedicated post to analyze it in the next weeks. About autopilot, again, I will do a dedicated post what exactly we are implementing, the short answer is that will have not an autopilot capable flying RNAV approaches! A GPS used maybe as reference, is another story though.
-
No ETA, but working on full steam. About performance, I can't give any concrete numbers, but testing in XP11.50 Vulkan, we are on par with the default B737, and most of the optimization is still ahead.
-
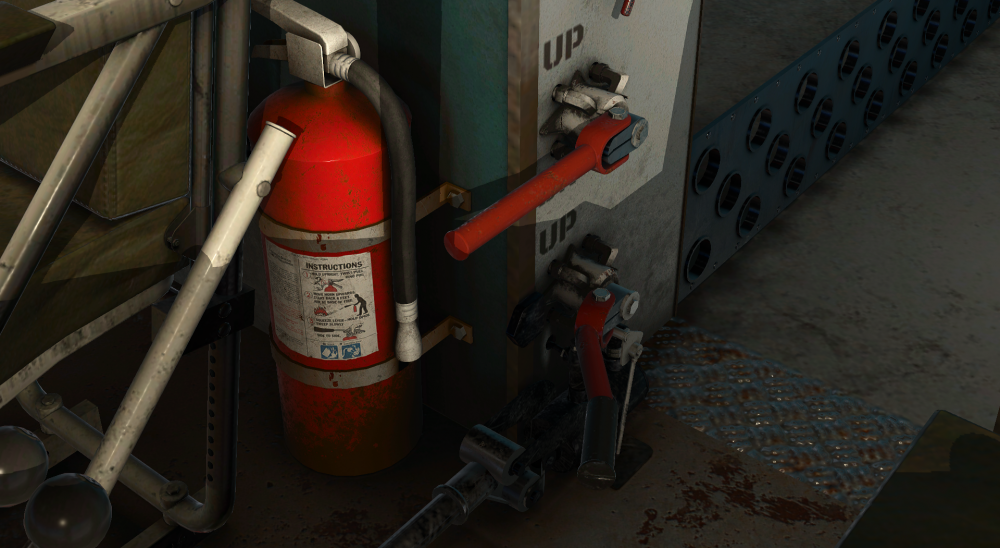
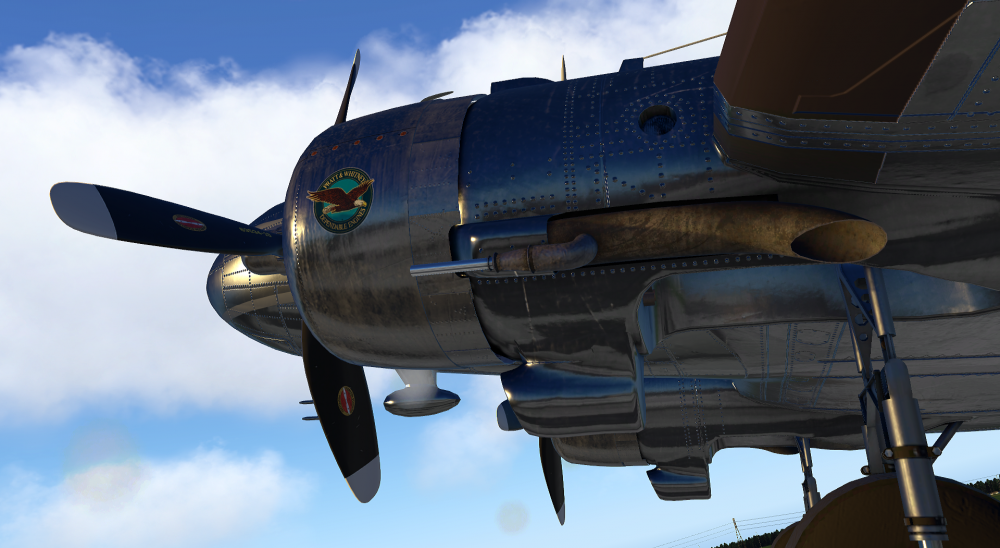
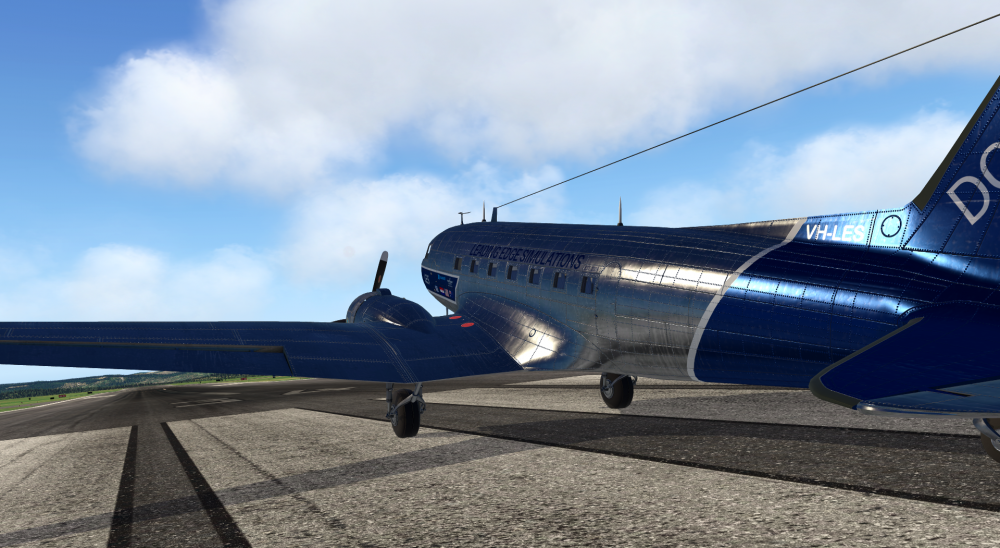
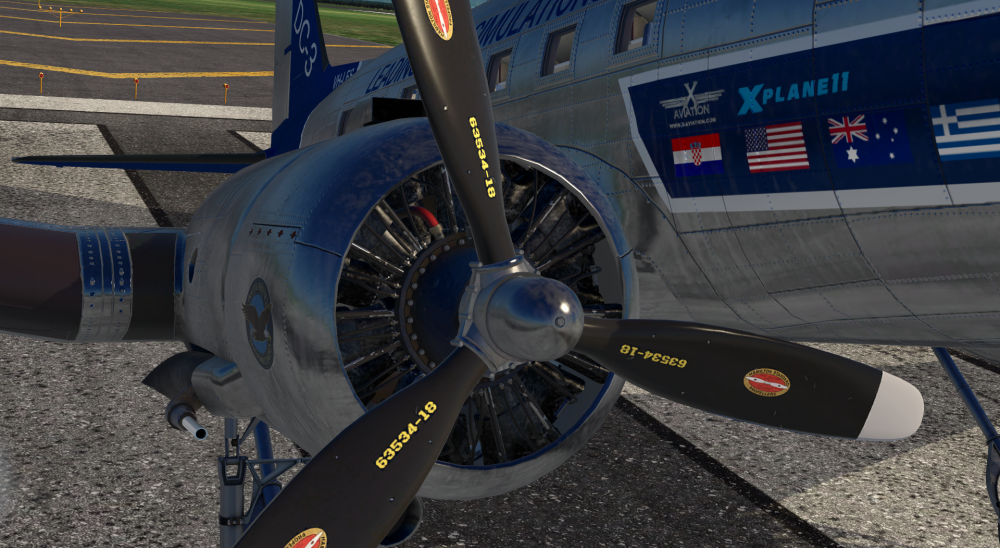
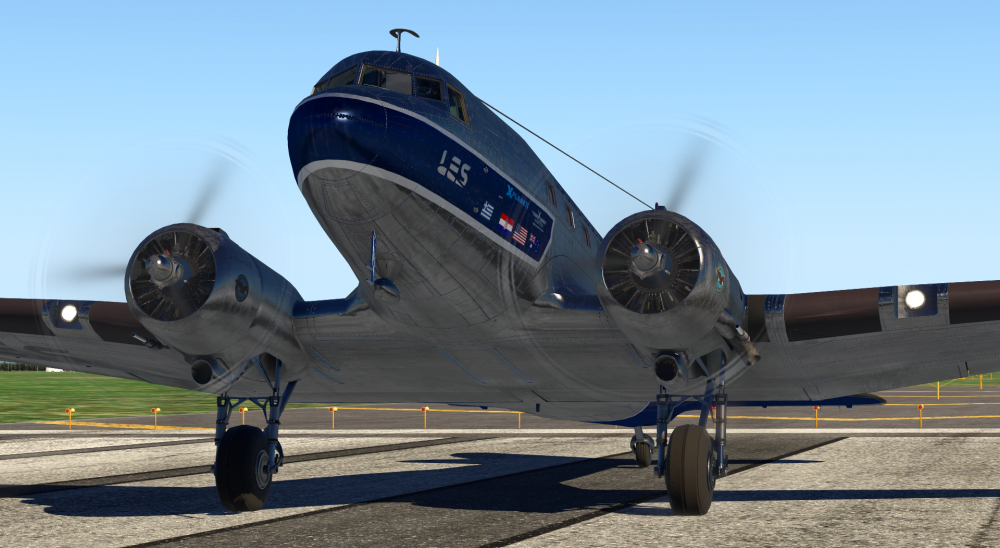
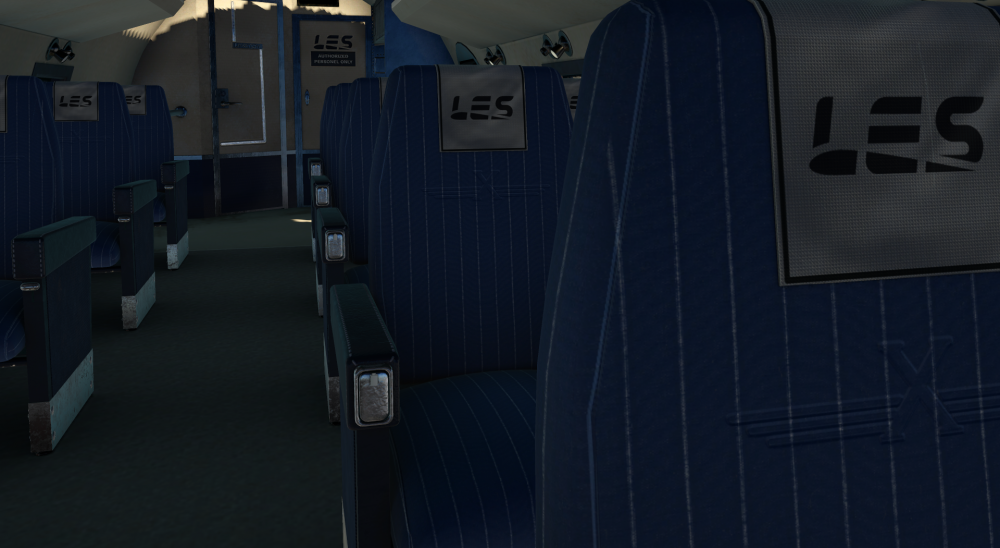
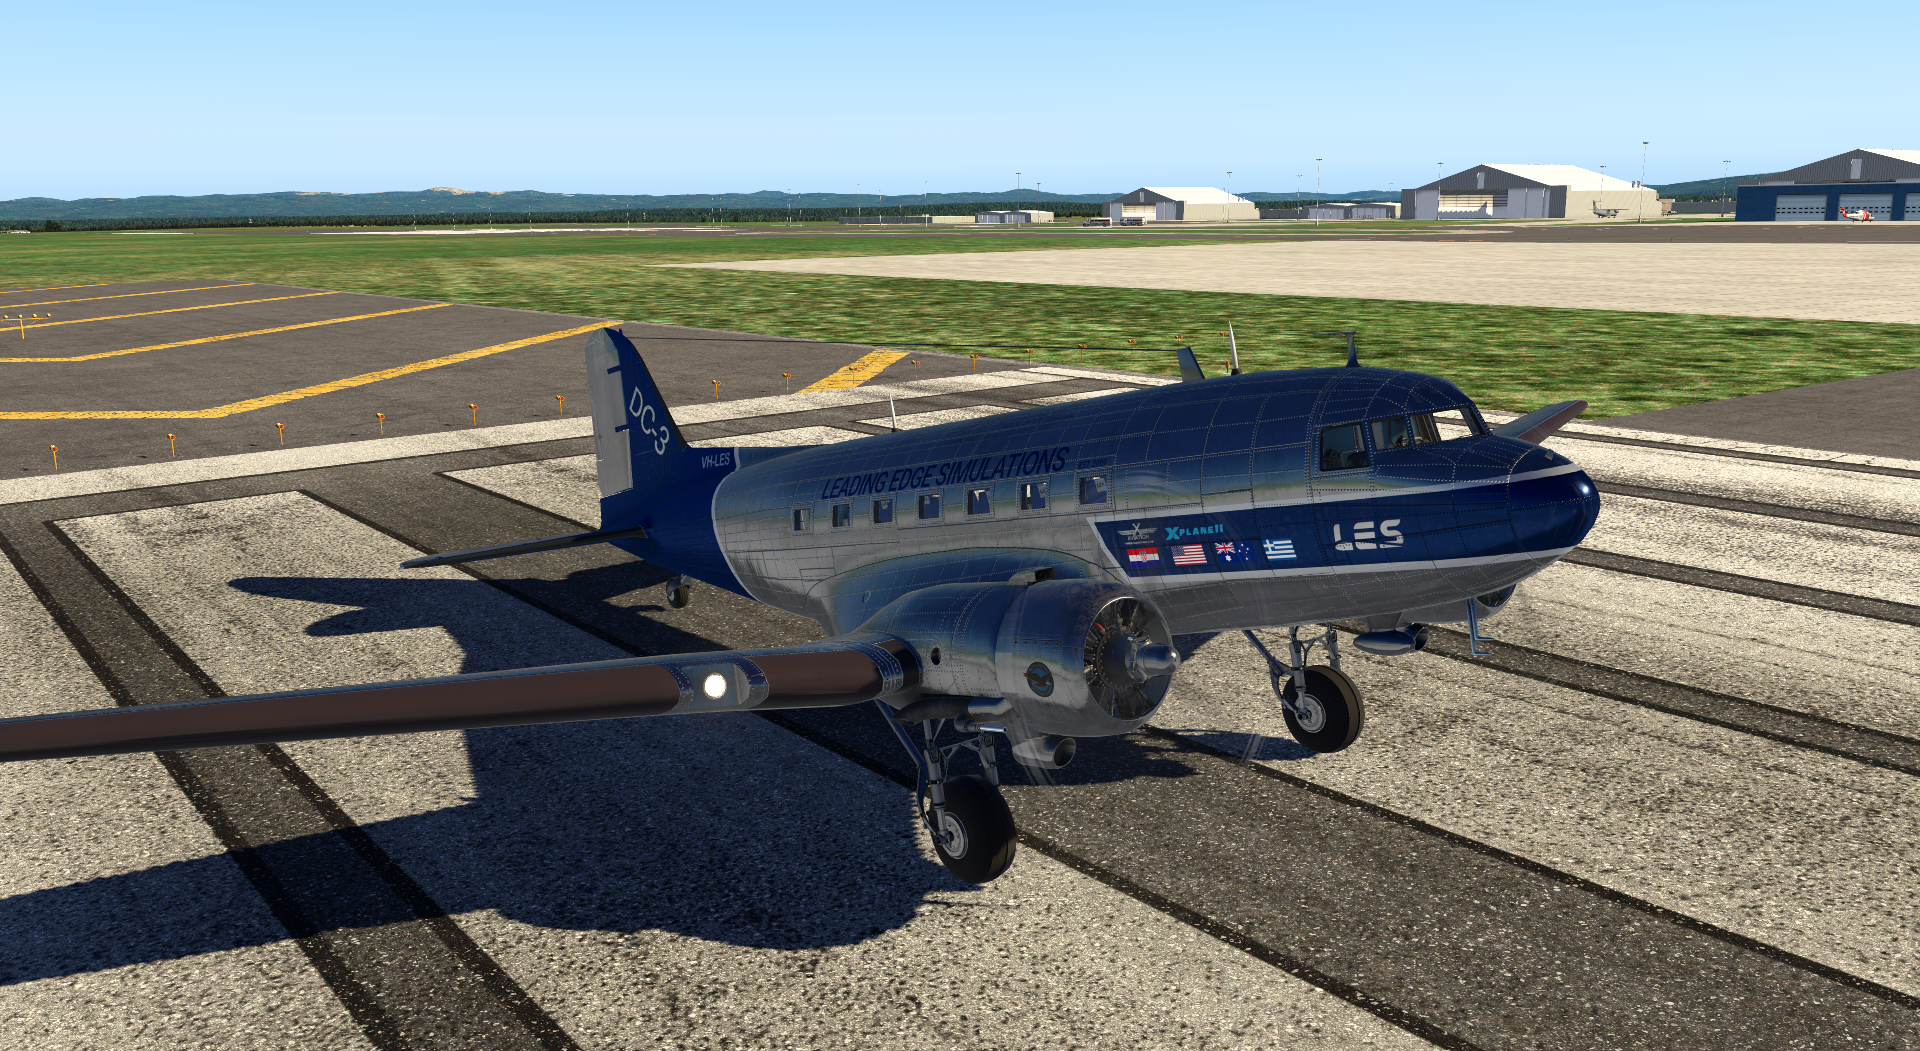
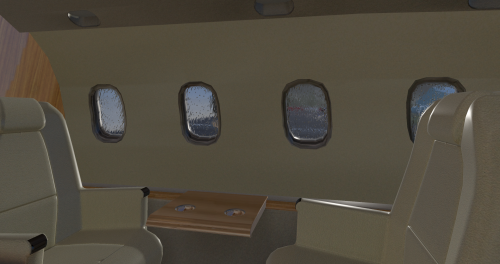
We are going to talk about "eye-candy"! Yes, this term has been used to point out those aircrafts with serious lack of functionality, which is not entirely fair. When you are trying to simulate an aircraft, how the aircraft looks is neither irrelevant, nor secondary. It is in an equal role with the systems’ simulations and flight dynamics, if you are looking to create the best experience, as close as possible to flying the real aircraft. And this is what we are looking for! Returning to DC-3, we have created every little detail of the aircraft, with high definition textures, and the application, everywhere, of PBR materials. As this is an old bird, there is extensive use of weathering effects, ranging from bare metal and rust, to rough metal surfaces. For example, on the cockpit walls, you can see the thousands of small bumps, covered in thick paint, and the way the light is interacting with all these, thanks to PBR materials, you can almost “sense” how this surface feels on the touch. In my personal opinion, the visual quality is “top-notch”, and I must admit that there are times that I feel… mesmerized the way everything looks! @Goran_M’s 3D skills, as well in texturing and application of PBR materials, are present here, in every (small) corner of the aircraft, and I feel very lucky and honored to work with such a talented guy. Of course some might worry about the cost in performance of such detailed aircraft. When there is a deep knowledge of 3D modeling, and how to use materials and various effects, you can achieve great results without suffering in performance. In addition, the new tools that Laminar introduced with X-Plane 11.50 (Vulkan/Metal), allow us to have metrics of the performance, and help us to optimize the aircraft, without any loss in quality. This is not magic, just hard work and experience built through the years, developing aircrafts for X-Plane. In conclusion, we are packing as much as detail as possible, without performance penalties. It will be a nice place to be and fly, projecting the character of the aircraft, and doing justice to the one that change the airline industry as no one else! Now it is time to enjoy more visual details of the aircraft!