


Jeffory
-
Posts
11 -
Joined
-
Last visited
Content Type
Profiles
Forums
Latest X-Plane & Community News
Events
Downloads
Store
Everything posted by Jeffory
-
I have no earthly idea why it decided to work this morning. thanks for your efforts to help!
-
Trying to simply fly HDG mode. Standby is stuck on at all times. If I hit HDG mode it flashes "ON" but immediately turns off. If I hold STANDBY all lights in the AP select panel light up. If I hit AP button (with TURN knob in the center detent), only the YD ENGAGE lamp lights. I also tried hitting HDG before engaging AP with no luck. I guess next step is uninstall and re-install?
-
I purchased the Marquise for XP12 a while back but have just gotten around to trying to fly it. Flying in 5 blade OEM mode. (though I have the same problem with all acf versions) I swear I am following the manual, but cannot get the AP to engage. In flight (or on the ground), engines running, inverter on, the TURN knob is centered (in the detent), the left radio switch is on, MASTER SWITCH normal and the aircraft is flying healthy, but when I hit the AP button on the center console, the YD ENGAGE light comes on, but the AP ENGAGE just doesn't. It makes me sad. Does anyone have any idea what I've missed?
-
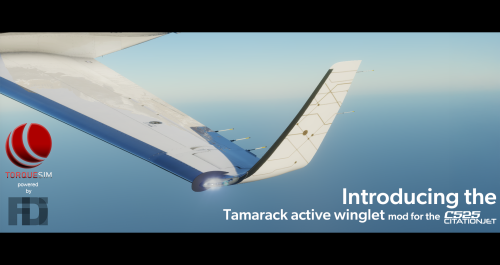
Tamarack Active Winglet mod for the TorqueSim CitationJet 525
Jeffory commented on PilotFidi's file in Business Aviation
 I wonder if @PilotFidi can get permission to redistribute the corrected files in the distribution.
 -
Tamarack Active Winglet mod for the TorqueSim CitationJet 525
Jeffory commented on PilotFidi's file in Business Aviation
For what it's worth, you can change it in Planemaker in the Bodies window. -
Yeah, you can't model an asymmetric fuselage in PM. But you can get "close enough" then model whatever you want in the OBJ. Asymmetric wings could be done with misc. wings easily enough though. I was going to give the Boomerang a go myself, until I heard VSkyLabs is already on it.
-
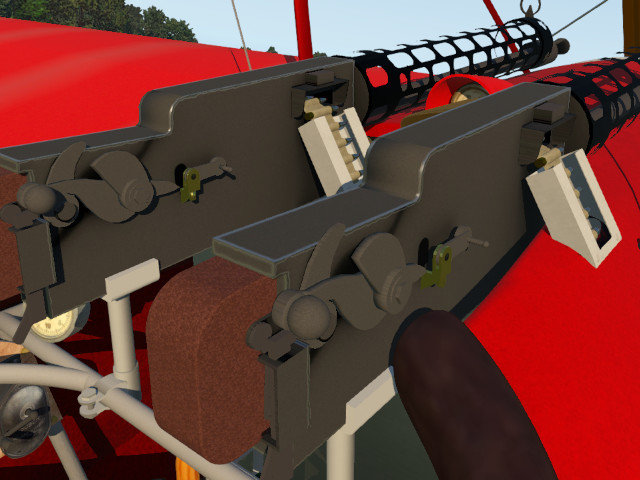
My first fully developed aircraft from scratch. I started this project in March as a means to teach myself X-Plane 11 aircraft development. I've learned a lot along the way. Features: - An entertaining POH. - Very VR friendly features, including one of the first X-Plane 11.50+ aircraft to feature direct exterior manipulation of control surfaces for an immersive pre-flight walk-through in VR. (Vulkan required). - Hand pulling the prop from the outside of the aircraft is required to start (Vulkan required) - Hand cranked magneto to generate the pre-start spark. - Accurate depiction and animation of cockpit control rigging. - Fully animated Spandau LMG 08/15 machine guns. Each gun operates per the original WWI versions of these weapons. They can be fire individually, or in combination, and the barrels will begin to glow if fired too long and will fail if you completely overheat them. The guns will also jam if operated improperly. - The first fully animated handlebar moustache in X-Plane 11. Quick start guide. - Turn on the fuel valve (red handle on the lower right) - Turn on magento switch (silver switch on left) - Crank the black magneto generator 11-12 times. - Mixture full rich (it's backward so pull fully toward you) - Go to an exterior view and pull down the prop near the left side of the prop hub. it may not start the first few pulls so keep trying. 221786207_FokkerDr1.zip


-
OK. So I modified the mesh as specified, and attempted my first insert. The insert utility ran with no error messages but a modified ACF file was not generated. Update: If I only extract the mesh, import the obj, modify, export and insert the utility worked well. I had originally imported the wavefront.obj into a blender file with a full aircraft model to use to move the vertices, even after deleting the original aircraft, the resulting wavefront.obj export file caused failures with the insert executable. I'm now trying to figure out the work flow that allows me to trace a blender model and still get a good export.
-
If you have ever had to add an AVITAB to an aircraft, you know what a hassle it is to append the manipulators to an existing cockpit.obj, and that's assuming you created the object and manipulators so that they are placed exactly where they need to be within the aircraft's cockpit. With KITBASH 2.0, you can create an 0,0,0 origin instrument OBJ and a corresponding (non-animated) manipulator OBJ. You can then place the instrument OBJ anywhere you want in any aircraft with Planemaker. You then run KITBASH 2.0, which finds the object in the ACF file, applies the necessary 3D rotational transformation to each vertex of the manipulator OBJ and appends that new information to the existing aircraft cockpit object. Detailed instructions are in the repository. https://github.com/JemmaStudios/KitBash_2
-
What plugin are you referring to?
-
I'm finally able to put these tool to use and can instantly tell they are game changing. I'm super excited about this!
