ilias.tselios
-
Posts
943 -
Joined
-
Last visited
-
Days Won
88
Content Type
Profiles
Forums
Latest X-Plane & Community News
Events
Downloads
Store
Everything posted by ilias.tselios
-
I don't see how this could work. And I'm talking only from pilot's perspective, when half of field of view is blocked.
-
Maybe. You can build the symmetric part as normal, and add a misc body, or engine nacelle.
-
Oldie Goldie!

-
Pure Metal!

-
 Do you have Gizmo installed? Do you own any other X-Aviation product. If you don't have Gizmo, or mayby, and older version might have troubles working with Metal.
 -
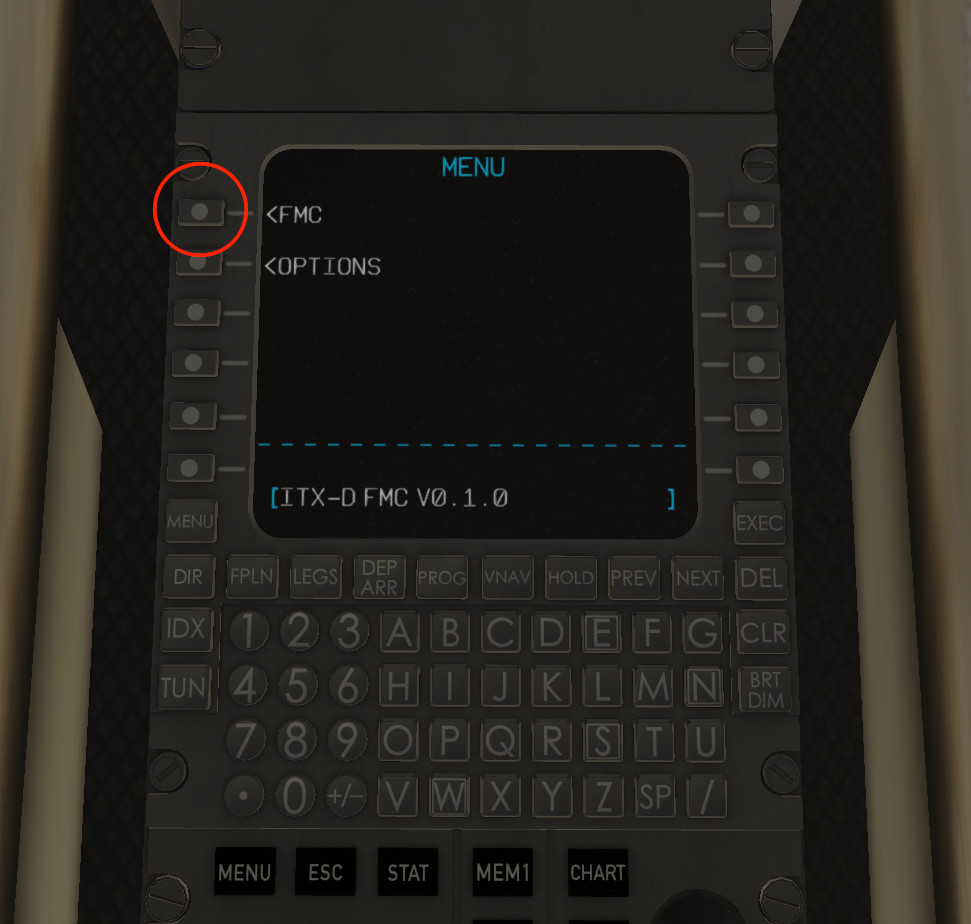
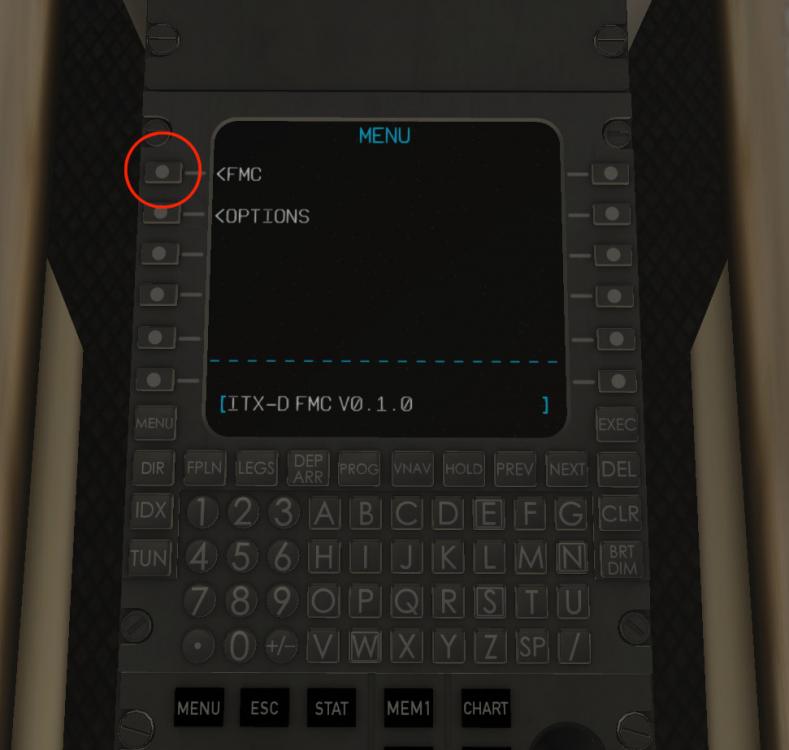
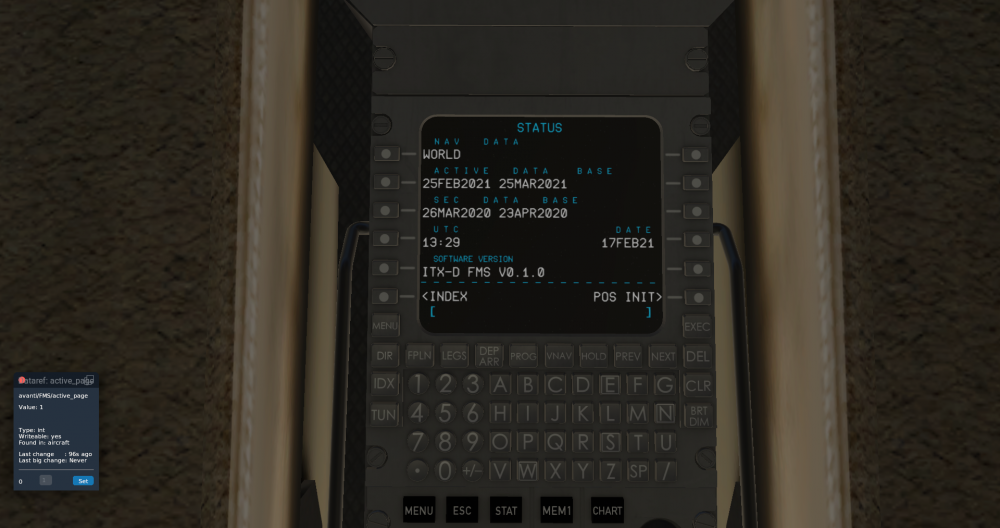
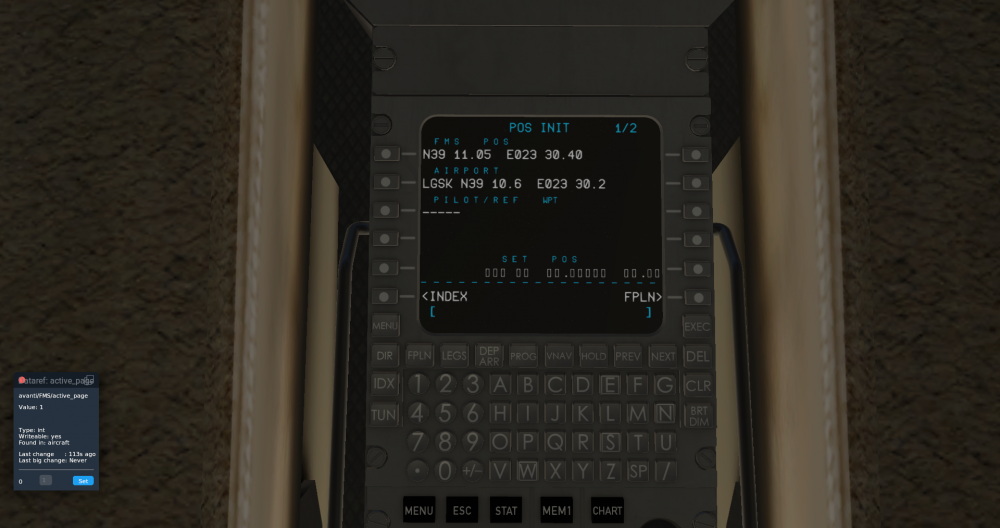
Avanti has the default FMC, except the very top page that gives you control to some options. By clicking the left top button you get access to X-Plane's FMC. The FMC is a different thing from a GPS unit, with more capabilities. If you don't know how to use it, here is a video that might help you.
-
There is no GPS unit. Only FMC.
-
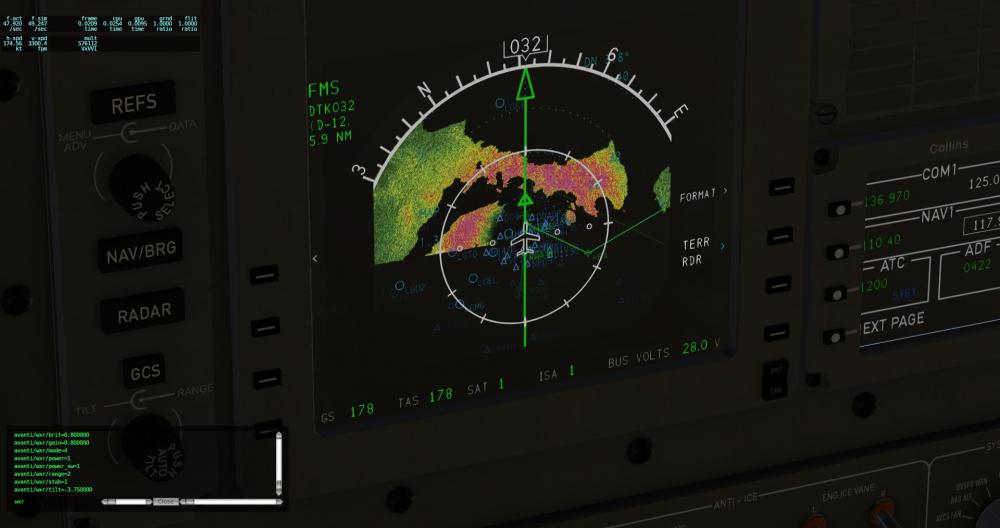
@rhalunenno worries my friend. It is also an omission from my side not to provide any current documentation that you can refer to. Been a side project many year now, I just add a few things when I have some spare time, leaving documentation out. I hope to find a few hours to put together a small pdf file with a few tips for such things. Also I hope that I can be able to push soon a newer version with some extra stuff I have done a bit of work, like a custom ND with weather/terrain radar, and some FMC customizations.
-
@rhalunen have you looked at this? https://forums.x-pilot.com/forums/topic/13851-general-aviation-p180-avanti-ii/?do=findComment&comment=148360
-
As the night falls!

-

DC-3 Development Update 7: Navigation Equipment
ilias.tselios replied to ilias.tselios's topic in Douglas DC-3 v2 - Released!
Default sounds? Of course not! -
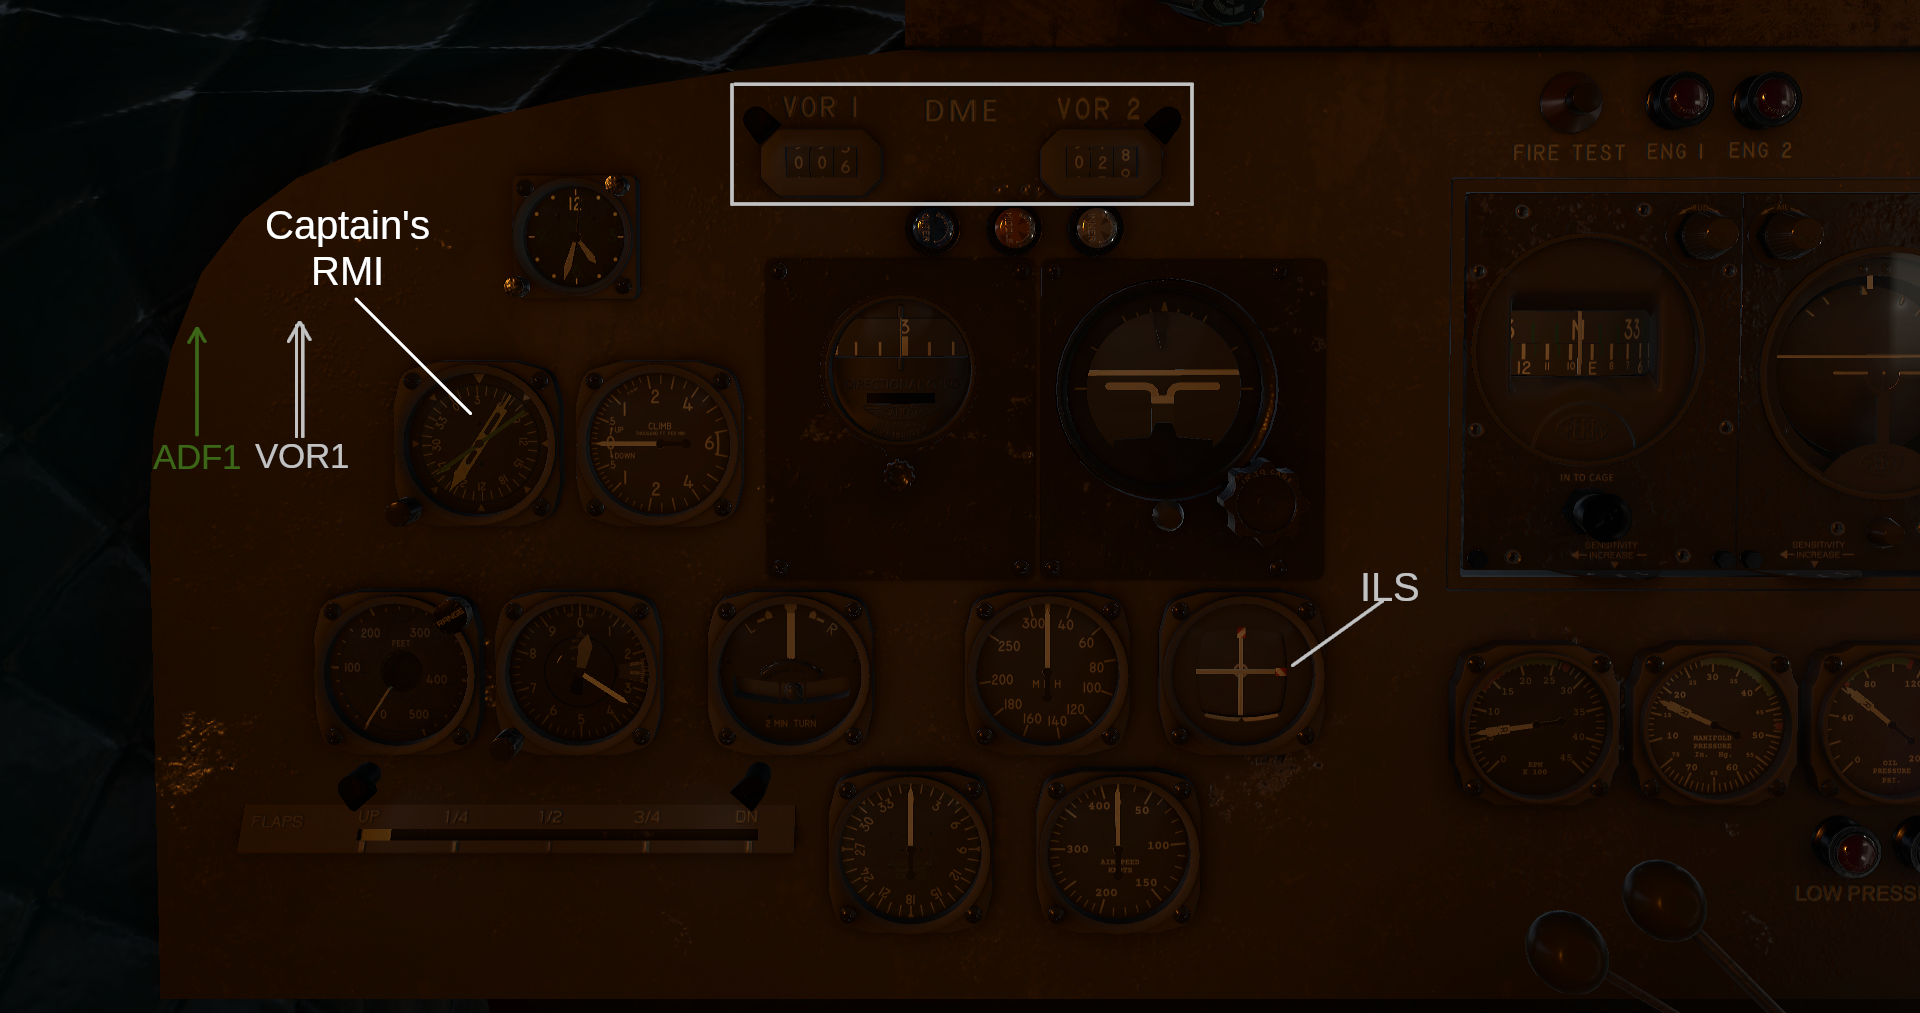
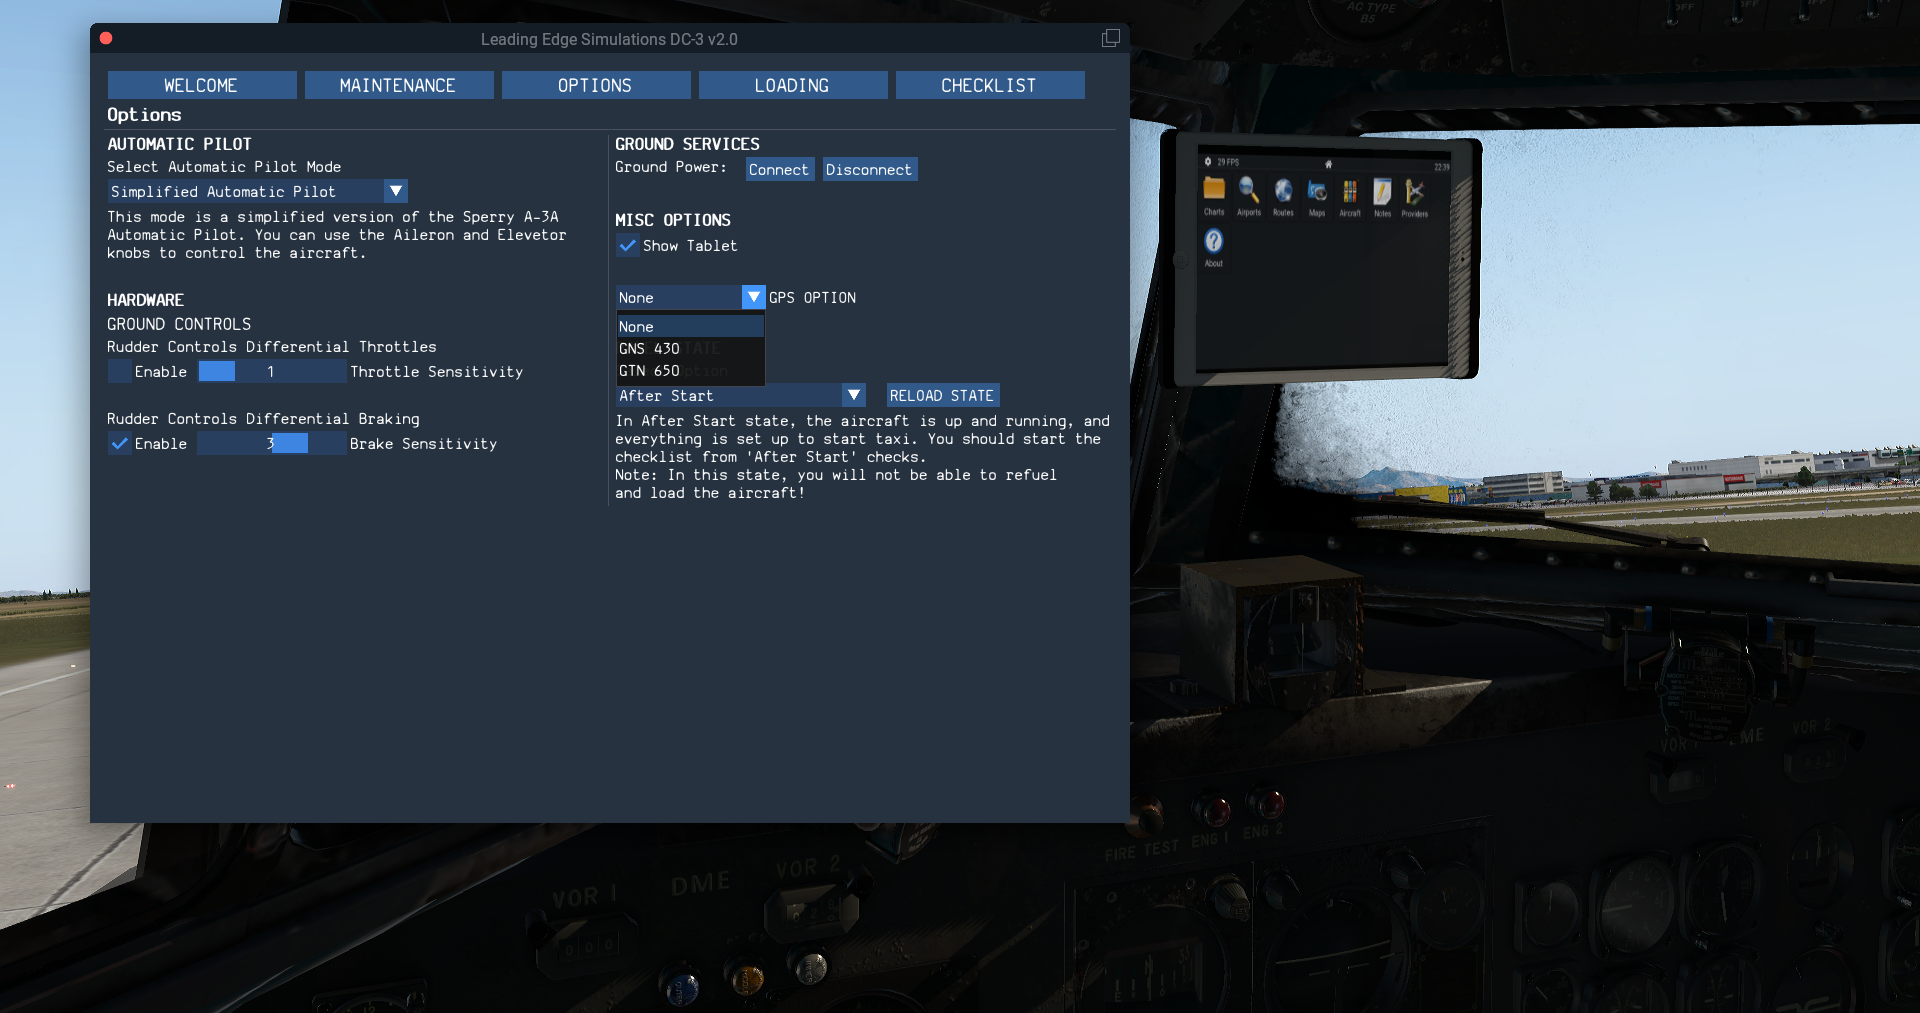
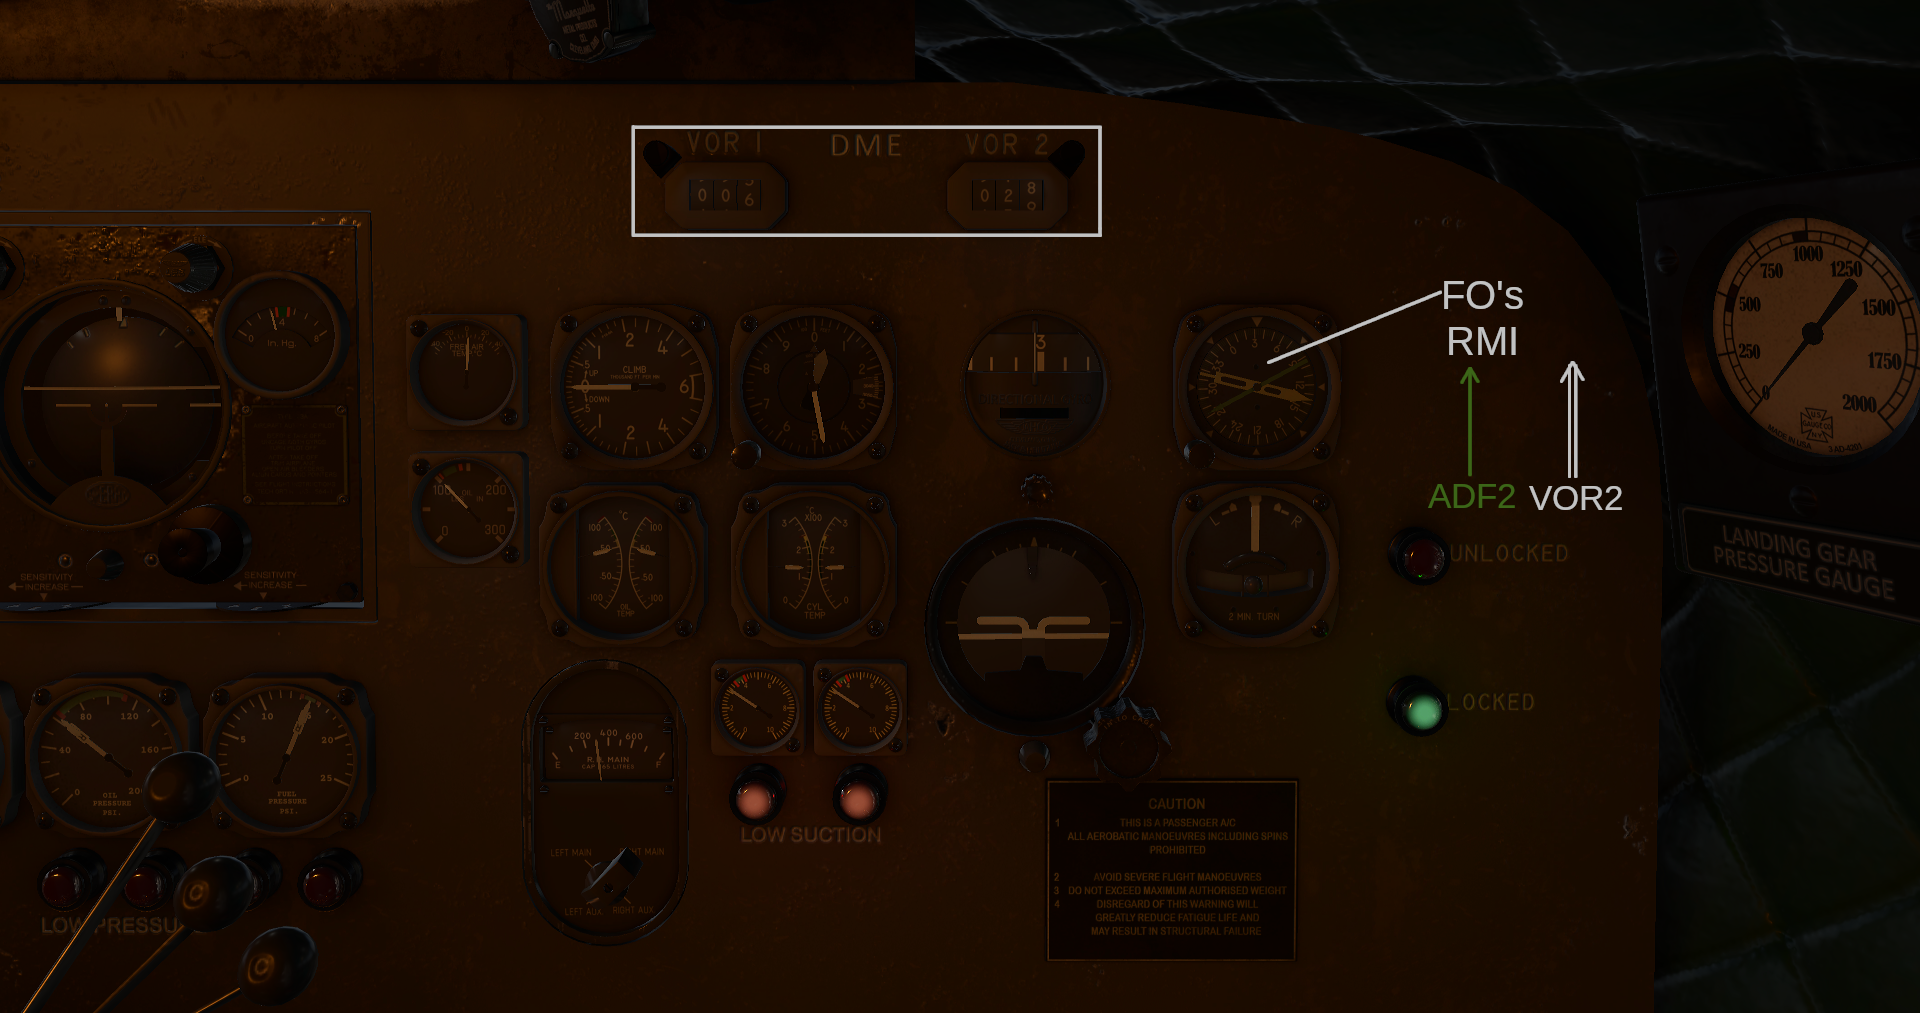
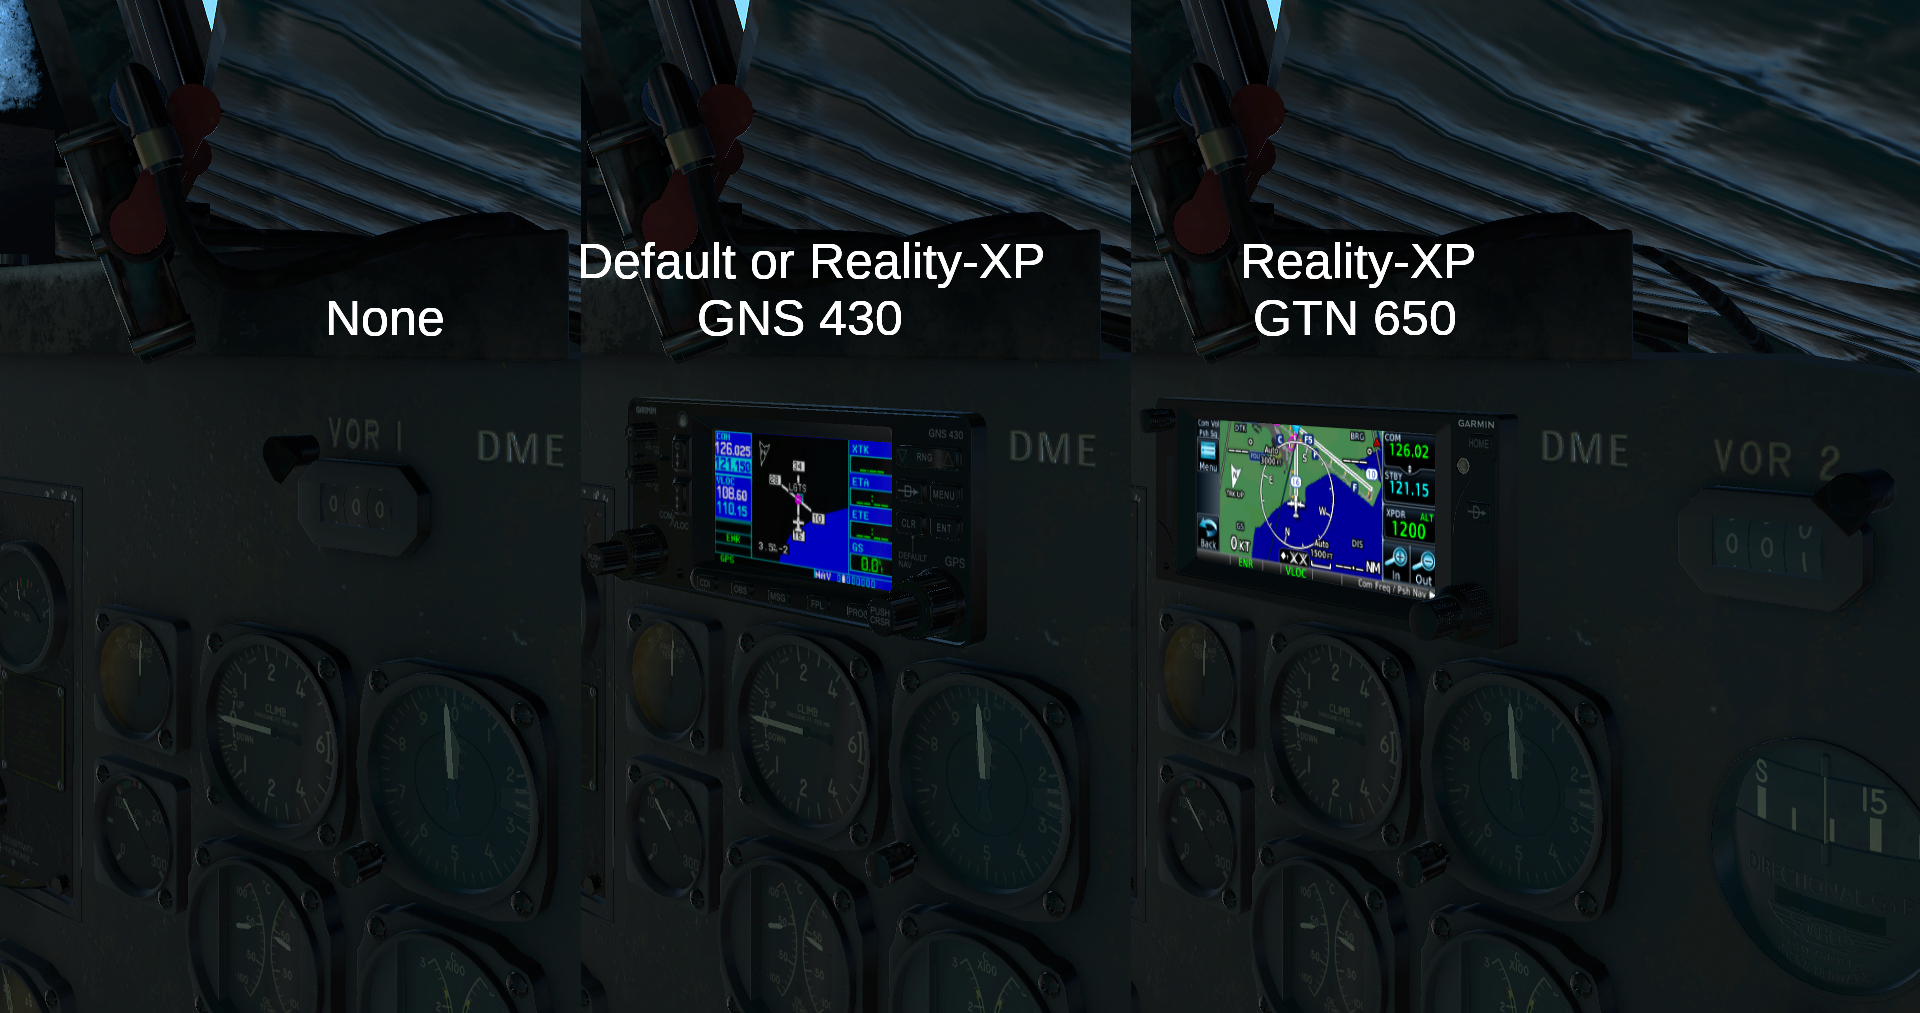
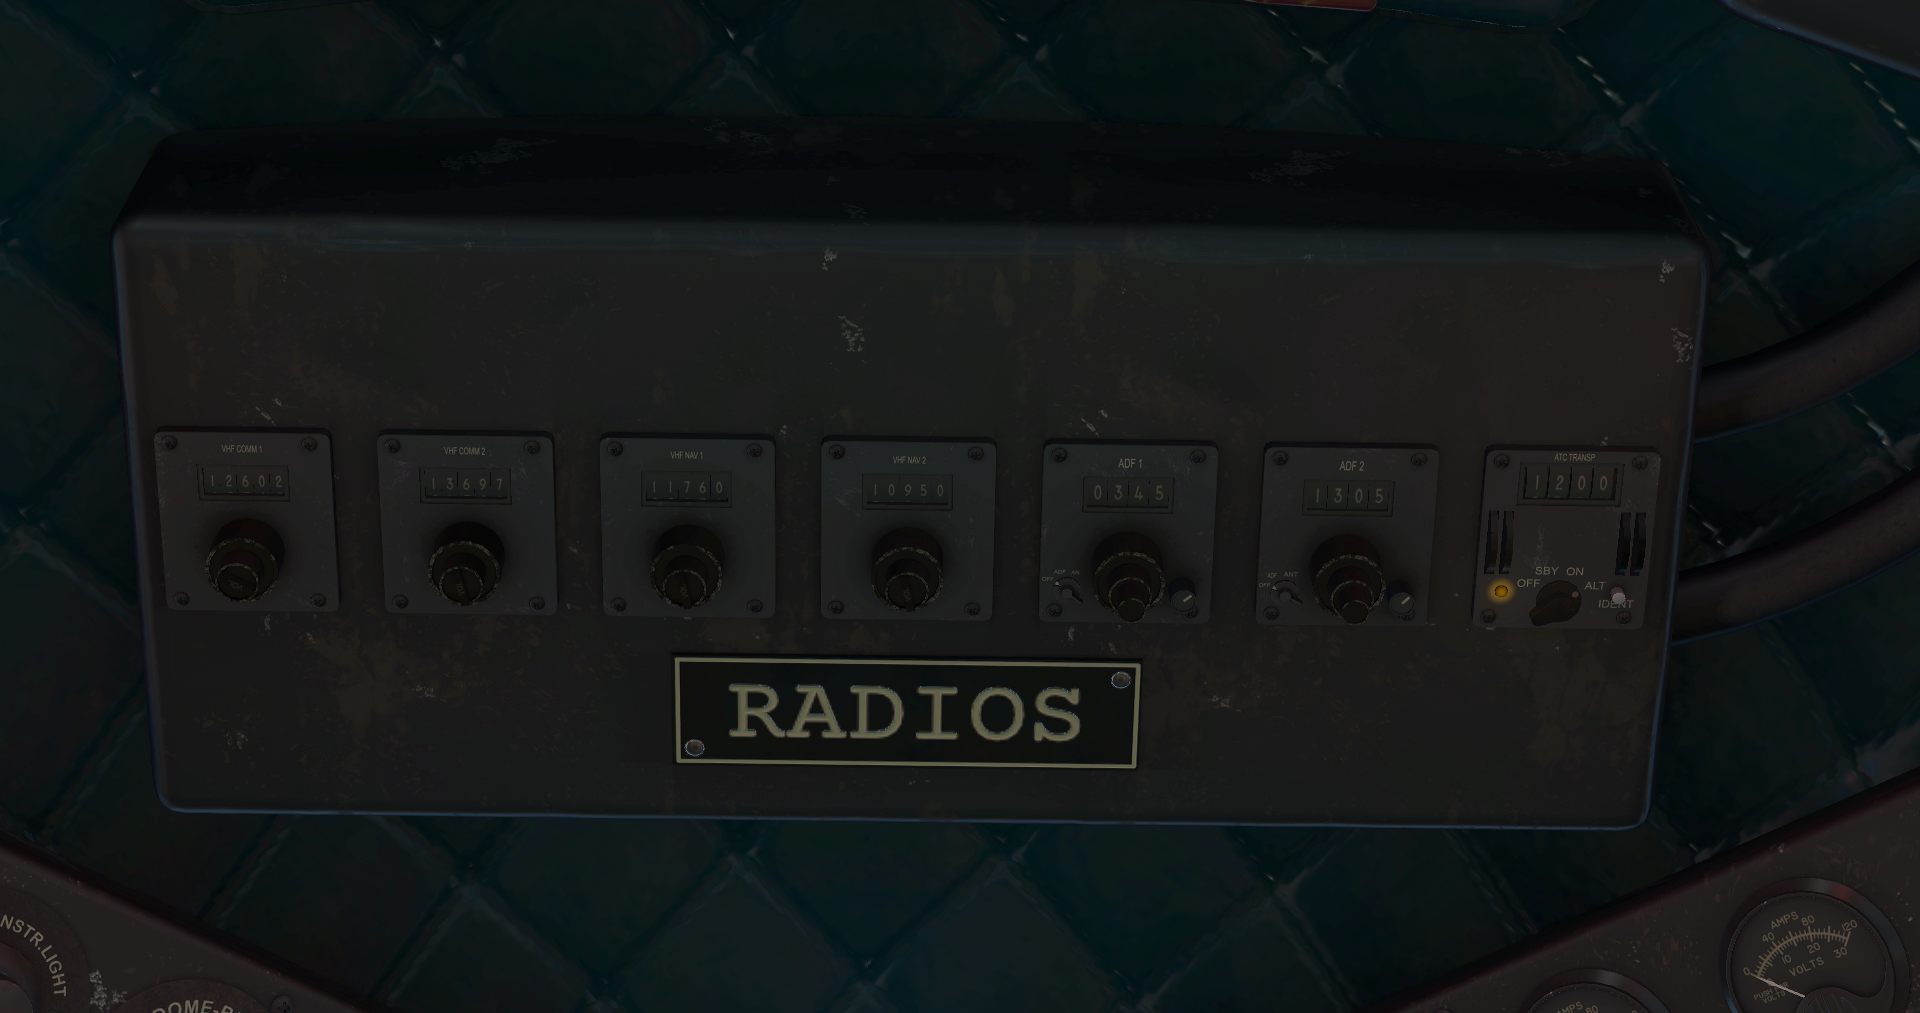
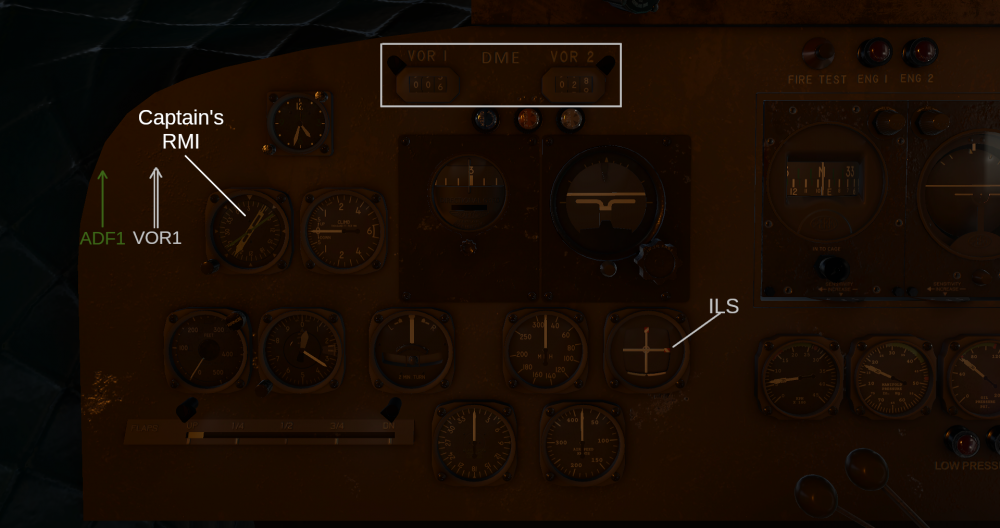
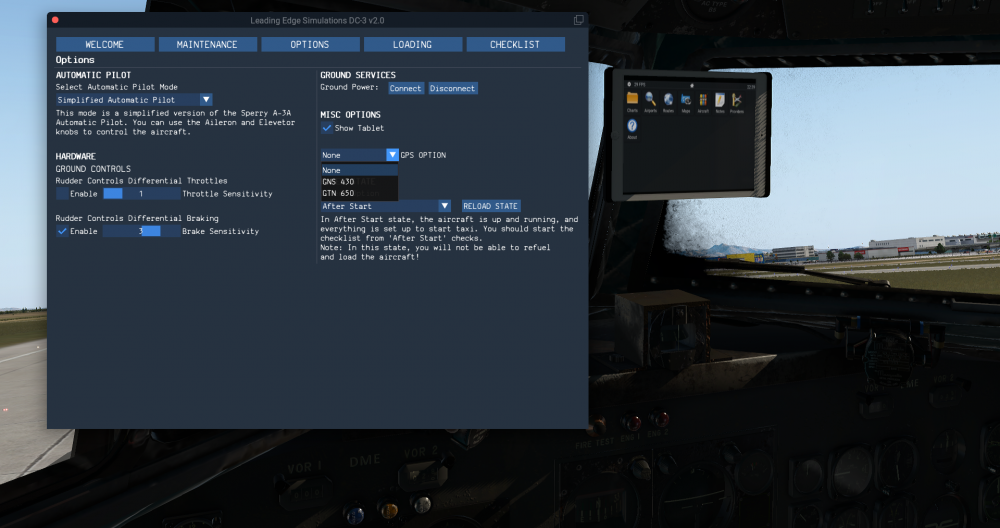
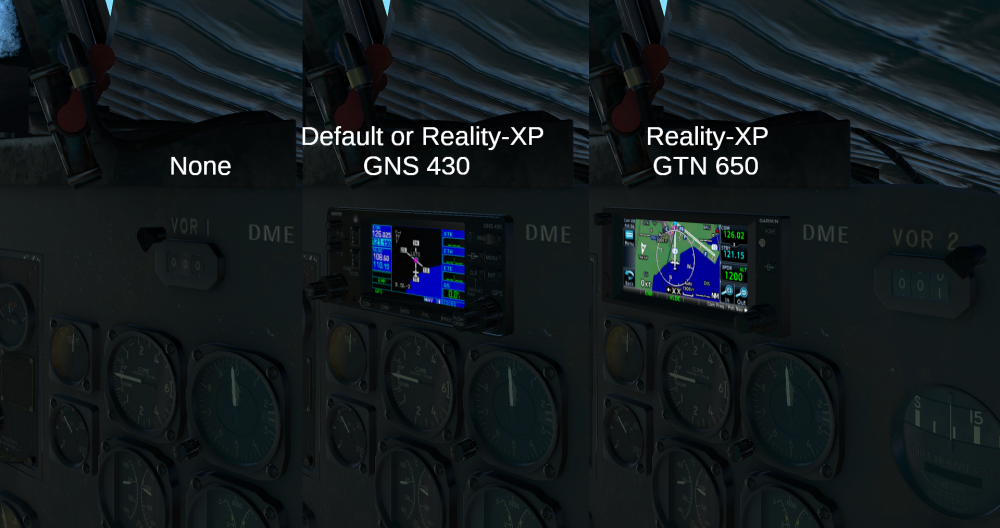
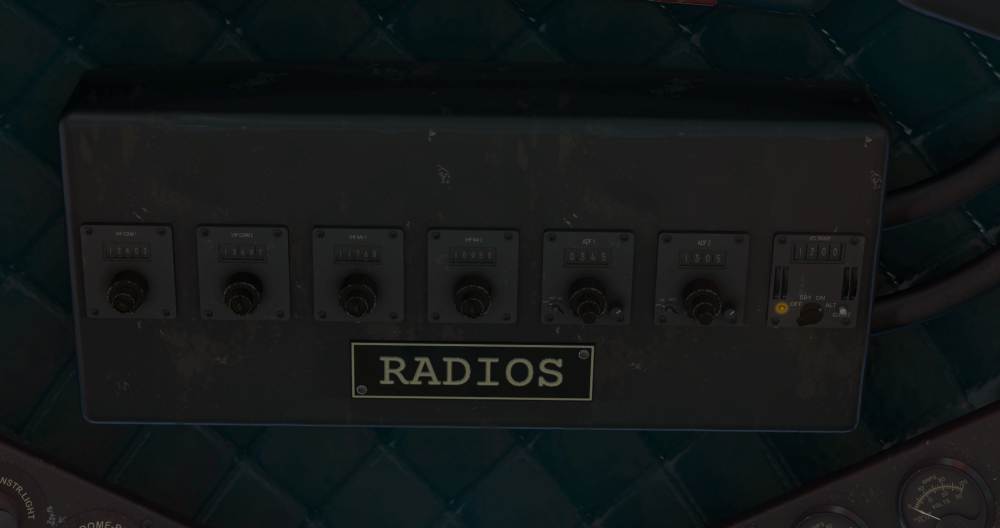
It has been a while since the last update, so let's see another system; the navigation equipment of our DC-3. Since this is a vintage bird, you should not expect less than vintage navigation equipment, and this is what you'll get. The aircraft has 4 navigation radios located in the middle of the overhead area. There are 2 VHF NAV radios (VOR) and 2 ADF radios. On the Captain's panel are installed two DME counters for VOR1 and VOR2, one Radio Magnetic Indicator (RMI) with #1 needle (green) showing the NDB station tuned into ADF1 radio, and the #2 needle the VOR1 station. Also, there is an ILS indicator which source is the VHF NAV1 radio. It will show deviation only if the source radio is tuned into an ILS frequency, and Localizer and/or Glideslope signal is received. The localizer deviation is displayed automatically, and there is no option to set course, like in a course indicator. Over the First Officer's side, there are also the same two DME counters, and one RMI with needles for ADF2 radio (green) and VOR2 (white). This is the standard navigation equipment of the aircraft, and as you see it is typical of DC-3 era. But we know and understand that some pilots might need a bit more "info" available in the cockpit. For that reason, we've added a couple options for you! Starting with a tablet to display the Avitab plugin. You'll be able to show the tablet when you like through DC-3's GUI, as well tilt and turn it to your preference. You can also select a GPS if you like! Will talk about this below! The option to have a GPS on the panel, is for pilots who want to have a better situation awareness, from that they can have using only the standard instruments. Must be noted here that the GPS is only advisory. Not coupled in any way with the autopilot, and not meant to be used for flying RNAV approaches! You can load a flight plan or approach, but you have either hand fly it, or use the autopilot to follow the flight plan line. Use the GPS as a moving map. There are 3 options. First, go vintage and do not use GPS at all! Second is the GNS 430, either X-Plane's default or Reality-XP 430, if you have it. The third is the Reality-XP GTN 650. In the last two options, the FO's VOR1 DME indication goes away. In the case of the use one of the GPSs, the #1 VHF COMM and VHF NAV radio controls will become inoperative and will be controlled via the GPSs. That's for now! Stay tuned for more...soon!

-
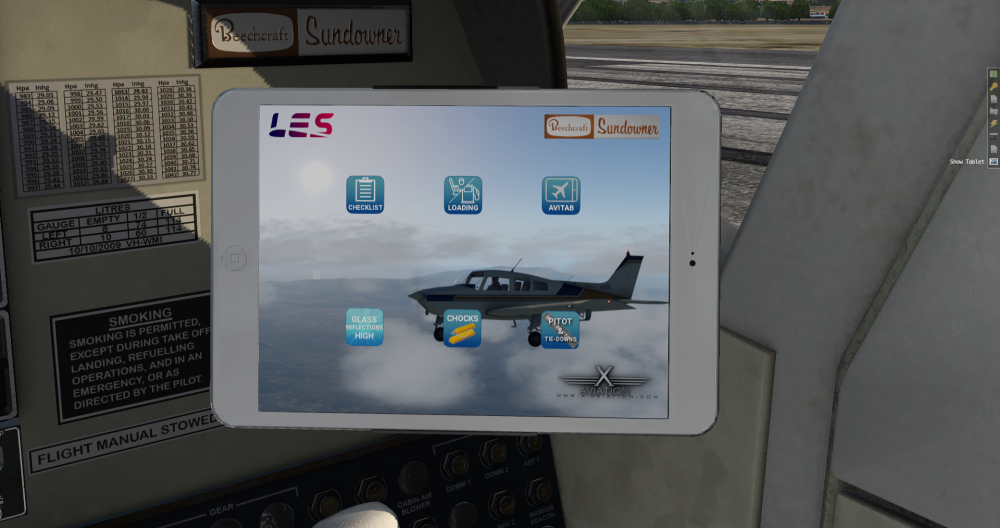
Move your mouse to the right side of the screen and click on the "Show Tablet" button. Power up the iPad and use the icons to remove them. Colored icons means the items are installed, greyed out are removed. I need to update the iPad manual for the next update. By the way, post Sundowner support question in the respective forums, which I monitored them continuously and can reply faster. https://forums.x-pilot.com/forums/forum/235-beechcraft-sundowner-c23-v2/
-
Awesome setup you have!
-
@new1@mac.comseems that you haven't Gizmo installed in your X-Plane. Go where you downloaded the aircraft and read the description how you'll get the Gizmo plugin.
-
Librain works only in OpenGL. You don't need to do anything.
-
Just a short update. This is not an excuse for the lack of updates, but the reality that affects almost everyone on this planet. Development progress continues, but in very slow speed for the last month. The reason is that due covid-19 pandemic, kids remain home doing online classes, and my wife has to do some webinars before start her new job, so I spend most of the time to provide "technical support" around the house, check kids doing their classes, etc. Time to sit down and focus on my job has become very sparse, mostly during weekends. Hopefully I can spend more time developing during holidays, and after holidays if the situation will be improved and schools opened again, do the final stretch needed on full speed.
-
You have the chocks on the wheels. For the Gizmo menu, open the iPad and click on the chocks icon to remove them. Then you will be able to use the parking brake.
-
N778MW - Leading Edge Simulations Beechcraft C23 Sundowner View File INSTALLATION Unzip the file into C23 liveries folder. Works for both analogue and G5 models. Submitter airfighter Submitted 11/19/2020 Category General Aviation Livery For https://www.x-aviation.com/catalog/product_info.php/beechcraft-sundowner-c23-p-166 X-Plane Version(s) X-Plane 11
-

Version 1.0.0
40 downloads
INSTALLATION Unzip the file into C23 liveries folder. Works for both analogue and G5 models. -
Will be soon. Stay tuned!
-
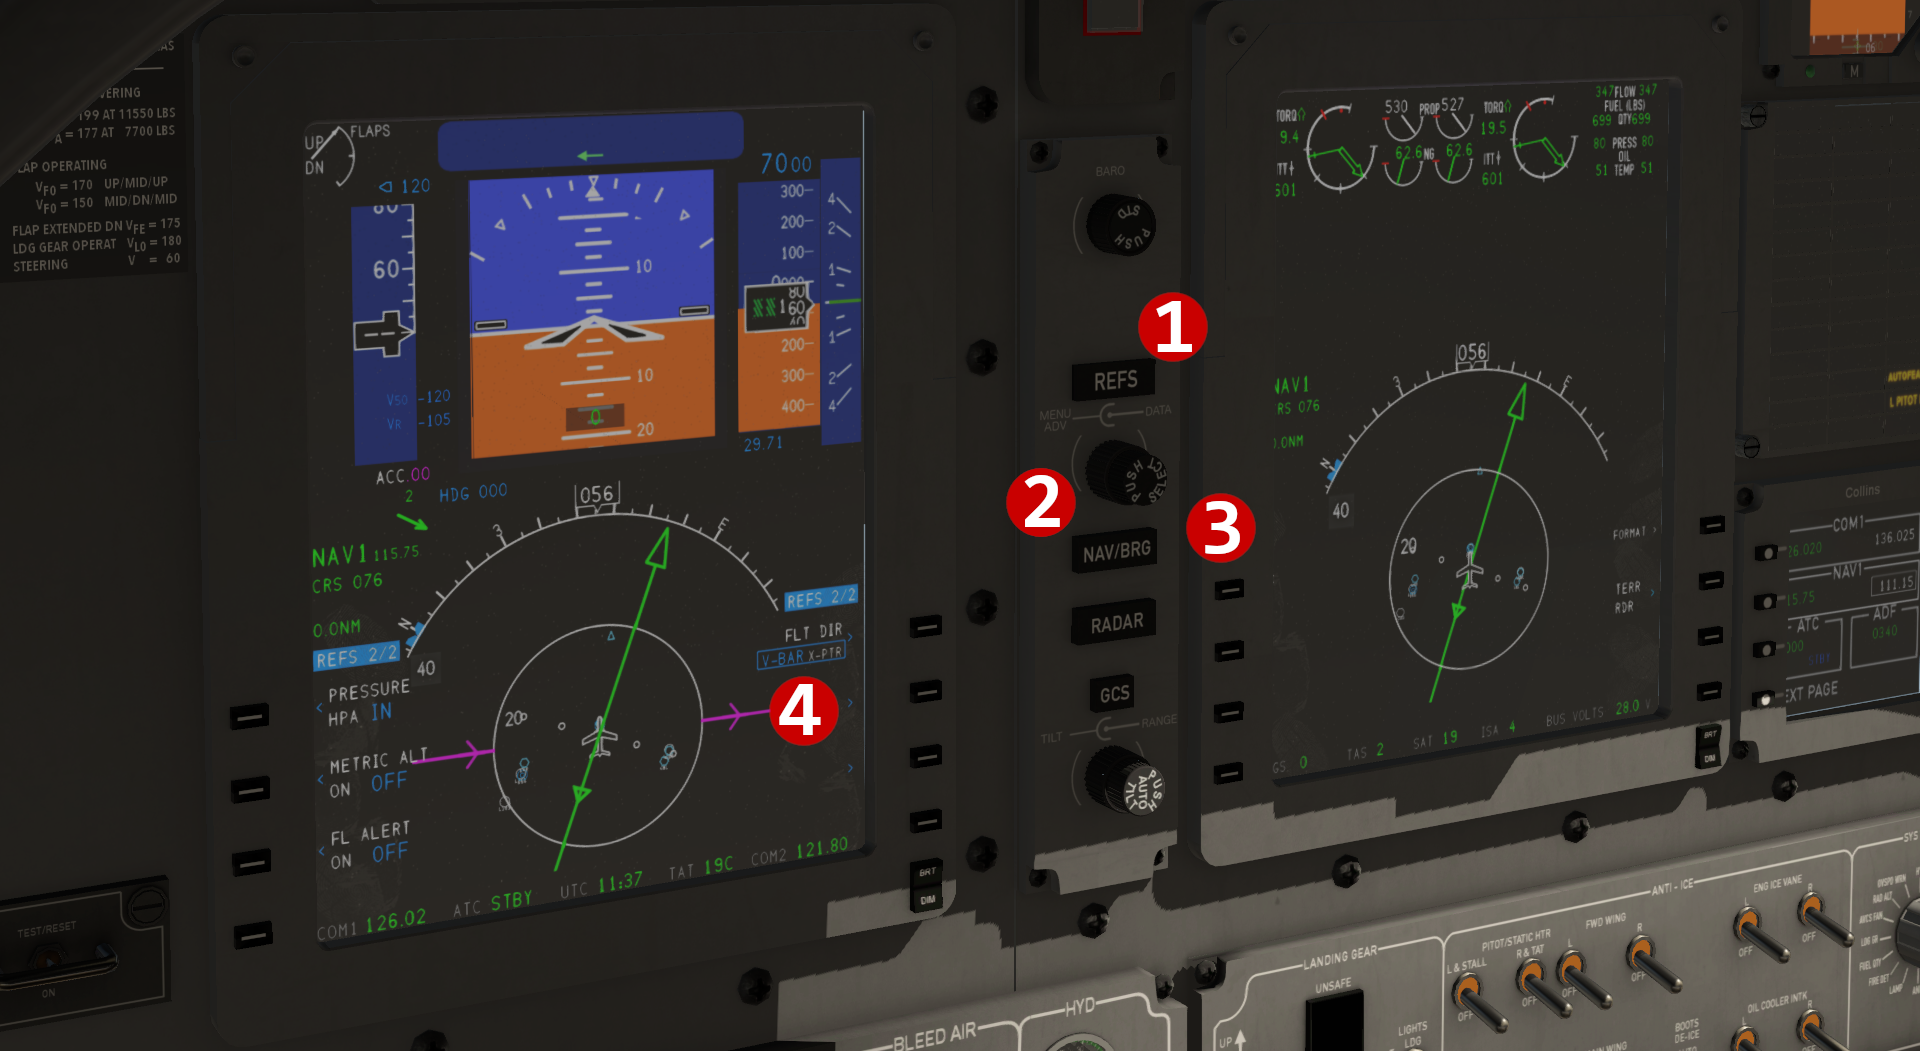
As shown in the picture below: 1. Press the REFS button twice to go to REFS 2/2 page. 2. Turn the outer knob until the blue rectangle go over the "V-BAR X-PTR" text (number 4). 3. Turn the inner knob until "V-BAR" text is blue and large as below. 4. Press REFS once again to hide the REFS pages.

-
Please provide more info.
-
Make sure to read the description well. Probably you are missing the Gizmo plugin. If you have any problems, please post your Log.txt.
-
Select a lower altitude and then select one of the vertical modes, like vertical speed (VS), flight level change (FLC), pitch, or VNAV (buggy). Use the throttles to control, if in VS mode the airspeed, or if in FLC mode, the VS.