



tkyler
-
Posts
2,827 -
Joined
-
Last visited
-
Days Won
622
Content Type
Profiles
Forums
Latest X-Plane & Community News
Events
Downloads
Store
Everything posted by tkyler
-
If you can get used to GIMP, it has a pen tool and is more than sufficient for texturing. It's all I use for my texturing and about 600.00 cheaper than photoshop. Everybody has their own environment they feel comfortable in I know so it's not for everybody...but my point is that money doesn't have to keep you from getting results. GIMP is available for mac/windows/linux.
-
Ok here's a cool one for the online flying folks. Since I originally started the MU2 as my own online flying IFR machine..I've always lacked a true "staging" frequency. The old radios on the MU2 did not have fancy integrated circuits for storing frequencies but instead used a source select knob (TX1 / TX2) to swap between the com radios 1 & 2. So you'd transmit on com1 and stage the next frequency on com2. When you were ready to transfer to the next frequency, you just turned the source select knob to TX2 to use com2 and then staged the next frequency back on com1 etc. As of now, Pilotedge and VATSIM only use x-plane's com1 frequency for voice communications so you couldn't use the TX1/TX2 switch on the Mu2 before. Well now you can. This won't mean much to the "non-online" flying crowd, but when you need to transition from ground > tower > departure ATC etc, then this will be exactly like the real thing....well not exactly like a Marquise because that radio panel is different but exactly like all the previous models :-P. What's different about this is that you can't use a swap knob simply without causing the frequencies in the MU-2's com windows to swap. Of course the frequency readouts in the MU2 are mechanical rolling digits so swappie is not an option.....so you have to use a plugin to keep the com window displays consistent while always using com1 for online flying. Eventually, pilotedge will move to using com2 and this wont' be so fancy. If it doesn't look special at all and looks perfectly simple and normal...then I did my job :-) The video link below shows using com1 and com2 to tune into a local ATIS station. The text mode is turned on in xplane so whenever the ATIS is tuned in, a gray text box appears at the top of the screen...it's a bit tough to see. Anyhow, you''ll only see the gray box appear whenever one of the coms is tuned into 135.12 AND the source knob is selected to that radio. http://dl.dropbox.com/u/955680/swap.mov
-
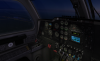
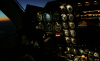
I'm starting to chip away on the light texture which is a good thing because it's towards the end of this update feature list. There's a little ways to go but you can see that this is way better than the previous version and there's still subtle effects to be added. I'm a bit partial to a nice night texture because most of my MU2 flights were in the late night and dawn hours....it's a cool time to fly. I had some very good success implementing the custom commands for the hardware guys...and if I miss anything in the update, it should be a very quick and simple matter to add in more. I've ordered a USB joystick controller so I can build my own quadrant and also develop more functionality for the hardware guys...this is getting to be some fun.
-
New corporate RED livery on the org. http://forums.x-plane.org/index.php?automodule=downloads&showfile=12746 Per Dozer's recommendation, when using GIMP, turn png compression OFF during development, it'll speed things up a lot BUT do remember to apply compression for your final livery PNGs...and for those on windows and Mac, use 'xgrinder' by Ben Supnik to turn your PNG to DDS and according to Ben, that will use much less VRAM than png....haven't tried it myself, but I'm going to soon!
-
We're making progress and hopefully you're learning and that's what counts! So what was it that allowed you to see your texture finally? Using the "texture draw" mode? or using the "image > replace" menu command? Actually, that error message comes up after a successful export so you are exporting the file...it's just that the script is not writing any filepath before the texture name. Now that error message is fine and indeed common as long as the file path given in the object file points to the texture. It is very normal when you have a custom x-plane object, that the texture file be located in the same folder as that object. If the x-plane export script is unsure of or doesn't trust the filepath to the texture (for whatever reason I don't care to read the code to find out), then it will simply write the name of the texture file in the object file with no preceding path. If the texture is located in the same directory as the object, then this will work in x-plane. So even if you get that error message, as long as the object and texture are in the same folder, you will be fine. What the error message is saying is that it has no idea what path to write to the object file so it's just going to forget the path and write the name of the texture file only...and as I said, by having the texture and object in the same folder, this works. I cant' tell you more without seeing the file structure of the converted scenery. Now I can't say with any certainty, but if you use the UV menu "Image > open" instead of "image > replace", then you might not get that error message....it seems that each of those commands handles filepath info differently..but they'll both yield the same result onscreen.
-

Pilotedge: a new online network, beta has started
tkyler replied to Keith Smith's topic in General Discussion
Excellent...that's what I expected. For my users, I want them to be able to use the com selector to flip between com1 and com2, using each opposite com for staging the next frequency. This is how we did it in the real MU2 and I want users to get that same experience. It's no problem managing the coms behind the scenes in the plugin to always transmit on com1 for pilotedge. -
Pilotedge: a new online network, beta has started
tkyler replied to Keith Smith's topic in General Discussion
hello Keith....really cool work you're doing here. I was wondering how the network handles voice in relation to x-plane's com frequencies. IIRC, xsquawkbox only used COM1 for voice transmissions. The reason this is relevant is that the MU-2 uses a transmitter switch to swap between COM1 and COM2 in reality, there is no 'swap' or STBY frequency in the MU-2's setup. So for VATSIM usage, I manage the com1/com2 frequencies 'behind the scenes' with the plugin so that you're always transmitting on COM1 for VATSIM. Is pilotedge similar? -
don't worry about the ATTR_no_blend. Is your 3D view in "textured" mode? If not, you need to be..and if it is, then do the following: 1.) Import that object with PNG textures per above instructions 2.) split your windows in Blender so you have a 3D window and a UV editor window open 3.) Select any object in the 3D window and hit "TAB" to go into edit mode. 4.) In the UV editor window, go to the menu "Image > Replace" and in the ensuing file dialog, navigate your way to where the PNG file is and hit the "replace image" button. Note...to navigate "up" a folder level in blender, click on the two dots at the top of the file listing. What you're doing here is telling blender explicitly where the texture file is 5.) make sure you're 3D window is in in "texture draw" mode.
-
The problem is that the texture is of the format *.DDS. The blender importer cannot read *.DDS files. You need to convert the DDS file to PNG format. XPlane can read both formats and usually DDS yields less VRAM usage but is more of a headache for developers. What I would suggest is that you: 1.) Convert the DDS to PNG somehow. I use GIMP with a DDS plugin that I can't remember where I got it. 2.) Open up the *.OJB file with a text editor BEFORE importing into blender and at the top of the file, you'll see a line that says "TEXTURE" followed by a path to the image. Change the extension of the image from .dds to .png This tells the blender importer where to look for the png file and because it is now a png file, blender will import it. 3.) Import into Blender and hopefully you'll see the texture. 4.) move the mesh and export your new object. 5.) Make sure that the file path given in your exported object file (after the word "TEXTURE) is the correct path in your scenery package setup.
-
Dude123, Sorry if I insult your Blender skills, I certainly don't mean to. These instructions are for Blender 2.49 I'll just describe the way I would do it. First, in blender, make sure your 3D cursor is at the 0, 0, 0 location. Whenever blender imports x-plane objects, it does so wherever the 3D cursor is located. By putting the 3D cursor at the 0, 0, 0 location, you ensure that the object is imported into blender exactly in the way x-plane will load it instead of offset. The way to set the 3D cursor to 0, 0, 0 is to go to the menu in the 3D view and select "View > View Properties" and a view properties box will appear. In the X, Y & Z fields for the 3D cursor, type zeros in each field and the 3D cursor will move to the 0, 0, 0 position. You can then hit the 'c' button (Blender 2.49) and it will center the view at the origin of the grid. Now, once you have the 3D cursor at the zero position, THEN import the jetway into Blender. After the jetway is successfully imported, then use the 'A' key to select everything. Then hit the keys 'GZ' and move the jetways up to their proper level. The G keys says "move" and the Z key says "only move up in the Z direction". I then recommend you save your blender file with your newly imported jetway. As far as the texture goes, if you get a message that says "texture not found" during import, then you'll need to tell blender where the texture is. If you do NOT get a message that says "texture not found", then simply hit the 'D' key while the cursor is in the 3D view, and that will bring up a menu. From that menu, select, "Textured Solid" and the texture should appear. At this point, simply re-export the object using the export script and you should be good to go. If the texture isn't found by blender during import, then we'll address that in another post.
-
That came out real sweet Dozer! I updated the reflections in the paint kit...you can download it...perhaps the empennage file will be OK for you. http://dl.dropbox.com/u/955680/xsMU2_Paint_Kit.zip I basically "removed" the stripes and it has a bit more of a generic look now, not quite so obvious. You going to post that paint at the org or make it available?
-
ah gotcha....guess I didn't read the specs thoroughly. Sorry! :-[
-
That is correct...you can do the "3-position" with the mouse OR use the commands. My plugin is structured such that all the commands do is move the switches and the switches still control the logic. So it doesn't matter if the switches are moved by command, by the mouse or anything else. The separation between inputs and the logic is probably one of the wiser decisions I've made and allows me to really concentrate on systems simulation and interaction separately. I haven't downloaded your plugin yet (just looked at it). You do not have to check for aircraft type IF the plugin is inside the MU-2 folder. If it is, then your plugin will only load when the aircraft loads so the MU2 is guaranteed to be the active aircraft. The plugin systems was designed this way somewhere during the 8 series to make it easy for "aircraft specific" plugins to be distributed. You do multiple plugins for a single aircraft by creating separate folders in the MU2 plugin folder...call it "Dozer_plugin" and INSIDE that folder, you'd put your win.xpl. So you could have many different folders inside the plugin folder and each of those folders would contain the win/mac/lin xpls, thereby keeping them separate.
-
DOH! Ok, will get a new reflection layer out as soon as I can for the empennage ! Excellent work BTW! The paint is looking good!
-
Done...HOWEVER, it's through a custom command and not the default landing light. You'll just set your button to my landing light commands instead of x-plane's landing light commands and it'll extend/retract the lights and turn em on and off.
-
Will do. I'll set it so the command just bypasses the "extend" mode. Nobody ever uses that anyhow. In fact, I'll try and put that in here in the next hour since I'm doing some recreational coding on the Mu2 anyhow ;-)
-
ah...it does my heart good to see someone else do a paint...that's really good looking! So is it easy enough to figure out and use? Looks like you're using 2.5. I haven't converted over myself...can you update the texture without having the UV editor window open?
-
The paint kit WITH instructions has been uploaded at x-plane.org for those that want the instructions. Nothing else is new over the link I provided earlier except the instructions.
-
The org won't officially announce anything until it goes up for sale at the org. x-plane Carenado products are usually released on Carenado's site first to maximize "first rush" sales, unfortunately all the exposure is at the org. Once it goes for sale on the org, you should hear/read ALL abowt it ;-)
-
Started a new thread to give out the "unofficial" paint kit to x-pilot users...
-
Here's the download link to the paint kit for the MU2 Version 2.x and a video showing some advanced techniques for livery painting the Moo. DOWNLOAD: https://www.dropbox.com/s/adpm5dqlje0b91e/TOGA_MU2_Paint_Kit_v2.zip?dl=0 NOTE: The 3D *.fbx model included in the download link has been modified slightly from that shown in the demonstration video. . See this link for more info (it will make more sense after you watch the video)
-
It might be....never used it myself. I'm a big "old fashioned" in that regards I guess....certainly worthwhile to look into. Looking at some videos, I'd say it just might be something I'd like to try.
-
f
-
I finally reworked the paint kit to reduce the complexity and number of layers and make it many times more manageable. It was so bad, I didn't even want to do extra liveries. After a goodly amount of time cleaning up the paint kit files, I was able to eek out this 'bandit' paint in a few relaxing hours. It's available for download at the following link....instructions included. http://www.x-scenery.com/xscontent/downloads/mu2_bandit_paint.zip

-
The axis is handled by intercepting the joystick input. There are x-plane datarefs for this to make it somewhat easy. EDIT: I removed several posts regarding the MU2 paint kit to keep the thread relevant. They were not directly related to news of Mu2 updates.


